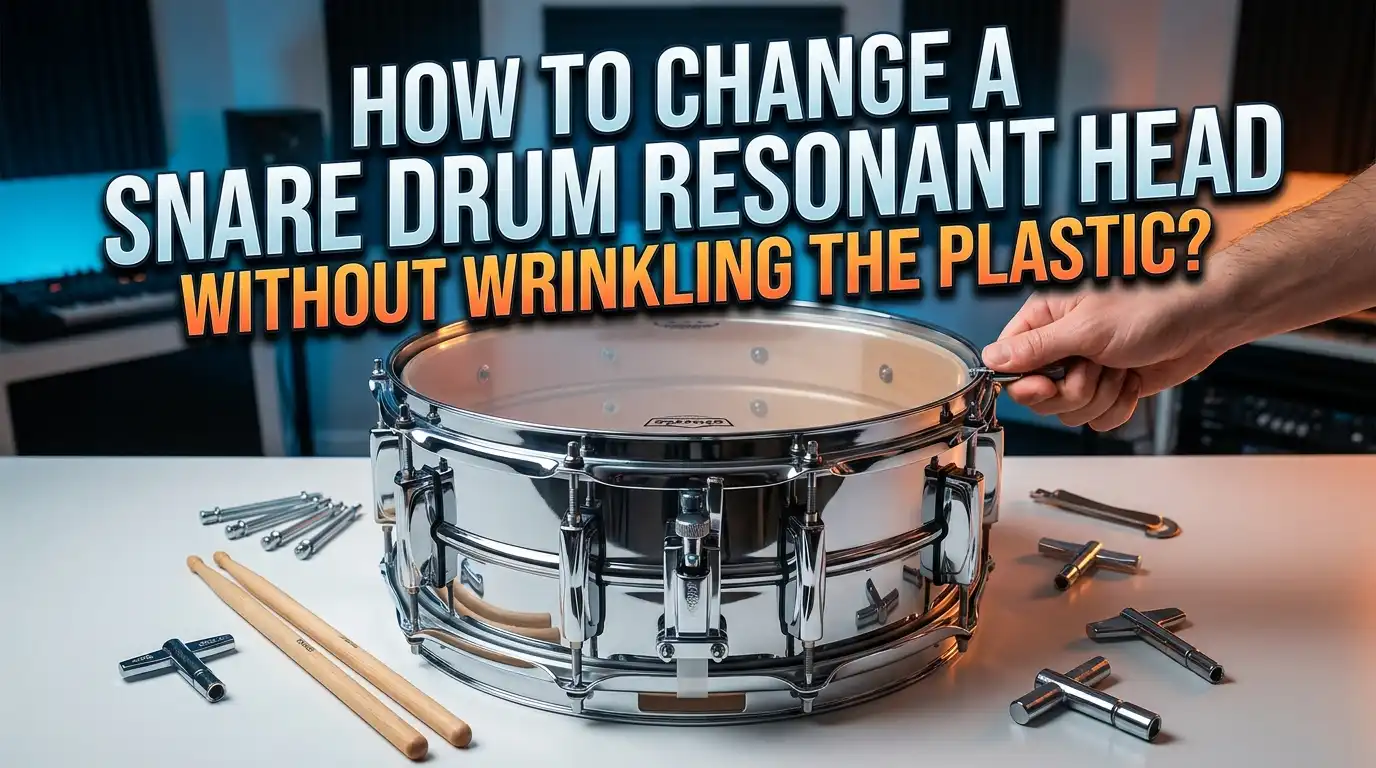
How to Change a Snare Drum Resonant Head Without Wrinkling the Plastic?
You just unwrapped a fresh snare side head. You placed it on the drum, tightened the tension rods, and then saw it: ugly wrinkles rippling across the thin plastic. Your stomach drops. Did you ruin the head? Is the drum broken? Relax. This is one of the most common frustrations drummers face, and it has clear, fixable causes.
Changing a snare drum resonant head sounds simple, but the snare side head is far thinner than a batter head. That ultra thin film reacts to every small error in your process. Uneven tension, dirty bearing edges, rushed tightening, or ignoring the snare beds can all cause wrinkles that affect both the look and sound of your drum.
The good news is that a wrinkle free resonant head install is absolutely possible. You just need the right technique and a bit of patience. This guide walks you through every step, from removing the old head to seating, tensioning, and tuning the new one. You will learn why wrinkles happen and exactly how to prevent them.
In a Nutshell
- Wrinkles on a snare resonant head usually come from uneven tension or improper seating. The snare side head is extremely thin, often just 2 to 3 mil, which makes it sensitive to every mistake in the installation process.
- Always use a star pattern when tightening tension rods. Going around the drum in a circle creates uneven pressure that pulls the head off center and produces wrinkles.
- Clean the bearing edge before installing a new head. Dust, debris, or sticky residue on the bearing edge will prevent the head from sitting flat, causing bumps and wrinkles that no amount of tuning can fix.
- The snare beds on your drum will naturally cause small wrinkles near the strainer and butt plate. These are normal and expected. You can reduce them by giving the tension rods closest to the snare beds a slight extra turn.
- Never press the center of a snare side head with your palm to seat it. This technique works for batter heads, but snare side heads are so thin that palm pressure can permanently distort or even break the film.
- Patience is your best tool. Small quarter turn increments on each tension rod, repeated across several rounds, will produce smooth and even results every time.
Why Snare Resonant Heads Wrinkle So Easily
Snare resonant heads are built to be thin. Most snare side heads measure just 2 to 3 mil in thickness, which is a fraction of the 10 to 14 mil thickness found on standard batter heads. This extreme thinness is intentional. A thin resonant head responds better to snare wire vibration and produces a crisper, more sensitive sound.
However, that same thinness makes the head far less forgiving during installation. Even a tiny imbalance in tension across the head can cause visible wrinkles. A batter head might hide minor tension differences, but a snare side head shows every imperfection immediately.
The plastic film also has very little structural rigidity. It cannot resist being pulled unevenly. If one side of the head receives more tension than the other during tightening, the film bunches and buckles. This creates the wrinkles that so many drummers encounter.
Temperature also plays a role. Cold environments make the Mylar film stiffer and more prone to creasing. If you store your heads in a cold garage or car trunk, let them warm to room temperature before installation. A few minutes of patience here can prevent a wrinkle that lasts the entire life of the head.
Tools You Need Before You Start
Gathering your tools before you begin saves time and prevents interruptions that can lead to mistakes. You do not need a large collection of specialty items. A few basics will cover everything.
A standard drum key is essential. Many drummers prefer to use two drum keys simultaneously, one in each hand, to tighten opposite tension rods at the same time. This method helps maintain even tension across the head. Some professionals recommend a torque style drum key for precise measurements, but a standard key works perfectly well for most players.
You will also need a clean, lint free cloth for wiping the bearing edge. Microfiber cloths work great. Avoid paper towels because they can leave small fibers behind on the edge.
A flat, stable surface is important too. A carpet, towel, or drum mat on a table or floor provides the ideal workspace. The soft surface protects the batter head on the opposite side while you work on the resonant head.
Optional but helpful items include a small amount of paraffin wax for the bearing edge and a drop of white lithium grease for tension rod threads. These reduce friction and allow smoother, more even tightening. Use lubricants sparingly, because excess product can drip onto the head or shell and cause problems.
How to Remove the Old Resonant Head Safely
Start by flipping your snare drum so the resonant side faces up. Place it on a soft surface to protect the batter head below. Before you touch any tension rods, disengage the snare strainer by flipping the throw off to the “off” position.
Next, remove the snare wires. Most snare drums use either cord, plastic straps, or metal clips to attach the wires to the strainer and butt plate. Carefully loosen these attachments and lift the snare wires away from the head. Set them aside in a safe place where they will not get bent or tangled.
Now loosen the tension rods using your drum key. Work in a star pattern even during removal. Give each rod a half turn counterclockwise, then move to the opposite rod, and continue this pattern across all lugs. This prevents the head from warping or the hoop from binding as you release tension.
Once all rods are fully loosened, lift the counter hoop straight up. Then remove the old resonant head. Inspect it briefly before discarding it. If you see tears, permanent creases, or heavy discoloration, those signs confirm it was time for a replacement.
Keep all tension rods and the counter hoop organized. Place the rods in a small container so none roll away and get lost during the process.
Cleaning the Bearing Edge Is Critical
The bearing edge is the precisely shaped top surface of the drum shell where the head makes contact. Any debris on this surface creates a bump that the thin resonant head cannot conform around. The result is a wrinkle or bubble right at that spot.
Use your lint free cloth to wipe the entire bearing edge carefully. Move the cloth in one direction around the full circumference. Look for dried stick residue, dust buildup, or small particles stuck to the surface. For stubborn residue, slightly dampen the cloth with water. Avoid harsh chemical cleaners that could damage the shell finish or leave a slippery film.
While cleaning, inspect the bearing edge for damage. Look for dents, flat spots, or chips. A damaged bearing edge is one of the most common causes of persistent wrinkles that tuning alone cannot fix. If you find a significant dent or flat area, the shell may need professional bearing edge repair.
Also check the inside of the shell. Make sure all internal hardware, such as the lug casings and snare bed inserts, are securely fastened. Loose internal parts can rattle or create uneven pressure on the head.
A small application of paraffin wax on the bearing edge can help the head slide smoothly into place during seating. Rub a small block of wax lightly across the edge. This reduces friction and allows the head to settle evenly as you bring up the tension.
Understanding the Snare Bed and Its Effect on Wrinkles
The snare bed is a shallow dip or cutaway in the bearing edge on two opposite sides of the drum shell. It sits directly beneath the strainer and the butt plate. This dip allows the snare wires to make full contact with the resonant head, which is essential for snare sensitivity and response.
Here is the key point many drummers miss: the snare bed will always cause some amount of wrinkling at those two spots on a new head. This is completely normal. The head cannot conform perfectly into the depression of the snare bed without slight creasing in the surrounding area.
Metal shell snare drums often have more pronounced snare beds than wood shell drums. Deeper snare beds produce more noticeable wrinkles. This does not mean anything is wrong with the drum or the head.
You can minimize snare bed wrinkles by giving the tension rods closest to the snare beds a slight extra turn, perhaps a quarter turn more than the other rods. This pulls the head down into the bed area more evenly. Be careful not to overtighten these rods, though. Excessive tension near the snare beds can actually reduce snare sensitivity by pulling the head too tight against the wires.
If your drum has very deep snare beds and the wrinkles bother you, a heat gun can help. Professional drum technicians use heat guns to gently warm the head near the snare beds, allowing the Mylar to soften and conform better to the bearing edge contour.
How to Seat the New Resonant Head Correctly
Seating the head means getting it to settle properly onto the bearing edge before you begin serious tensioning. This step is crucial for a wrinkle free result.
Remove the new head from its packaging and place it centered on the drum shell. The collar of the head, which is the turned down edge around the perimeter, should sit evenly around the shell on all sides. Take a moment to visually check that the head is centered.
Place the counter hoop on top of the head. Align the hoop so that each hole lines up with its corresponding lug casing. Then insert all tension rods through the hoop holes and into the lug casings.
Finger tighten each tension rod. Turn each rod clockwise by hand until it is snug against the hoop. Do not use a drum key yet. The goal is to create a uniform, light contact between the hoop, the head, and the bearing edge all the way around.
Here is an important warning from professional drum technicians: never use your palm to press the center of a snare side head. Batter heads are thick enough to handle palm pressure for seating, but snare side heads are not. Pressing down on the center of a 2 to 3 mil head can permanently stretch, distort, or even puncture the film. Instead, rely on the tension rods and the star pattern to gradually and evenly draw the head down onto the bearing edge.
The Star Pattern Tightening Method Explained
The star pattern is the single most important technique for preventing wrinkles. It ensures that tension increases evenly across the entire head, which keeps the film flat and smooth.
Start with any tension rod and give it a quarter turn with your drum key. Then move directly across the drum to the opposite tension rod and give it the same quarter turn. Continue this cross pattern, moving to the next pair of opposite rods, until you have tightened every rod once.
That completes one round. Now repeat the entire process. Give each rod another quarter turn in the same star pattern order. Continue this cycle across multiple rounds, bringing the tension up slowly and evenly.
Why does this matter so much for the resonant head? Because the thin plastic distributes force across a very small area. If you tighten one rod fully before moving to the next, you create a localized high tension spot. The film pulls sharply toward that rod and bunches up on the opposite side. This produces wrinkles that are very difficult to remove later.
Some drummers use two drum keys at once, tightening two opposite rods simultaneously. This speeds up the process and provides even better tension balance. If you have two keys available, this is worth trying.
Keep your turns small. Quarter turns are ideal. Half turns are acceptable during the first couple of rounds when the head is still very loose. Full turns are too aggressive for a thin snare side head and increase the risk of wrinkles or uneven seating.
How to Use the Tap Method for Even Tuning
Once you have brought the head up to a moderate tension using the star pattern, it is time to fine tune. The tap method lets you check whether each lug point is at the same pitch, which confirms even tension around the head.
Tap the head about one inch in front of each tension rod using the tip of a drumstick or your fingernail. Listen carefully to the pitch produced at each point. In a perfectly tuned head, every lug point produces the same pitch.
If one point sounds higher than the others, that rod has more tension. Loosen it slightly with a small counterclockwise turn. If a point sounds lower, tighten that rod with a small clockwise turn. Always make tiny adjustments, just an eighth or quarter turn at a time.
Work your way around the entire drum, tapping and adjusting until the pitches match at every lug. This process may take several passes. Be patient. Each adjustment at one rod can slightly affect the neighboring rods, so multiple rounds of fine tuning are normal.
The resonant head should ultimately be tuned to a medium to medium high tension for most playing styles. This range gives good snare wire response and sensitivity. A head that is too loose will produce a flabby sound with excessive snare buzz. A head that is too tight will choke the drum and reduce sustain.
Remember that the tension rods near the snare beds may need to be tuned slightly differently from the rest to accommodate the bearing edge dip. Use your ears as the final judge.
Common Mistakes That Cause Wrinkles
Several common errors lead to wrinkled resonant heads. Knowing what to avoid is just as important as knowing the correct steps.
Tightening in a circle instead of a star pattern is the number one mistake. Going from one rod to the adjacent rod creates a wave of tension that travels around the head unevenly. This almost always produces wrinkles.
Rushing the process is another frequent cause. Drummers who give each rod a full turn or more per round bring the tension up too fast. The head does not have time to settle evenly onto the bearing edge. Slow, incremental tightening produces far better results.
Using palm pressure to seat the head destroys thin snare side heads. This technique is appropriate for thicker batter heads, but the resonant head cannot withstand that force without permanent deformation.
Skipping the bearing edge cleaning leaves debris that creates localized bumps. Even a tiny grain of sand under the head can produce a visible wrinkle on a 2 mil film.
Ignoring a damaged bearing edge leads to chronic wrinkling. If the bearing edge has dents, warps, or flat spots, no technique or tuning method will fully eliminate wrinkles. The edge must be repaired first.
Installing the head in a cold environment makes the Mylar stiff and resistant to smooth seating. Always install heads at room temperature for the best results.
When to Use a Heat Gun for Stubborn Wrinkles
A heat gun is a powerful tool for dealing with persistent wrinkles, especially near the snare beds. Professional drum technicians use this technique regularly on orchestral snare drums and high end concert instruments.
Hold the heat gun about three to four inches from the head surface. Use wide, sweeping motions across the wrinkled area. Never hold the heat in one spot for more than a second or two. The Mylar film is thin and can melt or warp if exposed to concentrated heat.
The gentle warmth softens the plastic just enough for it to relax and conform to the bearing edge contour. This is especially effective near snare beds where the head must dip into the cutaway.
After applying heat, immediately tighten the nearby tension rods while the plastic is still warm and pliable. Use small quarter turn increments. The head will settle into the snare bed more smoothly than it would at room temperature.
Not every drummer needs a heat gun. If your drum has shallow snare beds and you follow the star pattern carefully, you may never see significant wrinkles. But for drums with deep snare beds or for players who demand a perfectly smooth resonant head, a heat gun is a valuable addition to your toolkit.
Use a standard heat gun on a low setting. Hair dryers produce less heat but can also work for minor wrinkles. Avoid using open flames or torches, which create too much concentrated heat and can destroy the head instantly.
Reattaching the Snare Wires After Installation
Once the resonant head is seated, tensioned, and tuned, it is time to put the snare wires back on. This step directly affects how your drum sounds and responds.
Lay the snare wires across the center of the resonant head. Align them so they sit evenly across the head surface with equal spacing on both sides. The wire assembly should be centered between the strainer and the butt plate.
Attach the cord, strap, or clip to the butt plate side first. Pull it just tight enough to hold the wires flat against the head without creating excess tension. Then attach the other end to the strainer mechanism.
Engage the throw off and slowly increase snare tension. The wires should begin making contact with the head evenly across their full width. Tap the center of the batter head lightly with a stick. You should hear a crisp snare response even at a quiet playing volume.
If you hear excessive buzz or rattle, the snare wires may be too loose. If the drum sounds choked with no sustain, the wires are too tight. Find the sweet spot where a gentle tap produces a clear snare sound and harder hits deliver a full, open tone.
Make sure the snare cord or strap sits neatly within the snare bed on both sides. If the cord sits on top of the bearing edge rather than in the bed, it will create a bump under the head that causes buzzing and potential wrinkles.
How Tuning Affects Wrinkle Prevention Long Term
Proper tuning is not just about getting a good sound today. It also protects the head from developing wrinkles over weeks and months of playing.
Tension rods loosen naturally over time due to vibration from playing. Rim shots, in particular, send strong vibrations through the hoop and can gradually back out tension rods. When rods loosen unevenly, the head loses its balanced tension and wrinkles can appear.
Check your resonant head tension regularly, even if you are not changing the head. A quick tap test around the lugs every few weeks will tell you if things have drifted out of balance. Retune as needed using the same star pattern and small incremental turns.
Some drummers use lug locks or nylon insert lock nuts to help tension rods stay in place. These small accessories add friction to the rod threads and resist loosening from vibration. They are a simple and inexpensive way to maintain even tension between tuning sessions.
Avoid extreme temperature changes with your drum. Moving a drum from a hot stage into a cold loading dock causes the head material to contract rapidly. This thermal shock can produce wrinkles even on a well tuned head. Let your drums acclimate gradually to new environments.
If you notice wrinkles appearing on a previously smooth head, do not panic. Loosen all the tension rods evenly, reseat the head, and retune from scratch using the star pattern. Often the wrinkles will disappear completely after a fresh tuning session.
Choosing the Right Resonant Head for Your Snare
Not all snare side heads are identical. Different brands offer slightly different film thicknesses, collar shapes, and manufacturing processes. These differences can affect how easily the head seats and whether wrinkles form during installation.
Most snare side heads are single ply and measure between 2 and 3 mil. Some specialty heads are slightly thicker for added durability, but standard thin heads provide the best sensitivity and snare wire response.
Remo, Evans, and Aquarian are the three major drum head manufacturers. Each brand uses a different process for forming the collar. Evans and Aquarian heads often come with pre shaped or pre formed collars that make seating easier and faster. Remo heads sometimes require a bit more effort during the seating phase because their collars may need to break in.
Choose a head that matches the size of your drum exactly. A 14 inch head on a 14 inch drum should fit snugly with no gaps. If the head feels too tight or too loose in the shell, double check the drum size and head size.
Clear and hazy snare side heads perform similarly. Hazy heads have a slightly textured surface that some drummers prefer for snare wire response. Clear heads offer a bit more brightness. Both types seat and tune the same way, so choose based on your tonal preference.
Troubleshooting Persistent Wrinkles
If you have followed every step and wrinkles still appear, there may be an underlying issue with the drum or the head itself.
Check the counter hoop for warping. Place the hoop on a flat surface like a glass table and see if it rocks. A warped hoop applies uneven pressure on the head and creates wrinkles that no tuning adjustment can fix. Replace a warped hoop.
Inspect the bearing edge again with a straight edge or ruler. Place it across the diameter of the shell and look for gaps between the ruler and the edge. A gap indicates a low spot or warp in the shell. Bearing edge repairs require sanding on a flat surface or professional help from a drum shop.
Sometimes a defective head is the problem. Manufacturing defects, while rare, can include uneven film thickness or a poorly formed collar. If you suspect a bad head, try installing a different head from the same pack or a different brand. If the wrinkles disappear, the first head was likely defective.
Lug casings that are not aligned properly can also cause issues. If a lug casing is tilted or loose, the tension rod enters at an angle and applies force unevenly. Tighten any loose lug mounting screws and ensure each casing is straight.
Finally, remember that small wrinkles directly at the snare beds are normal and unavoidable on most drums. If the wrinkles are limited to those two areas and the drum sounds good, you can confidently leave them alone. They do not indicate a problem and do not significantly affect the sound.
Frequently Asked Questions
Is it normal for a snare resonant head to have some wrinkles near the snare beds?
Yes, this is completely normal. The snare beds are shallow dips in the bearing edge that allow the snare wires to contact the head. The thin resonant head cannot perfectly conform into these dips, so minor wrinkles or bubbles at those two points are expected. You can reduce them by giving the tension rods nearest the snare beds a slight extra quarter turn. Deep snare beds, especially on metal shell drums, tend to produce more noticeable wrinkles than shallow beds on wood shells.
Can I use a hair dryer instead of a heat gun to fix wrinkles?
A hair dryer can work for very minor wrinkles, but it produces significantly less heat than a dedicated heat gun. For stubborn wrinkles near the snare beds, a heat gun on a low setting is more effective. Hold it three to four inches from the head and keep it moving with wide sweeping passes. Never hold the heat source in one spot, because the thin Mylar film can melt or deform quickly under concentrated heat.
How tight should a snare resonant head be tuned?
Most drummers tune the snare resonant head to a medium or medium high tension. The head should feel taut with minimal give when you press lightly near the edge. A tighter resonant head produces a crisper, drier snare sound with less buzz. A looser resonant head creates more sustain and a fatter snare buzz. The best tension depends on your musical style, but a good starting point is to tune the resonant head slightly higher in pitch than the batter head.
Should I stretch a snare side head like I stretch a batter head?
No. Batter heads benefit from palm pressure in the center to break in the glue and seat the collar. Snare side heads are far too thin for this treatment. Pressing down on the center of a 2 to 3 mil head can permanently stretch, distort, or puncture the film. Instead, rely on the star pattern tightening method to gradually and evenly seat the resonant head onto the bearing edge. The tension rods do all the work for you.
How often should I replace my snare resonant head?
Snare resonant heads last much longer than batter heads because they do not receive direct stick impact. Many drummers can go a year or more on the same resonant head. Replace it when you notice a loss of snare sensitivity, visible damage, or a dull and lifeless quality in the snare response. If the head has permanent creases or discoloration, it is time for a fresh one. Professional players who perform frequently may change the resonant head every few months to maintain peak performance.
Why do wrinkles keep coming back after I tune the head?
Recurring wrinkles usually indicate a problem with the bearing edge, the counter hoop, or the tension rods. Check the bearing edge for dents or flat spots using a straight edge. Inspect the counter hoop on a flat surface for warping. Also verify that all lug casings are secure and properly aligned on the shell. If all hardware is in good condition, the wrinkles may be caused by tension rods loosening from playing vibrations. Lug locks or nylon insert lock nuts can help keep the rods in place between tuning sessions.

Hi, I’m Tessa! As a lifelong music lover and gear enthusiast, I started this blog to help fellow musicians navigate the overwhelming world of instruments and equipment. I spend my time researching, comparing, and reviewing musical gear so you can spend yours doing what matters most — making music.