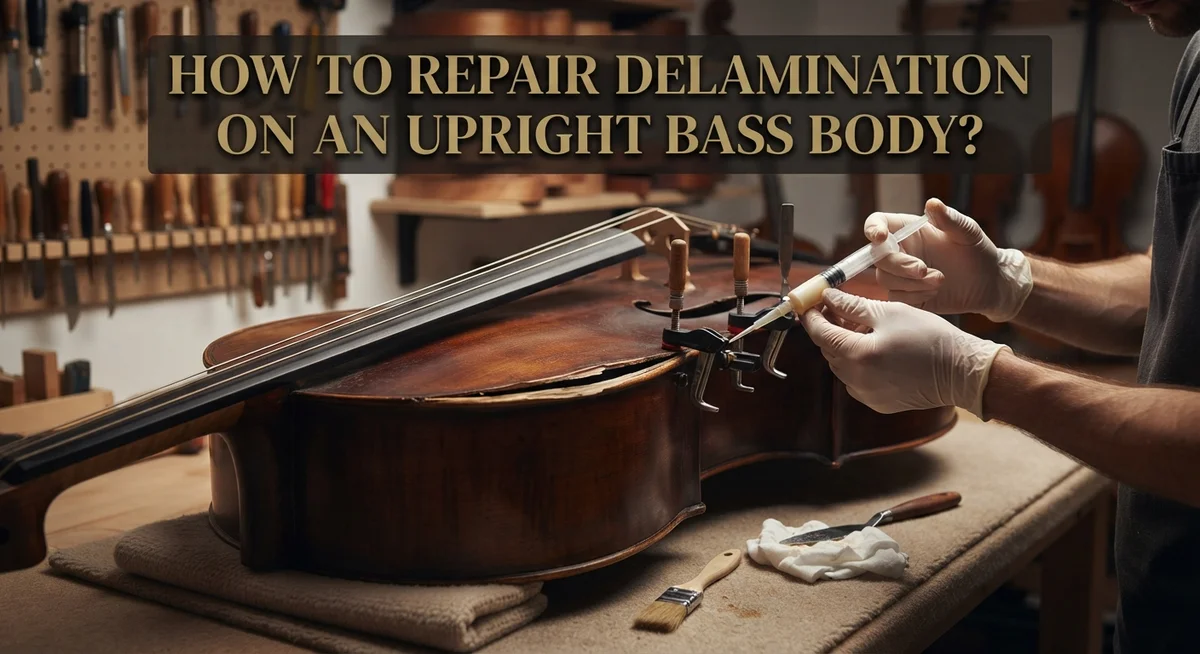
How to Repair Delamination on an Upright Bass Body?
Your upright bass gives you deep, rich tones. But over time, you might spot the plies separating on the body. This is called delamination, and it can affect both sound and looks.
Delamination often happens on plywood basses. Case bumps, humidity changes, or plain old age can cause the layers to pull apart. You might see it along the edges, near the binding, or across the flat body panels.
The good news? You can fix this yourself in many cases. This guide walks you through repairing delamination step by step. We will cover how to spot the damage early, what tools you need, and how to inject glue between the separated plies.
In a Nutshell
- Spot the damage early. Look for gaps, loose binding, or a hollow sound when you tap the body.
- Use hot hide glue. It works deep into the plies and stays reversible if you need steam to fix mistakes later.
- Inject glue with a thin knife. Push it between the separated layers so it coats both sides fully.
- Flex the wood gently. This helps the glue spread deep into the crack instead of just sitting on top.
- Clamp firmly with clothes pins. Leave them on until the glue sets completely for a strong bond.
- Finish with care. Sand the area smooth, then stain and spray to match the rest of your bass.
What Is Delamination and What Causes It on an Upright Bass?
Delamination is the separation of wood layers on your upright bass body. Your bass is made of plywood, which means it has multiple thin sheets glued together. When these sheets start to come apart, you get delamination. The edge binding (the strip around your bass edges) can also separate from the body.
Why does this happen? Delamination usually starts with case damage. If your bass gets dropped or bumped hard, the impact can crack the glue holding the plies together. Environmental stress causes problems too. When humidity changes quickly, wood expands and contracts at different rates. The plies move differently, and eventually the glue fails.
Temperature swings make it worse. Moving your bass from a cold car to a warm room creates stress. The outer plies warm up faster than the inner ones. This uneven heating pushes the layers apart.
Where does delamination appear? You will often see it on the ribs (the curved sides). The back and front plates can also delaminate. Edge binding damage is common along the corners and edges where impacts happen first.
How can you spot it? Look for visible gaps between layers. You might see the wood separating slightly. Tap the body gently with your finger. A hollow or different sound means layers are loose inside. Sometimes you can see light through small gaps if you look closely.
The good news? You caught the problem at the right time. Early detection means easier repairs. The longer delamination sits, the harder it becomes to fix because dust and dirt fill the gaps.
Assessing the Damage: How to Identify Delamination and Its Severity
Delamination on an upright bass shows itself in specific ways. You need to know what to look for so you can act fast before the damage spreads.
Visual signs tell the story first. Look at your bass body closely. Do you see gaps or cracks where the plywood layers should be glued together? These gaps often appear as thin lines running along the ribs or back. The separation might be small at first, but it grows over time.
Feel the damage with your fingers. Run your hand along the body. You might feel raised edges or loose binding where the edge glue has failed. Press gently on suspicious areas. If the wood feels soft or moves slightly, delamination is likely present.
Listen to your bass. Tap different spots on the body with your knuckles. A solid area sounds full and resonant. A delaminated area sounds hollow or dull. This hollow sound tells you the layers have separated inside.
Check the severity carefully. Small separations less than an inch long are minor. You can handle these yourself. Medium damage spans several inches and may affect the sound slightly. Large delamination covering big sections or affecting multiple ribs needs more work.
Look at the location too. Delamination on the ribs is most common. Edge binding damage is also frequent. Damage near the soundpost area is more serious because it affects tone production.
Act quickly now. Early detection makes repairs much easier. Small problems stay small when you address them right away. Waiting lets the separation grow, making the fix harder and more expensive later.
Tools and Materials Needed for a Delamination Repair
When you prepare to fix delamination, gather the right supplies first. You need several items to do this job well.
Hot hide glue is your main material. This glue works best because it flows deep between the separated plies and stays reversible. If you make a mistake, steam can undo it later. Keep the glue warm in a pot or glue warmer while you work.
A thin, flat knife serves as your injection tool. The blade should fit into the gap between layers without forcing them apart further. A putty knife works, but a butter knife often fits better in tight spaces.
Clamps hold everything together while glue sets. Plastic clothes pins work great for this job because they grip without damaging the wood. You may need 5 to 10 pins depending on the separation length. Regular bar clamps or C clamps also work if you have them.
Prepare some water and clean rags nearby. You will need these to wipe away excess glue before it hardens.
For the finishing stage, gather sandpaper in different grits. Start with 120 grit and move up to 220 grit for smoothness. You will also want stain that matches your bass color and spray finish for protection.
A small brush helps apply stain evenly. A spray can or spray gun applies the final finish coat.
Keep paper towels handy for cleanup throughout the project. Work in a well ventilated space because hot hide glue and spray finish release fumes.
Organize all materials before you start. This prevents interruptions once you begin injecting glue into the separation.
Step-by-Step: Injecting and Working Glue Into Separated Plies
Now you’re ready to inject glue and work it into the separated plies. This step determines whether your repair holds strong or fails later. Take your time here because rushing causes weak bonds.
Start by heating your hot hide glue until it flows like water. Cold glue won’t penetrate deep between the layers. Use a thin, flat knife to work glue into the separation. Push the knife tip into the gap and wiggle it gently. This action spreads the glue along the entire length of the split.
Work the glue back and forth several times. You want glue coating all surfaces inside the separation, not just sitting on top. The glue must reach deep into the crack to bond the plies together. Insufficient glue penetration causes repairs to fail within months.
Once you’ve injected glue throughout the separation, flex the plies gently. Bend the wood slightly to help the glue work into every crevice. Don’t force it or you’ll crack the wood. Just gentle flexing helps the glue spread evenly.
Now clamp the area immediately before glue cools. Plastic clothes pins work perfectly for this job because they grip without damaging the finish. Space pins about two inches apart along the entire delaminated section. Tighten each pin firmly but don’t over tighten to the point of crushing the wood.
Leave clamps in place for the full curing time. Hot hide glue typically needs 24 hours to set completely. Check the manufacturer’s instructions for your specific glue. Once cured, remove the clamps slowly and carefully.
Inspect the repair before moving to finishing work. The separation should feel solid with no gaps remaining. If you find weak spots, repeat the injection process on those areas.
Clamping Techniques for Setting the Glue Properly
Clamping holds the separated plies together while glue sets. This step determines whether your repair succeeds or fails. You need steady pressure applied evenly across the entire delaminated area.
Plastic clothes pins work exceptionally well for this job. They grip without damaging the delicate wood surfaces. Position them perpendicular to the separation so they pull the plies back together. Space them about one inch apart along the entire damaged section.
Start clamping immediately after you finish working the glue between the plies. Hot hide glue begins setting quickly, so speed matters here. Tighten each pin firmly but not aggressively. You want solid contact, not crushed wood.
Check that the plies sit flush against each other. Run your finger along the clamped area to feel for gaps. Any separation means the glue won’t bond properly. Adjust pins as needed to eliminate visible spaces.
Leave clamps in place for the full curing time. Hot hide glue typically needs 24 hours to set completely. Resist the urge to remove clamps early. Premature removal risks the repair failing.
Monitor the area occasionally while glue cures. Clamps sometimes shift slightly as wood settles. If you notice movement, gently retighten. Wipe away any excess glue that squeezes out before it hardens.
After the full curing period passes, carefully remove all clamps. Work slowly to avoid sudden stress on the repair. The bond should feel solid and permanent. If any separation remains, you may need to repeat the injection and clamping process in that spot.
Finishing Touches: Sanding, Staining, and Spraying After Repair
Once your glue has fully cured and clamps are removed, the repair area needs proper finishing. Start by sanding the region where you applied glue. Use coarse grit sandpaper first to level any uneven spots where the plies were separated. Work slowly and check your progress often.
Move to medium grit sandpaper next. This step smooths the surface and removes scratches from the coarse grit. Sand in the direction of the wood grain to avoid creating cross grain marks. Wipe away all dust with a damp cloth before moving forward.
Fine grit sandpaper comes last. This creates a smooth, even surface ready for staining. Feather the edges of your repair area into the surrounding wood so transitions blend naturally. The goal is making the repair invisible to the eye.
Before staining, inspect the repair carefully. Run your hand across it to feel for bumps or rough spots. Sand any problem areas again if needed. Clean away all dust thoroughly with a tack cloth or damp rag.
Apply stain to match the rest of your bass body. Test the stain on a hidden area first to confirm the color matches. Use a small brush to apply stain evenly across the repair zone. Let stain dry completely according to product instructions.
Spraying comes last in your finishing process. Apply clear spray finish over the entire repair area. Multiple thin coats work better than one thick coat. Allow proper drying time between each coat. Sand lightly with fine grit between coats for better adhesion. This protective layer seals your repair and restores the bass body’s appearance.
Common Mistakes to Avoid During Delamination Repair
Many people rush through delamination repair and end up with poor results. Understanding what goes wrong helps you succeed the first time.
The most common mistake is not injecting enough glue between the separated plies. You need glue to reach the entire separation, not just one spot. If you skip this step, the plies will separate again after clamping. Take your time working the glue back and forth through the gap using your knife. The glue must penetrate deeply into every area where wood meets wood.
Another frequent error involves insufficient clamping pressure or removing clamps too early. Hot hide glue needs the full curing time to set properly. If you remove clamps before the glue hardens completely, the repair fails. Clamp pressure also matters—the plies must sit flush against each other during the entire process. Loose or weak clamping leaves gaps that weaken your repair.
Some people use the wrong adhesive for this job. Hot hide glue is reversible, which means you can fix mistakes with steam if needed. Other glues create permanent bonds that cannot be undone if problems arise.
Cold glue also causes problems. Hot hide glue flows better and penetrates deeper than cold adhesive. Always heat your glue properly before injecting it between plies.
Finally, rushing the finishing stage ruins good repair work. Sand gradually through different grit levels. Inspect your repair carefully before staining. Apply stain evenly to match your bass body color. These finishing steps protect your repair and make it invisible.
Avoiding these mistakes takes patience, but it saves you from redoing the entire repair later. Follow each step carefully and your delamination repair will last for years.
When to Call a Professional Luthier Instead of DIY Repair
Knowing when to stop and call a professional luthier saves your bass from permanent damage. Some delamination repairs work well as DIY projects, but others demand expert hands.
Basic delamination where plies separate cleanly is manageable at home. You inject glue, clamp the area, and let it cure. This straightforward approach works because the damage is isolated and doesn’t affect the bass’s structural integrity or sound quality.
Complex damage requires professional help. If the soundpost has punctured through the body, a luthier must access the interior properly. If ribs are bulging outward or the neck shows signs of stress, the problem runs deeper than surface separation. These issues need someone who understands how forces move through the instrument.
Call a professional if you see cracks spreading from the delaminated area. Cracks indicate the wood has already begun to fail structurally. Attempting DIY repair on cracked wood often makes the problem worse because pressure from clamping can force cracks further apart.
Environmental damage also signals professional work. If humidity changes caused the delamination and warped the body, a luthier can assess whether the wood will stabilize or needs reinforcement.
Your skill level matters too. If you’ve never worked with wood glue or clamps, practice on scrap wood first. Watch the repair process carefully before attempting it on your instrument.
When in doubt, send photos to a luthier and ask their opinion. Most charge nothing for this consultation. Spending a bit on expert advice prevents costly mistakes. Your bass body is valuable, and professional restoration protects that investment far better than a risky DIY attempt.
Final Thoughts
Delamination repair does not have to scare you. With patience and the right approach, you can fix separated plies at home.
Hot hide glue remains your best friend in this process. It bonds well and stays reversible if you need to fix mistakes later.
Take your time with each step. Rushing leads to weak repairs that fail again within months.
Clamping properly makes a huge difference. Give the glue enough time to cure fully before you touch the area again.
Your bass deserves careful attention during this repair. It has likely served you well for years already.
Small delaminations are perfect learning projects. They teach you skills that help with future repairs too.
Watch your instrument closely after finishing the repair. Catching new separation early prevents bigger problems down the road.
Temperature and humidity affect plywood basses constantly. Store your instrument in stable conditions to reduce future delamination risk.
A good case protects your bass from bumps and drops. Many delamination cases start from simple transport accidents.
Trust your instincts throughout this process. If something feels wrong or looks off, stop and reassess before continuing.
Professional luthiers exist for good reason. Complex damage sometimes needs expert hands and specialized tools you may not own.
Do not feel discouraged if your first repair looks imperfect. Every luthier started as a beginner once too.
Practice builds confidence over time. Each repair teaches you something new about wood, glue, and patience.
Your upright bass can sound great for decades. Proper care and timely repairs keep it playing beautifully for years ahead.
Frequently Asked Questions
What causes delamination on upright bass bodies?
Delamination happens when the plywood plies separate from each other or when edge binding pulls away from the body. This usually occurs after case damage, drops, or exposure to extreme temperature and humidity changes. Plywood basses are especially vulnerable because they have multiple layers that can shift independently under stress.
Is hot hide glue really better than other adhesives?
Yes, hot hide glue works best for bass repairs because it’s reversible. If you make a mistake, you can apply steam to soften the glue and try again. Modern glues like epoxy create permanent bonds that are difficult to fix later. Hot hide glue also allows you to flex the plies and work the adhesive deep into the separation before it sets.
Can I repair delamination myself as a beginner?
Basic delamination repairs are absolutely manageable for beginners. If the plies separated cleanly without cracks spreading elsewhere, you can handle it at home. The process involves injecting glue, flexing the wood, clamping with clothes pins, and finishing with sand and stain. However, complex damage like soundpost punctures or rib bulging requires professional help.
How long should I leave clamps on the repair?
Leave clamps in place until the hot hide glue fully sets. This typically takes 24 hours or longer depending on temperature and humidity in your workshop. Removing clamps too early causes the repair to fail. Check the glue manufacturer’s instructions for exact timing, and avoid playing your bass until the repair completely hardens.
What’s the biggest mistake people make during this repair?
The most common error is not injecting enough glue between the separated plies. People rush through this step and end up with weak spots that fail later. Another mistake involves removing clamps before the glue sets completely. Take your time working the glue thoroughly into the separation, and be patient with the clamping stage.

Hi, I’m Tessa! As a lifelong music lover and gear enthusiast, I started this blog to help fellow musicians navigate the overwhelming world of instruments and equipment. I spend my time researching, comparing, and reviewing musical gear so you can spend yours doing what matters most — making music.