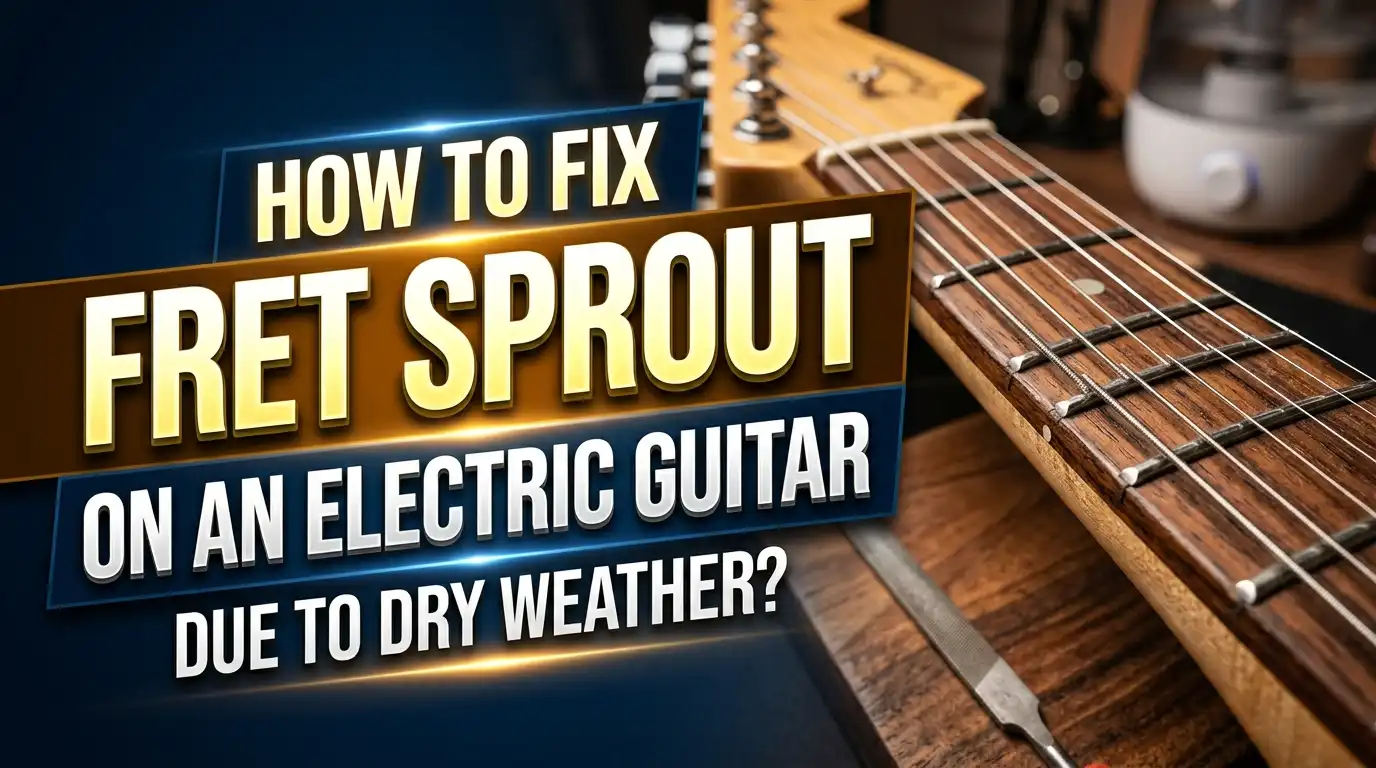
How to Fix Fret Sprout on an Electric Guitar Due to Dry Weather?
Have you ever picked up your electric guitar and felt tiny sharp edges poking out from the sides of the neck? That uncomfortable sensation is called fret sprout, and it is one of the most common problems guitar owners face during dry weather.
Those protruding fret ends can scratch your hand, slow down your playing, and make every chord change feel like a chore.
Fret sprout happens because wood is a natural material that reacts to its environment. When the air gets dry, your guitar’s fretboard shrinks. The metal frets, however, stay the same size.
This guide will walk you through everything you need to know. You will learn what causes fret sprout, how to identify it early, what tools you need, and exactly how to file, bevel, and polish those fret ends back to smooth perfection.
Key Takeaways
- Fret sprout occurs when dry air causes the fretboard wood to shrink, leaving the metal fret ends exposed and sharp on either side of the neck. This is a common issue during winter months or in arid climates where indoor heating removes moisture from the air.
- The ideal humidity range for guitar storage is 40% to 50% relative humidity. Keeping your guitar in this range will help prevent fret sprout and other humidity related damage like cracking, buzzing, and warped necks.
- You can fix fret sprout at home with a fine tooth flat file, a three corner file, sandpaper, and polishing materials. The process involves filing the fret ends flush, beveling them at a slight angle, rounding the edges, and then polishing for a smooth finish.
- Always condition your fretboard after fixing fret sprout. Applying fretboard oil to unfinished rosewood or ebony fingerboards restores moisture and helps prevent future shrinkage.
- Humidity control is the best long term prevention strategy. Using a room humidifier, a case humidifier, or a hygrometer to monitor conditions can save you from repeated fret sprout repairs.
- Bound fretboards require special caution. If your guitar has binding along the fretboard edges, filing the fret ends yourself can damage the binding and finish. In these cases, a professional luthier is the safer choice.
What Exactly Is Fret Sprout?
Fret sprout is the term guitarists and luthiers use to describe a condition where the ends of the metal frets extend past the edges of the fretboard. The frets themselves do not actually grow or change size. Instead, the wooden fingerboard underneath them contracts and becomes narrower.
Picture a metal rod set into a wooden channel. If the wood shrinks, the rod will stick out on both sides. That is exactly what happens on your guitar neck. The fret wire is made of a nickel silver alloy that does not respond to humidity changes. The fretboard, made from wood like rosewood, ebony, or maple, absolutely does respond to those changes.
You will notice fret sprout most often along the treble side of the neck, though it can appear on both sides. In mild cases, you might feel a subtle roughness as you slide your hand along the neck. In severe cases, the fret ends become genuinely sharp and can cut your skin during play.
Fret sprout affects guitars of all price ranges. A custom shop instrument can develop fret sprout just as easily as a budget model. The difference often comes down to how the guitar is stored, not how much it costs. Any fretted instrument can develop this condition, including basses, mandolins, and banjos.
Why Does Dry Weather Cause Fret Sprout?
Dry weather is the primary cause of fret sprout on electric guitars. When relative humidity drops below 40%, the wood in your guitar’s fretboard begins to lose moisture. This moisture loss causes the wood fibers to contract, and the fretboard physically narrows.
Winter is the peak season for this problem. Indoor heating systems circulate warm, dry air throughout your home. This can push indoor humidity levels down to 20% or even lower. At those levels, your fretboard can shrink enough to expose fret ends within just a few weeks.
Hot, arid climates produce the same effect year round. If you live in a desert region or an area with consistently low humidity, your guitars face this risk regardless of the season. Air conditioning also removes moisture from the air, which makes summer a potential risk period in some locations.
The science is straightforward. Wood is a hygroscopic material, meaning it absorbs and releases water vapor from the surrounding air. When the air is moist, the wood swells. When the air is dry, the wood shrinks. Metal fret wire does not share this property. This difference in how these two materials respond to humidity is the entire cause of fret sprout.
Temperature fluctuations compound the problem. Moving a guitar from a cold car trunk into a heated room creates rapid environmental changes that accelerate moisture loss.
How to Identify Fret Sprout on Your Guitar
Detecting fret sprout is simple once you know what to look for. The easiest test is to run your thumb and fingers along both edges of the fretboard, from the nut down to the last fret. The sides should feel smooth and uninterrupted.
If you feel small, sharp bumps at each fret position, you have fret sprout. The severity can range from barely noticeable to painfully sharp. Even a mild case deserves attention because it will likely get worse as dry conditions continue.
Visual inspection can also help. Hold your guitar at eye level and look along the edge of the fretboard. In moderate to severe cases, you can actually see the fret ends poking out. They will look like tiny metal slivers extending past the wood.
Pay attention to how the guitar feels during play. If chords feel rougher than usual, or if you notice small scratches on the side of your index finger after playing barre chords, fret sprout is the likely cause. Some players describe the sensation as a “cheese grater” feeling along the neck.
Other signs of a dry guitar often accompany fret sprout. These include fret buzz (because the top or neck has shifted slightly), visible grain lines that feel raised on the fretboard surface, and in extreme cases, small cracks in the wood. If you notice any of these along with sharp fret ends, your guitar needs moisture and maintenance right away.
Tools You Will Need for the Repair
Before you start filing fret ends, gather the right tools. Having everything ready will make the process smoother and reduce the risk of damage to your guitar. You do not need a workshop full of specialized equipment. A few key items will get the job done.
The most important tool is a fine tooth flat file. This file should be between 4 and 8 inches long. You will use it to file the protruding fret ends flush with the fretboard edge. Diamond coated flat files also work well and provide a consistent cut.
You will also need a three corner file (also called a triangular file). This tool lets you round and smooth the edges of each fret end after the initial filing. Choose a single cut file if possible, as the teeth only cut in one direction, which prevents debris buildup and gives you more control.
A set of sandpaper or micro mesh polishing cloths in progressive grits (from 400 up to 2000 or higher) is essential for polishing the frets after filing. This step removes scratches and gives the frets a professional shine.
Other helpful items include painter’s tape (to protect the fretboard and guitar finish), a clean cloth, fretboard conditioner or oil (for unfinished rosewood and ebony boards), and good lighting. A magnifying glass or loupe can help you inspect your work closely.
If you want to protect the fretboard surface during filing, low tack painter’s tape applied along both edges of the neck works perfectly. It prevents accidental scratches on the wood or finish.
Step 1: Prepare Your Guitar for the Repair
Preparation makes the difference between a clean repair and accidental damage. Start by removing the strings from your guitar. You need full access to every fret, and strings will only get in the way.
Place the guitar on a stable, padded surface. A folded towel on a table works well. Make sure the neck is supported and the guitar will not slide or roll. Good lighting is critical for this work. Set up a desk lamp or work light so you can clearly see the fret ends from multiple angles.
Next, apply painter’s tape along the edges of the fretboard. This protects the finish on the neck and body from accidental file contact. If your guitar has a glossy finished neck, this step is especially important. A single slip of the file can leave a visible gouge.
Take a moment to inspect each fret end closely. Note which frets have the worst sprout. Some frets may barely protrude, while others may stick out significantly. This assessment will help you gauge how much filing each fret needs.
Clean the fretboard with a dry cloth to remove any dust or debris. If the fretboard is particularly dirty, a light wipe with a barely damp cloth will help. Do not soak the fretboard with water. You want a clean working surface, but you will do the deep conditioning at the end of the process.
Step 2: File the Fret Ends Flush
This is the core step of the repair. Hold the fine tooth flat file against the side of the fretboard and gently draw it from the first fret down to the last fret. Let the weight of the file do most of the work. You are guiding the tool, not forcing it.
Use smooth, even strokes. The goal is to remove only the metal that sticks out past the fretboard edge. Do not press hard. Excessive pressure can cut into the fretboard wood or the neck finish. Two or three light passes are usually enough to bring the fret ends flush.
Work on one side of the neck at a time. Complete all the frets on the treble side before flipping the guitar and doing the bass side. This approach keeps your filing angle consistent across all frets.
After filing, run your finger along the fretboard edge again. The fret ends should now feel flush with the wood. If any frets still poke out, give them a few more gentle strokes with the flat file. Focus only on the problem spots rather than running the file across all the frets again.
Check your work frequently. It is much easier to remove a little more metal than to fix an over filed fret. Patience here pays off with a better result.
Step 3: Bevel the Fret Ends
Once the fret ends are flush with the fretboard, the next step is to add a slight bevel. Angle the flat file at approximately 35 to 45 degrees and glide it along the tips of the frets. This creates a small chamfer on each fret end that prevents the edges from feeling sharp.
The bevel serves two purposes. First, it removes the sharp 90 degree edge left after the flush filing. Second, it makes the neck feel smoother and faster under your fretting hand. Professional guitar setups always include this bevel, and it is one of the details that separates a great playing instrument from an average one.
Be careful not to create too deep of a bevel. If the bevel is too aggressive, the high E and low E strings can slip off the frets during aggressive playing. A bevel depth of about 1 to 2 millimeters is ideal for most playing styles. Some luthiers recommend a 23 degree angle for the bevel, which provides a good balance between comfort and string retention.
Work slowly and check your progress after every few strokes. The bevel should look uniform across all frets. Inconsistent bevel angles will feel uneven under your hand and can affect playability.
After beveling both sides of the neck, run your hand along the fretboard edges one more time. The difference should be obvious. What once felt sharp and rough should now feel smooth and comfortable.
Step 4: Round and Smooth Each Fret End
Filing and beveling get the fret ends flush and angled, but the edges can still feel slightly rough. The three corner file is the tool for this step. It lets you individually round and smooth each fret end for a professional feel.
Place the smoothed edge of the three corner file facing down against the fretboard. Gently roll the file over the edge of the fret end. It only takes about three to four light strokes per fret to achieve a smooth, rounded profile. Work on each fret individually, and be consistent with your technique.
This step requires patience. You have 21 to 24 frets on most electric guitars, and each one needs attention on both sides of the neck. That is potentially 48 individual fret ends to smooth. Take your time and do not rush.
Keep your file movements controlled and deliberate. Be especially careful near the body of the guitar. A slip of the file can scratch or gouge the guitar’s finish. If you taped off the guitar body earlier, this risk is minimized.
After rounding all the fret ends, do another tactile check. Slide your hand up and down both edges of the neck. Every fret should feel smooth, rounded, and comfortable. If any fret end still catches your skin, give it a few more strokes with the three corner file.
Step 5: Polish the Frets
Polishing is the finishing touch that makes your repair look and feel professional. Start with a medium grit sandpaper (around 400 grit) and work your way up through finer grits to at least 1500 or 2000 grit. Micro mesh polishing cloths are excellent for this step.
Wrap the sandpaper around your finger or a small block and gently rub each fret end. This removes any file marks and scratches left from the previous steps. Progress through each grit level, spending 10 to 15 seconds per fret end at each stage.
As you move to finer grits, you will see the fret ends start to shine. By the time you reach 2000 grit, the metal should have a smooth, mirror like finish. This is not just cosmetic. Polished fret ends reduce friction against your skin and make the neck feel faster.
While you are at it, consider polishing the tops of the frets as well. Smooth, polished fret crowns improve string bending, reduce wear on strings, and give your guitar a cleaner tone. This extra step takes only a few minutes and significantly improves the overall playing experience.
After polishing, wipe down the entire neck with a clean, dry cloth to remove any metal dust or polishing residue. Inspect your work under bright light. The fret ends should look clean, shiny, and uniform across the entire length of the neck.
Step 6: Condition the Fretboard
After all that filing and polishing, your fretboard needs some care. Apply a quality fretboard conditioner or oil to restore moisture and protect the wood. This step is essential for unfinished fretboards made from rosewood, ebony, or similar woods.
Put a small amount of fretboard oil on a clean, soft cloth. Rub the oil into the fretboard, working it between and around each fret. Let the oil soak in for about 10 to 15 minutes. This gives the wood time to absorb the moisture it needs.
After the oil has soaked in, wipe off any excess with a dry cloth. The fretboard should look refreshed and slightly darker than before. This visual change shows that the wood has absorbed the oil and is now better protected against future moisture loss.
Do not use fretboard oil on finished maple fretboards. Maple necks with a glossy or satin finish do not need conditioning because the finish seals the wood. Applying oil to a finished maple neck can damage the coating. Only apply oil to unfinished, open pore wood surfaces.
An old toothbrush is useful for scrubbing the conditioner into areas right next to the frets where dirt and grime tend to accumulate. This serves double duty as a cleaning step and a conditioning step. Once you are done, your fretboard will look and feel noticeably better.
How to Prevent Fret Sprout from Coming Back
Fixing fret sprout is only half the solution. Prevention is the real key to keeping your guitar comfortable and playable year round. A few simple habits will dramatically reduce the chances of fret sprout returning.
The most effective prevention strategy is humidity control. Keep your guitar in an environment with 40% to 50% relative humidity. A room humidifier works well for guitars stored on stands or wall hangers. For guitars kept in cases, a small case humidifier maintains ideal conditions inside the closed space.
Buy a hygrometer and place it near your guitars. This inexpensive device measures the relative humidity in the room. Checking it regularly takes only a second and can alert you before conditions become damaging. Digital hygrometers are cheap and accurate enough for this purpose.
Store your guitar in its case when you are not playing it. A hardshell case provides insulation from rapid environmental changes. The enclosed space is also much easier to humidify than an entire room.
Condition your fretboard two to four times per year, especially before and during the dry season. Regular oiling keeps the wood hydrated and supple, which reduces shrinkage. Think of it like moisturizer for your guitar’s neck.
Avoid placing your guitar near heat sources like radiators, heating vents, fireplaces, or sunny windows. These locations create localized hot, dry zones that accelerate moisture loss from the wood.
When to Seek Professional Help
While fixing fret sprout is a manageable DIY project, some situations call for a professional luthier. If your guitar has a bound fretboard, attempting to file the fret ends yourself can damage the binding. Binding is the decorative strip of plastic or wood that runs along the edge of the fretboard. Filing through this material creates visible and permanent damage.
Seek professional help if the fret sprout is severe and accompanied by other structural problems. Cracked fretboards, lifted frets, or a significantly warped neck are all signs that the guitar needs more than simple fret end filing. These issues require specialized tools and experience to repair correctly.
If you are uncomfortable with any step of the process, a guitar technician can complete the repair quickly and affordably. A professional fret dressing typically costs between $50 and $100, depending on the severity and your location. This investment is well worth it compared to the risk of damaging your guitar.
Guitars with lacquered or finished necks also require extra caution. Filing can easily scratch through the finish, leaving visible marks. A professional will know how to work around the finish and repair any cosmetic issues that arise during the process.
New guitars still under warranty may also benefit from professional service. Some manufacturers cover fret sprout repairs as part of their warranty or setup guarantee, especially if the issue appeared shortly after purchase.
Common Mistakes to Avoid During Fret Sprout Repair
Even a straightforward repair like this has pitfalls. Knowing the common mistakes beforehand will help you avoid them. The most frequent error is using too much pressure with the file. Heavy pressure removes material too fast and can cut into the fretboard wood or damage the neck finish.
Another common mistake is filing at an inconsistent angle. If your bevel angle changes from fret to fret, the neck will feel uneven. Practice maintaining a steady hand and checking your angle frequently.
Skipping the polishing step is a mistake many beginners make. Unpolished fret ends feel rough even after proper filing and beveling. The few extra minutes spent polishing makes a significant difference in how the finished repair feels.
Do not forget to condition the fretboard afterward. The wood is already dry if fret sprout has occurred. Leaving it unconditioned after the repair means the problem will return faster because the wood has no moisture protection.
Avoid using power tools like a Dremel for fret end filing unless you have significant experience. Power tools remove material extremely fast and offer far less control than a hand file. One moment of inattention can ruin a fret or gouge the fretboard.
Finally, do not ignore fret sprout in hopes that it will fix itself. While re humidifying your guitar can cause the wood to swell back slightly, severe fret sprout rarely resolves completely without physical filing. The sooner you address the problem, the easier the fix.
Understanding How Seasonal Changes Affect Your Guitar
Your electric guitar responds to seasonal changes more than you might expect. Wood never truly stops reacting to its environment, even after it has been cut, shaped, and installed in a guitar. Every shift in humidity and temperature causes the wood to expand or contract slightly.
During winter months, indoor heating removes moisture from the air. Humidity levels inside homes can drop to 15% to 25% in extreme cases. This is far below the safe 40% to 50% range for guitars. Fretboards shrink, fret sprout appears, and other issues like fret buzz and neck relief changes become common.
In summer months, humidity often rises above 50%. The fretboard absorbs moisture and swells. This can actually reverse mild fret sprout temporarily. However, the constant cycle of swelling and shrinking is not good for the instrument. It stresses the wood and the glue joints over time.
New guitars are especially vulnerable during their first few seasonal cycles. The wood is still “settling” into its final state. A guitar that develops fret sprout during its first winter may not experience the same problem in subsequent years once the wood has stabilized.
Consistent humidity is more important than perfect humidity. A guitar kept at a steady 45% relative humidity year round will fare far better than one that swings between 25% in winter and 65% in summer. Stability reduces the expansion and contraction cycle that causes fret sprout and other structural issues.
Understanding this relationship between your guitar and its environment empowers you to take preventive action. A small investment in humidity control can save you from repeated repairs and keep your instrument in peak playing condition.
The Role of Fretboard Wood in Fret Sprout
Different fretboard woods respond to humidity changes in different ways. Rosewood, ebony, and pau ferro are the most common unfinished fretboard materials on electric guitars, and all three are susceptible to fret sprout because they are left unsealed and exposed to the air.
Rosewood is a popular fretboard wood on many electric guitars. It is naturally oily, which provides some protection against moisture loss. However, this natural oil is not enough to prevent shrinkage in very dry conditions. Regular conditioning helps maintain rosewood’s moisture content.
Ebony is a dense, hard wood that produces a smooth playing surface. Despite its density, ebony is actually more prone to cracking than rosewood in extremely dry conditions. Its lower natural oil content means it relies more heavily on external conditioning to stay hydrated.
Maple fretboards are typically finished with a lacquer or polyurethane coating. This finish seals the wood and provides significant protection against humidity changes. Maple fretboards experience fret sprout far less frequently than rosewood or ebony boards. However, if the finish develops cracks or wears through, the exposed wood can still shrink.
Pau ferro, often described as a rosewood alternative, has similar properties to rosewood but may be slightly less oily. It benefits from the same conditioning routine as rosewood.
Knowing your fretboard material helps you choose the right care products and understand your guitar’s vulnerability to dry weather. Guitars with unfinished fretboards need more active humidity management than those with sealed maple necks.
Frequently Asked Questions
Can humidifying my guitar reverse fret sprout without filing?
Humidifying your guitar can help the fretboard absorb moisture and swell back to its original width. In mild cases, this may reduce or eliminate fret sprout. However, most cases of moderate to severe fret sprout will not fully reverse through humidification alone. The wood may not return to its exact original dimensions. Filing the fret ends is still the most reliable solution for a smooth playing neck.
How often should I condition my guitar’s fretboard?
For most players, conditioning the fretboard two to four times per year is sufficient. Apply fretboard oil during string changes, especially before and during the dry season. If you live in a very dry climate, conditioning every time you change strings is a good practice. Always use products made for guitar fretboards, and never apply oil to finished maple necks.
Is fret sprout covered under guitar warranties?
This depends on the manufacturer and retailer. Some guitar brands consider fret sprout a normal result of environmental conditions and do not cover it under warranty. Others may include a free setup or adjustment within the first year of purchase. Check your warranty terms or contact the manufacturer directly to find out what is covered.
Can fret sprout damage my guitar permanently?
Fret sprout itself does not cause permanent structural damage to the guitar. However, the dry conditions that cause fret sprout can lead to more serious problems like fretboard cracks, loose frets, and warped necks. Addressing the humidity issue early prevents these more costly repairs.
How long does it take to fix fret sprout at home?
A DIY fret sprout repair typically takes one to two hours for someone doing it for the first time. Experienced players can complete the job in 30 to 45 minutes. The majority of the time is spent on the individual fret rounding and polishing steps. Take your time and focus on quality rather than speed.
Should I fix fret sprout during winter or wait until summer?
You can fix fret sprout at any time of year. However, keep in mind that if you file the frets during winter and humidity rises in summer, the fretboard may swell and the fret ends could become slightly recessed. Many luthiers recommend waiting until the guitar has acclimated to a stable humidity of 40% to 50% before making permanent changes. If the fret sprout is causing discomfort, fix it immediately and re evaluate after the seasons change.

Hi, I’m Tessa! As a lifelong music lover and gear enthusiast, I started this blog to help fellow musicians navigate the overwhelming world of instruments and equipment. I spend my time researching, comparing, and reviewing musical gear so you can spend yours doing what matters most — making music.