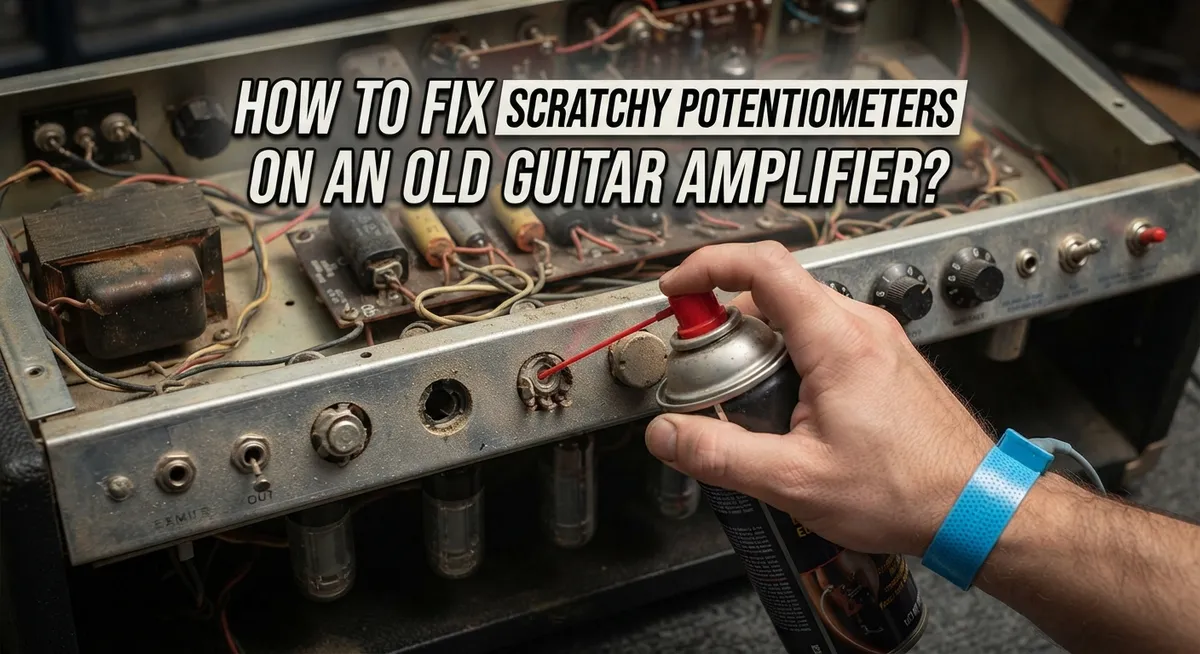
How to Fix Scratchy Potentiometers on an Old Guitar Amplifier?
Does your old guitar amp make a scratchy or crackling noise when you turn the volume knob? You are not alone.
This annoying sound happens to almost every vintage amplifier over time. The good news? It is usually a simple fix.
That scratchy noise comes from dust and oxidation building up inside the potentiometer. This buildup blocks the smooth electrical contact your amp needs.
This guide walks you through the entire process. You will learn how to access the pots safely and clean them properly.
By the end, you will understand exactly why this happens and how to stop it. Your amp can sound clean and quiet again, just like it did decades ago.
Let’s bring that classic tone back to life.
In a Nutshell
- The fix is simple. Dust and oxidation build up inside the potentiometer over time. A good contact cleaner clears this out and restores smooth operation.
- Prep your amp first. Turn off the power and let the amp sit for a bit. Then position it on its back so the pots face the ceiling.
- Remove the knobs. You need clear access to the shaft opening on each pot. This step is not optional if you want the spray to work.
- Spray a small amount into the shaft. Use a contact cleaner made for electronics. Avoid household oils since they can damage the internal components.
- Cycle the knob while wet. Turn it back and forth many times. This spreads the cleaner and physically wipes away grime from the contacts.
- Test the amp. Plug in and play. The scratchy noise should disappear, and this fix can last for many years.
What Causes Scratchy Potentiometers in Guitar Amps
Dust is the primary culprit behind scratchy potentiometers in old guitar amplifiers. As your amp sits unused or gets played regularly, fine particles drift inside the potentiometer housing. These particles settle on the internal contact surfaces where the wiper arm slides across the resistive element.
Oxidation compounds the problem over time. The metal components inside the potentiometer gradually develop a thin oxide layer. This layer acts like an insulator, blocking clean electrical contact. When you turn the knob, the wiper struggles to make consistent connection with the resistive track beneath.
Humidity and temperature swings accelerate both issues. Moisture in the air can seep into the potentiometer casing through tiny openings. Temperature changes cause the metal components to expand and contract slightly. This movement allows more dust to enter and helps oxidation spread faster.
The longer an amp sits unused, the worse scratchy pots become. Vintage amplifiers from the 1960s and 1970s are especially prone to this problem. Their potentiometers used simpler sealing designs compared to modern electronics. Even well maintained amps develop some scratching after 20 or 30 years.
Interestingly, the scratchy noise you hear is not actually the potentiometer failing. The component still functions electrically. The noise comes from the wiper making inconsistent contact as it moves across the dusty, oxidized surface. The resistance values jump around rapidly, causing audible crackling through your speakers.
Understanding this root cause helps you avoid future problems. Regular amp use actually helps prevent scratchy pots. Playing your amp keeps air circulating inside and prevents dust from settling. Storing your amplifier in a dry location also slows oxidation development significantly.
Tools and Supplies You’ll Need Before Starting
Before you start cleaning your potentiometers, gather the right supplies. Having everything ready makes the job faster and prevents mistakes.
You will need a contact cleaner spray made for electronics. This is the most important item. Look for products labeled as contact cleaner or pot cleaner. Avoid general purpose sprays like WD-40, as they leave residue and make things worse.
Get a small can of lubricant designed for potentiometers. Some contact cleaners include lubricant in the formula. Others come as separate products. Either option works well. The lubricant helps the potentiometer move smoothly after cleaning.
Grab a clean cloth or paper towels. You will use these to wipe away excess spray and any debris that comes out. Have several towels ready because the process can get messy.
Find a screwdriver or knob puller if your amp has knobs stuck tight. Most guitar amp knobs pull straight off by hand, but older models sometimes need help. A small flat head screwdriver works for stubborn knobs.
Set up a workspace with good lighting. You need to see the potentiometer shafts clearly. A flashlight or lamp helps a lot.
Position your amp on its back before you start. This angle lets the cleaner flow down into the potentiometer and drain out properly. Gravity works in your favor here.
Keep the contact cleaner away from your skin and eyes. Read the safety instructions on the can. Work in a well ventilated area. Some cleaners produce strong fumes.
Have your guitar cable and a speaker ready for testing. You will want to plug in and verify the fix works before you finish.
Preparing Your Amplifier for Safe Cleaning
Before you spray anything into your amp, you need to prepare it safely. This step prevents damage to your equipment and keeps you safe from electrical hazards.
Start by unplugging your amplifier from the wall outlet. This is non negotiable. Even if your amp is turned off, electricity can still flow through internal capacitors. Wait at least five minutes after unplugging before touching anything inside. This allows capacitors to discharge completely.
Next, position your amplifier on its back with the potentiometer shafts facing upward toward the ceiling. This positioning is critical because it prevents any cleaning liquid from dripping down into other components. Gravity works with you, not against you.
Let your amp sit in this position for another 10 to 15 minutes. This allows any residual heat to escape and ensures the interior is completely cool before you begin work.
Check your workspace lighting. You need to see clearly into the potentiometer shaft openings. A bright work light or headlamp helps you aim the spray accurately without overshooting and hitting nearby circuit boards.
Lay down paper towels or newspaper underneath and around your amp. Contact cleaners can drip, and you want to protect your work surface.
Remove the knobs from each potentiometer shaft. Some knobs pull straight off. Others have set screws underneath that you must loosen first. Take a photo of your amp before removing knobs so you remember which knob goes where.
Finally, identify which potentiometers need cleaning. Turn the amp back on briefly to listen for scratchy sounds, then turn it off again. Mark those pots with a small piece of tape. This focuses your cleaning efforts on problem areas only.
Step-by-Step Guide to Cleaning Scratchy Pots
Start by spraying the contact cleaner directly into the potentiometer shaft opening. Aim the nozzle straight into the center where the knob was attached. You want the liquid to penetrate deep inside the pot body to reach the dirty contacts.
Spray in short bursts rather than one long stream. Two to three quick pulses work better than flooding the shaft. The cleaner needs to dissolve the dust and oxidation buildup that creates the scratchy sound.
Now comes the important part: cycle the potentiometer back and forth while the cleaner is still wet. Turn the shaft left and right repeatedly for about 30 seconds. This motion helps the liquid wash away debris from the internal contact surfaces. Keep the pot wet during this entire cycling process.
Listen as you work. The scratchy noise should gradually decrease with each cycle. If the sound persists after 30 seconds, spray again and repeat the cycling motion. Some pots need multiple applications depending on how much buildup exists inside.
Work through each potentiometer on your amp one at a time. Volume controls, tone controls, and gain knobs all need the same treatment. Don’t rush this step. Thorough cycling ensures the cleaner reaches every internal surface.
After cycling all the pots, let your amp sit for five minutes. This allows excess liquid to drip out and evaporate. Wipe away any cleaner residue visible around the shaft openings with a clean cloth.
The cleaner must dry completely before you plug the amp back in. Wait at least 15 minutes to be safe. This prevents any electrical issues when power returns to the amplifier. Once dry, reattach your knobs and test the amp to confirm the scratchy noise is gone.
Cycling the Potentiometer for Best Results
Cycling your potentiometer is the key action that makes cleaning actually work. This step removes the buildup inside the pot and restores clean electrical contact.
Here’s how to do it correctly. With the contact cleaner still wet inside the shaft, grab the knob area and turn it back and forth repeatedly. Move it from the fully clockwise position to fully counterclockwise. Don’t just turn it once or twice. You need 20 to 30 full cycles for best results.
The motion matters because it forces the cleaner deep into the potentiometer mechanism. As you cycle, the cleaner reaches the internal contacts and dissolves oxidation and dust particles. You’ll often hear the scratching noise decrease as you work. This audio feedback tells you the cleaning is happening.
Move slowly and deliberately through each cycle. Rush the process and you won’t give the cleaner time to work effectively. The combination of wet cleaner plus mechanical motion is what actually restores function.
Cycle each potentiometer on your amp one at a time. Don’t try to clean all of them simultaneously. Focus on the volume pot first since that’s usually the scratchiest. Then move to tone controls and any other pots.
Pay attention to resistance changes as you cycle. A pot that felt stiff or scratchy at the start should feel smoother as you continue. Some pots need extra cycles if the scratching persists.
After you finish cycling all the potentiometers, let your amp sit for five minutes. This allows the cleaner to evaporate completely. The lubricant component stays behind on the internal contacts, keeping them clean and quiet for years to come.
Common Mistakes That Prevent a Lasting Fix
Many people make mistakes that undo their cleaning work or prevent the fix from lasting. Understanding these errors helps you succeed on your first try.
The biggest mistake is using the wrong cleaning product. Some people grab general purpose lubricants thinking any spray will work. These products leave sticky residue inside your potentiometer. The residue attracts more dust and grime. Your scratchy noise returns within weeks instead of lasting years.
Another common error is spraying the cleaner without cycling the potentiometer afterward. You might spray contact cleaner into the shaft, wait a few minutes, and assume you’re done. This doesn’t work. The cleaner needs to physically move through all the internal parts. Without cycling, the cleaner sits on top of the buildup instead of breaking it apart.
Not removing the knobs first causes real problems. Some people try to spray around the knob or work with it still attached. This blocks your access to the shaft opening. You can’t spray accurately. The cleaner misses the internal contact points where the scratching happens.
Impatience ruins many repairs too. People plug their amp back in before the cleaner fully dries. Moisture inside the potentiometer creates electrical issues. Your amp might pop, crackle, or stop working entirely.
Finally, cleaning only one potentiometer while ignoring others wastes your effort. If your volume knob is scratchy, your tone controls probably are too. Dust affects all the pots on your amp. Clean them all at once while you have everything set up.
These mistakes are easy to avoid once you know about them. Taking your time and following the proper process gives you a repair that lasts decades.
Troubleshooting: When Scratchiness Persists After Cleaning
Sometimes scratchiness returns even after you’ve cleaned your potentiometers. This happens because dust and oxidation can rebuild inside the pot over time. The good news is that you can troubleshoot this problem without removing the entire potentiometer from your amp.
Start by testing each potentiometer individually. Turn your amp on and slowly adjust one knob while listening carefully. Note which pots still make noise. Some potentiometers may be clean while others need more attention. This helps you focus your efforts on the real problem areas.
If scratchiness persists, try cleaning again using the same method. Position your amp on its back with the potentiometer openings facing upward. Remove the knobs and spray the cleaner directly into each shaft opening. The second cleaning often works better because you now understand exactly where the problem exists.
Cycle the potentiometer more thoroughly this time. Move the knob back and forth at least 20 to 30 times while the cleaner is still wet. Some scratchy pots need extra cycling to push the cleaner deep into the internal contacts. Take your time with this step.
If scratchiness still returns after a second cleaning, the potentiometer itself may be damaged internally. Worn contacts or broken internal components cannot be fixed with cleaning alone. In this case, you’ll need to consider replacing that specific potentiometer.
Between cleanings, avoid using your amp heavily. Let it sit unplugged for several hours after each cleaning session. This allows all moisture to evaporate completely before electrical current flows through the circuits again.
How Long the Fix Lasts and Maintenance Tips
A good cleaning can keep your potentiometers quiet for many years. Most users report that a single cleaning lasts around 30 years before scratchiness returns. This is because the cleaner removes oxidation and dust that built up over decades.
Maintenance between cleanings matters more than you think. Avoid using your amp constantly at maximum volume. Heavy use forces the potentiometer contacts to wear faster. Instead, use moderate volume levels during regular playing sessions. This reduces stress on the internal components.
Store your amp in a dry location. Humidity and moisture are enemies of potentiometers. Damp environments speed up oxidation and corrosion inside the pot body. A climate controlled room works best. If you live in a humid area, consider using a dehumidifier near your amp.
Keep dust away from your amplifier. Dust particles settle inside the potentiometer shaft openings and cause scratching to return. Use a soft cloth to wipe down your amp regularly. Avoid placing it in dusty rooms or near open windows.
Check your potentiometers every few months. Slowly turn each knob while listening for any scratching sounds. Catching scratchiness early means you can clean before it becomes severe. Early intervention prevents damage to the pot contacts.
Temperature swings also affect potentiometer life. Avoid moving your amp between hot and cold environments. Extreme temperature changes cause metal components to expand and contract. This creates tiny gaps where oxidation can form again.
If scratchiness returns after cleaning, the potentiometer may have internal damage. In this case, replacement becomes necessary. However, proper maintenance and storage can delay this outcome for decades.
Final Thoughts
Fixing scratchy potentiometers is a simple task anyone can handle at home. You do not need special training or expensive tools. A basic cleaning spray and some patience solve most noise problems.
This repair saves you money too. Many guitarists pay repair shops for something they can fix themselves in under an hour. Your amplifier deserves this small investment of time.
Remember that old amps often sound better than newer models. Scratchy pots should not push you toward replacing a good amplifier. Clean the pots instead and keep playing the gear you love.
Patience makes this fix work well. Rushing through the cleaning process leads to poor results. Take your time cycling each knob properly during the process.
Think of this maintenance task like changing guitar strings. It is a normal part of owning tube gear or vintage equipment. Regular care keeps your amplifier sounding its best for years.
Your amplifier holds value both musically and financially. A properly maintained vintage amp can last decades longer than one left neglected. This small fix protects that value.
Do not feel intimidated by opening your amp casing. The process involves basic steps that most people complete safely. Just remember to unplug the amp first and let it discharge before touching anything inside.
Trust the process outlined here. Thousands of guitarists have used this same method to restore their old amplifiers. The results speak for themselves.
Your amp likely just needs some attention paid to those noisy pots. Grab your cleaning spray, remove those knobs, and get started today. Quiet, smooth potentiometers wait on the other side of this quick project.
Frequently Asked Questions
Can I clean potentiometers without removing the amplifier casing?
Yes, you can. Position your amp on its back so the pot shafts face upward. Remove only the knobs from the shafts. Spray cleaning solution directly into each shaft opening. You do not need to disassemble the entire amp casing.
This method works because the solution flows down inside the potentiometer body. The contact surfaces sit directly below the shaft. Cycling the knob pushes the cleaner around the internal components.
Why does my scratchy pot return after cleaning?
Dust and oxidation can build up again over time. Heavy amp usage speeds up this process. Temperature changes and humidity also affect potentiometer performance.
Clean more thoroughly next time. Move the knob back and forth at least 20 to 30 times while wet. Some pots need extra cycles to fully restore. If scratchiness returns immediately, internal damage may exist instead of simple buildup.
Should I use WD-40 on my potentiometers?
No. WD-40 is not designed for potentiometer cleaning. It leaves residue that attracts dust. The buildup gets worse over time.
Use a cleaner specifically formulated for electrical contacts. These products dissolve oxidation without leaving sticky film behind.
How often should I clean my pots?
Most users report their amps stay quiet for many years after one good cleaning. This depends on how often you use your amp and where you store it.
Check your potentiometers every few months. Listen for scratching sounds when adjusting knobs. Clean them again if noise returns. Avoid storing your amp in dusty or damp locations.

Hi, I’m Tessa! As a lifelong music lover and gear enthusiast, I started this blog to help fellow musicians navigate the overwhelming world of instruments and equipment. I spend my time researching, comparing, and reviewing musical gear so you can spend yours doing what matters most — making music.