What Are the Fixes for a Loose Output Jack on an Electric Guitar?
Does your guitar cable wiggle inside the jack? That small wobble can cause big problems. A loose output jack often leads to crackling sounds, signal loss, or complete silence during your performance.
This issue is incredibly common among electric guitar players. The good news? You can fix it yourself in just a few minutes.
We will show you exactly how to tighten a loose output jack safely. You will learn to remove the jack plate and access the internal components without any special training.
Grab your screwdriver and let’s get your guitar sounding perfect again.
In a Nutshell
Remove the jack plate by taking out the two screws. This gives you room to work on the jack.
Hold the jack steady with one hand. This stops it from spinning while you tighten the bolt.
Tighten the retaining nut firmly with a wrench. A snug fit keeps the jack from wiggling inside the guitar.
Avoid over-tightening the bolt. Too much force can crack the jack or damage wires inside.
Check your cable too. Sometimes a loose cable connector causes the same problem as a loose jack.
Look at the contacts inside the jack. Worn contacts can cause crackling sounds even after tightening.
Understanding the Output Jack and Its Role in Your Guitar’s Signal Path
Your electric guitar’s output jack is a small but critical component. It sits on the body of your guitar and connects your instrument to amplifiers and audio equipment. This jack carries your guitar’s electrical signal from the pickups through the cable to your amp.
The output jack works as a gateway for your sound. When you plug in a cable, the connector makes contact with metal terminals inside the jack. These terminals then transmit your guitar’s signal down the cable. A loose jack breaks this connection, causing crackling, buzzing, or complete signal loss.
Your signal path depends on a secure jack connection. When the jack is tight, the cable connector sits firmly against the internal contacts. This creates a clean electrical pathway. A loose jack allows the connector to move around, which interrupts the signal constantly.
Understanding this role helps you recognize problems quickly. If your sound cuts out when you move the cable, the jack might be loose. If you hear crackling or buzzing that changes when you wiggle the cable, the jack could be the culprit.
The jack sits inside a metal plate mounted to your guitar’s body. Two screws hold this plate in place. Behind the plate, a bolt secures the jack housing itself. When either component loosens, your signal suffers.
Many guitarists confuse a loose jack with a loose cable connector. The cable connector is the part that plugs into the jack. A worn cable connector can wiggle inside a perfectly tight jack. Both problems create similar symptoms, so you need to check both carefully.
A properly functioning jack should feel solid when you plug in a cable. There should be no movement or wobbling. The connection should feel snug and secure. This tight fit ensures your signal travels cleanly from your guitar to your amp without interruption.
Signs Your Output Jack Is Loose or Failing
A loose output jack shows specific warning signs that you can identify yourself. The most obvious indicator is crackling or popping sounds when you move your guitar cable around. This noise happens because the loose connection creates intermittent contact with your signal.
Another clear sign is signal dropout or cutting out during playing. Your sound might disappear completely for a moment, then return when you adjust the cable position. This intermittent connection is frustrating and tells you the jack needs attention.
You might notice your cable feels wobbly or loose inside the jack opening. When you plug in your cable, it should fit snugly without any side to side movement. A cable that wiggles around indicates the jack housing has separated from your guitar body.
Some guitarists experience dead zones where certain cable positions kill the signal entirely. You find yourself moving the cable constantly to maintain sound. This behavior signals a failing jack rather than a cable problem.
Listen for buzzing or humming that changes when you touch the cable. A loose jack allows ground connections to become unstable. This creates unwanted noise in your signal path.
Check if your jack feels physically loose by gently pressing on the cable tip while it’s inserted. A secure jack should feel completely solid with no movement. Any flex or give indicates the jack plate has come loose from your guitar body.
The jack might also produce noise when you tap on the guitar body near the output. This vibration sensitivity shows the jack isn’t properly secured. A properly mounted jack should absorb these vibrations without transmitting them to your signal.
Pay attention to these warning signs early. Addressing a loose jack quickly prevents further damage to internal components and keeps your guitar performing at its best.
Tools You’ll Need Before Starting the Repair
Before you start fixing your loose output jack, gather the right tools. You’ll make the repair faster and safer when you have everything ready.
A screwdriver set is your first essential tool. You need both Phillips and flathead screwdrivers to remove the screws holding your jack plate. Different guitar models use different screw types, so having both options prevents frustration.
Next, get a wrench or socket set. The retaining nut inside your jack requires turning with a wrench. Most guitars use either an 8mm or 10mm nut, so a adjustable wrench works perfectly if you don’t have a full set.
A flashlight or headlamp helps you see inside the jack cavity clearly. Good lighting reveals whether contacts look worn or corroded. You can spot internal damage that might need professional attention.
Keep a clean cloth nearby for wiping away dust and debris. Guitar cavities collect dirt over time, and you want a clean workspace. This also lets you inspect the contacts without confusion.
Consider having a multimeter on hand if you own one. This tool checks electrical continuity and confirms whether your jack has real problems or if it’s just a loose cable. Many guitarists skip this step, but it saves time.
A cable tester or spare output cable helps you distinguish between jack problems and cable issues. Plug in a different cable to see if the signal problem disappears. This simple test answers whether you’re fixing the right component.
Finally, grab a small container to hold screws while you work. Losing tiny screws happens easily, and this prevents frustration later.
Having these tools ready means you’ll complete the repair without stopping to search for supplies. The entire process becomes smoother and more successful.
Step-by-Step Guide to Tightening a Loose Output Jack
Start by unplugging your cable from the jack. This prevents electrical damage and keeps you safe while working. Set your guitar on a flat surface with the output jack facing you.
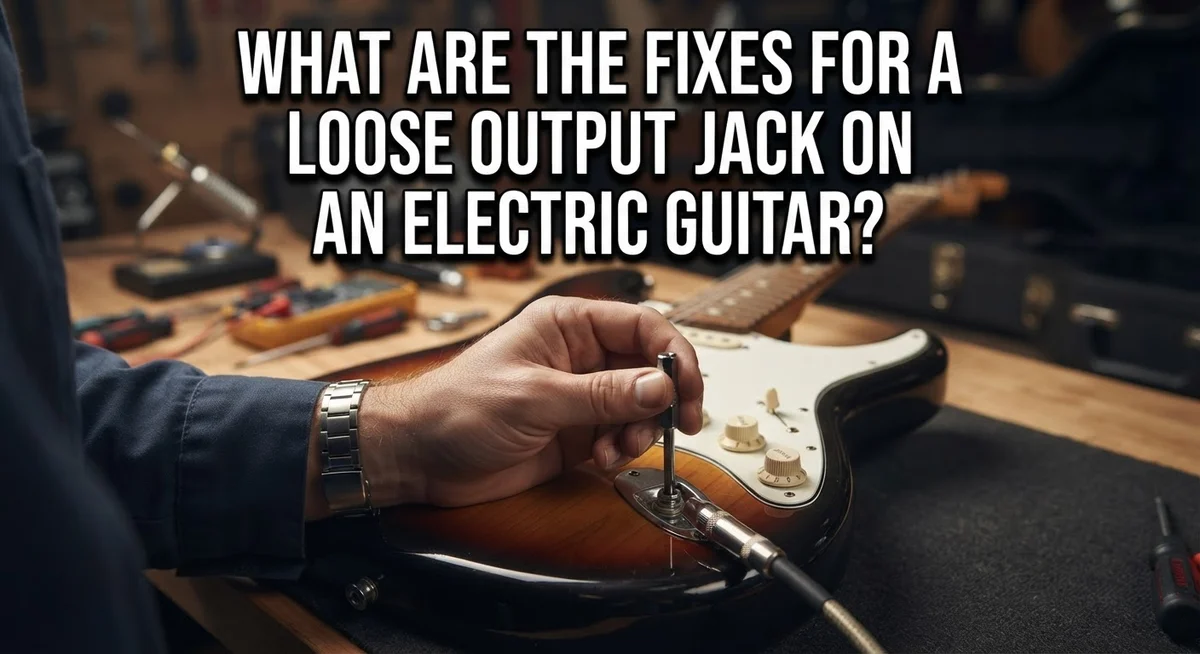
Locate the two screws on the metal jack plate. These screws hold the plate to your guitar’s body. Use your screwdriver to remove both screws carefully. Place them in your small container so you don’t lose them.
Now you’ll see the jack assembly. Look for the main bolt that holds the jack housing in place. This bolt sits behind the metal plate on the inside of your guitar. You need to hold the jack steady from the outside while tightening this bolt from the inside.
Have a friend help you if possible. One person should hold the jack connector steady from outside while the other person tightens the bolt using a wrench or socket. This prevents the jack from spinning and causing misalignment inside the guitar body.
Turn the bolt clockwise slowly. Tighten it firmly but stop before it feels too tight. Over tightening damages the internal components and the plastic housing. The jack should feel solid without excessive force.
Test the connection by plugging your cable in. The cable should fit snugly without wiggling around. If it still feels loose, tighten the bolt a bit more. Check the connection again.
Once the jack feels secure, reinstall the two screws on the metal plate. Tighten them evenly so the plate sits flat against your guitar.
Important note: If tightening doesn’t solve the problem, your jack contacts might be worn. Inspect the jack opening with your flashlight. Look for bent or corroded metal contacts inside. Worn contacts require jack replacement rather than simple tightening.
Distinguishing Jack Problems from Cable and Connector Issues
A loose output jack and a faulty cable connector can feel like the same problem. Both create signal loss and intermittent audio. Learning to tell them apart saves you time and money.
Start by testing with a different cable. Borrow one from a friend or use a spare cable you know works well. Plug it into your guitar’s jack. If the new cable works perfectly, your jack is probably fine. The original cable connector is likely worn or damaged instead.
Next, inspect your cable connector closely. Look at the metal tip that goes into the jack. Does it look bent, dented, or flattened? A damaged connector won’t grip the jack properly, even if the jack itself is tight and healthy. Worn connectors create the same wobbly feeling as a loose jack.
Check the cable fit by hand. Insert your working cable into the jack. Does it slide in smoothly and stay put? Now try your original cable. Does it feel looser or slip around inside? This comparison tells you whether the problem is the jack or the cable.
Listen for the difference too. A loose jack creates crackling that changes when you move the cable around. A bad connector produces similar sounds, but the problem follows the cable, not the jack.
Press gently on your cable where it enters the jack. If the signal cuts out when you apply pressure, the cable connector is likely the culprit. A truly loose jack won’t respond to light cable pressure the same way.
Test your jack’s physical tightness by pressing on the jack housing itself. Push from different angles. A loose jack will move slightly. A tight jack stays completely still.
Once you’ve confirmed the jack is actually loose, you can proceed with tightening it. But if the jack feels solid and the problem persists, you’ve identified that your cable or connector needs attention instead.
Common Mistakes to Avoid During the Fix
Over-tightening the bolt is the biggest mistake people make. You want the jack firm and secure, but excessive force damages the internal components inside. Stop tightening once you feel solid resistance. The jack should not wiggle, but you shouldn’t need to force the wrench.
Failing to hold the jack steady while tightening causes serious problems. If you turn the bolt without supporting the jack housing, the entire assembly rotates inside the guitar body. This misalignment makes the jack sit crooked. Your cable won’t fit properly even after tightening. Always have a friend hold the jack steady from inside the guitar, or use your hand to stabilize it through the cavity.
Many people ignore loose cable connectors as a separate issue. A loose output jack and a loose cable connector feel identical to the player. You might tighten the jack perfectly, yet the problem persists because your cable connector is actually the culprit. Test with a different cable first before assuming the jack needs fixing.
Skipping the inspection step wastes your effort. Before you start tightening, look inside the jack cavity with a flashlight. Check for bent metal contacts or visible damage. Worn contacts won’t work properly no matter how tight the jack sits. If you see corrosion or bent pins, tightening alone won’t solve your signal problems.
Forgetting to unplug your cable creates safety risks. Leave the cable connected while working, and you might accidentally create a short circuit. Always disconnect your guitar cable before starting any jack repair.
Finally, don’t overtighten then immediately test. Give the connection a moment to settle. Plug your cable in gently and wiggle it slightly to confirm the jack holds firm. This simple check prevents you from repeating the work later.
When to Inspect or Replace Worn Jack Contacts
Your guitar’s output jack contacts wear down over time. This happens because cables get plugged and unplugged repeatedly. Metal contacts rub against each other thousands of times. Eventually, they lose their ability to make solid electrical connections.
Signs of worn contacts include crackling sounds and intermittent signal loss. You might notice the audio cuts out when you move your cable slightly. The problem gets worse as months pass. Sometimes the sound returns if you jiggle the cable, which is a red flag.
Worn contacts differ from a loose jack housing. A loose jack wiggles physically inside the guitar body. Worn contacts stay tight but fail to conduct electricity properly. You need to identify which problem you have before attempting a fix.
Test your contacts by listening carefully to your signal. Plug in your cable and play a note. Move the cable gently in different directions. If sound cuts out during these movements, your contacts are likely worn. If the jack itself moves around, you have a different problem.
Inspect the actual contact points if you can see them. Look inside the jack opening with a flashlight. Worn contacts appear dull, pitted, or discolored. Clean contacts shine and look smooth. Dirt and oxidation also cause poor connections, so cleaning sometimes helps before replacing anything.
When contacts wear beyond cleaning, replacement becomes necessary. You can’t tighten your way out of this problem. Attempting to force a tight connection won’t restore worn metal surfaces. The contacts simply need replacement by someone experienced with guitar electronics.
Regular cable care prevents premature contact wear. Store cables properly and avoid sharp bends. Don’t leave your cable plugged in when you’re not playing. These habits extend the life of both your jack and your cables significantly.
Final Thoughts
A loose output jack is a simple problem with a simple fix. You do not need special tools or advanced skills to solve it. A screwdriver and a little patience get the job done.
Remember the core steps. Remove the two screws from the jack plate. Hold the jack steady while you tighten the bolt. This keeps everything aligned and secure.
Take your time during the process. Rushing leads to over-tightening or misalignment. Both mistakes create new problems instead of fixing the old one.
Always test your cable connection first. Sometimes a loose cable mimics a jack problem. Checking this saves you from unnecessary repairs.
Worn contacts need attention too. Tightening will not fix crackling sounds or signal dropouts caused by worn parts. Inspect your jack regularly to catch these issues early.
Your guitar deserves reliable connections. A secure output jack means clean sound and consistent performance. This matters whether you play at home or on stage.
Think of this fix as basic guitar maintenance. Just like changing strings or cleaning your fretboard, checking your jack keeps your instrument working well. Small efforts prevent bigger headaches later.
Do not ignore a loose jack. Signal loss and shorts can damage other components over time. Address the problem as soon as you notice it.
With the right approach, this repair takes just a few minutes. You save money by fixing it yourself instead of visiting a shop. You also gain confidence in handling your own gear.
Trust the process outlined here. Follow each step carefully. Your guitar will reward you with clear, steady sound for years to come.
A well maintained jack means fewer interruptions during practice or performance. That peace of mind is worth the small effort this fix requires.
Frequently Asked Questions
Why is my output jack loose in the first place?
Output jacks loosen over time due to normal use. Every time you plug in or unplug your cable, the jack experiences slight movement. Vibrations from playing also contribute to loosening. The bolt holding the jack to your guitar body gradually works itself free without proper maintenance.
How do I know if my jack is actually loose or if it’s my cable?
Hold your guitar steady and gently press on the jack housing itself. A loose jack will move or wiggle noticeably. Now test with a different cable to see if the problem persists. If the signal cuts out only with one cable, your cable connector is the issue, not the jack. A true loose jack causes problems with every cable you use.
What tools do I need to tighten my output jack?
You need very few tools. A screwdriver fits the two screws on your output jack plate. A wrench or socket fits the bolt behind the jack. Some guitars use a nut instead of a bolt. Check your specific guitar model to confirm which fastener you have. Most people already own these basic tools.
What’s the correct tightening technique?
Remove the two screws from the jack plate first. Hold the jack housing steady with one hand. Use your other hand to tighten the bolt firmly. Apply steady pressure without forcing it. Stop when you feel solid resistance. Test the jack by pressing on it gently. It should not move at all.
Can I damage my guitar by tightening the jack too much?
Yes. Over-tightening strips the bolt threads or cracks the jack housing. This creates a worse problem than a loose jack. Tighten until snug, then stop. Your jack should be secure but not crushed. When in doubt, tighten less rather than more.

Hi, I’m Tessa! As a lifelong music lover and gear enthusiast, I started this blog to help fellow musicians navigate the overwhelming world of instruments and equipment. I spend my time researching, comparing, and reviewing musical gear so you can spend yours doing what matters most — making music.