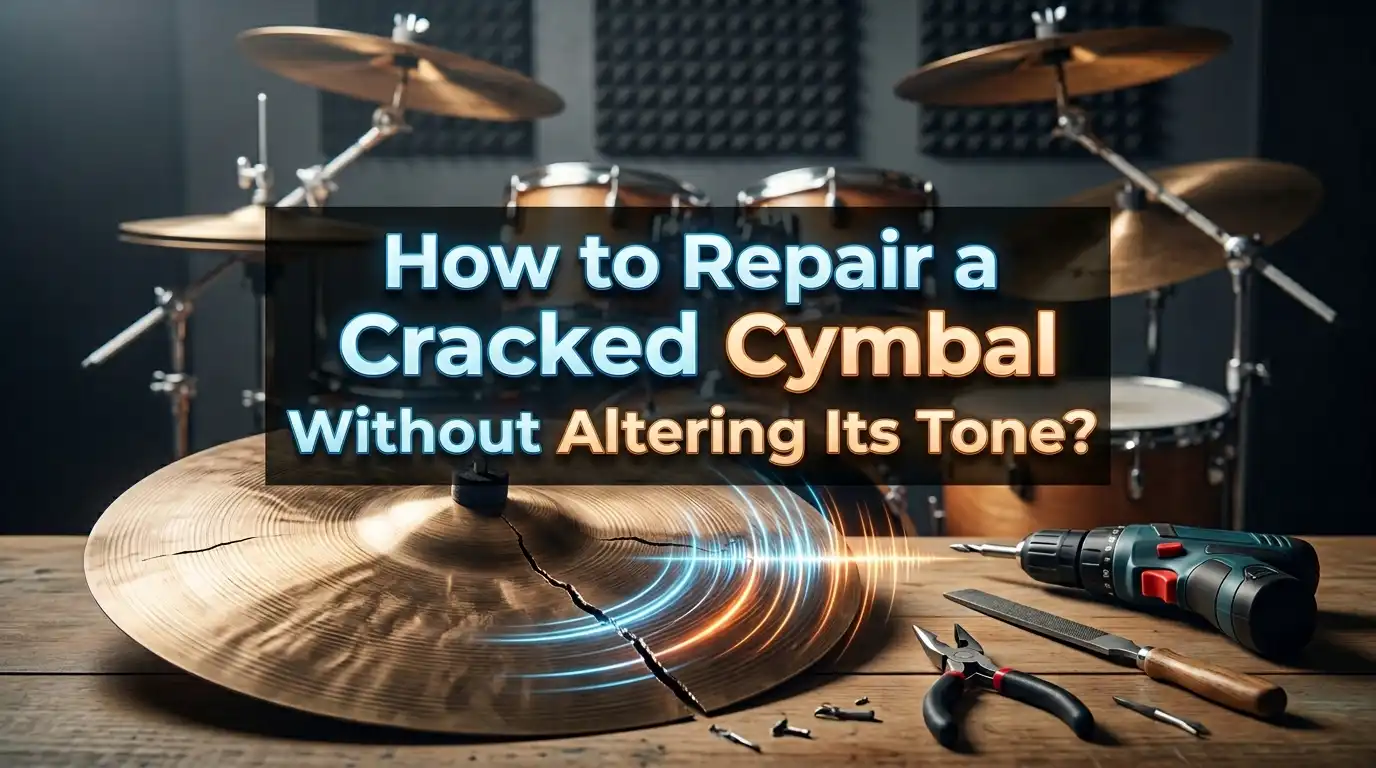
How to Repair a Cracked Cymbal Without Altering Its Tone?
You just noticed a crack on your favorite cymbal, and your stomach dropped. That cymbal has been part of your sound for years.
It has the perfect wash, the right sustain, and a crash that cuts through a mix like nothing else. Replacing it feels wrong because you know a new cymbal will not sound the same.
The good news is that a cracked cymbal does not have to become a paperweight. Several repair methods can stop the crack from spreading and keep your cymbal sounding close to its original voice.
This guide walks you through every proven technique, explains the pros and cons of each, and helps you pick the best approach for your situation.
In a Nutshell
- Drilling a stop hole at the end of a crack is the fastest and least invasive fix. It prevents the crack from spreading further and has minimal impact on tone when done correctly with a sharp, properly sized drill bit.
- Cutting out the crack using a half moon or arc shape is the most effective method for edge cracks. Removing the damaged section and smoothing the cut line stops new cracks from forming at sharp corners.
- Epoxy and adhesive patches offer a temporary solution but tend to dampen the cymbal’s vibration and alter its tone more than cutting or drilling methods do.
- Welding and brazing can close a crack entirely, but the heat changes the metal’s temper and often makes the cymbal sound dead or tinny. Newer micro pulse arc welding shows promise but requires professional equipment.
- The sooner you address a crack, the better. Small cracks are far easier to repair with minimal tone change than large ones that have spread across the bow or bell.
- Prevention matters as much as repair. Proper cymbal angle, loose mounting, correct stick technique, and quality felts all reduce the chance of cracks forming in the first place.
Why Do Cymbals Crack in the First Place
Understanding why your cymbal cracked helps you choose the right repair and avoid the same problem again. The most common cause of cymbal cracks is poor playing technique. Striking straight down on the edge of a cymbal, rather than using a glancing blow across the bow, concentrates force at a single point. Over time, this repeated stress causes metal fatigue and a crack forms.
Improper mounting is another major factor. If the wing nut on your cymbal stand is too tight, the cymbal cannot swing freely on impact. The energy from each hit has nowhere to go, so it travels through the bronze and creates stress fractures. Missing or worn out cymbal felts, cracked plastic sleeves, and metal on metal contact between the cymbal hole and the stand tilter all contribute to cracking.
Stand height and angle also play a role. Cymbals positioned too high force you to reach up and strike at an awkward angle. This usually leads to hitting the edge straight on instead of sweeping across the surface. Thinner cymbals crack more easily at the edge, while heavier cymbals tend to develop cracks in the body or near the bell because they store more internal energy from each strike.
Manufacturing inconsistencies can also be a factor. Cast cymbals sometimes contain small imperfections in the bronze alloy that create weak points. Sheet bronze cymbals are generally more uniform but can still crack under heavy use. Knowing the root cause lets you fix the problem at the source and protect your repaired cymbal from cracking again.
Assess the Damage Before You Start
Before you pick up any tools, take a close look at your cymbal and evaluate the crack. The type, location, and length of the crack will determine which repair method works best. Hold the cymbal up to a light source and look for the crack’s full extent. Hairline fractures can extend further than they appear to the naked eye.
Edge cracks are the most common type. They start at the outer rim and travel inward. These are usually the easiest to repair because you can cut away the damaged section without removing a large amount of material. Bow cracks run through the main playing surface and are trickier to address because cutting creates a hole in the middle of the cymbal.
Bell cracks form around the raised center dome and are often the hardest to fix. The bell is a critical part of the cymbal’s tone, and any alteration here will have a noticeable impact on sound. Keyhole damage around the center mounting hole is caused by metal on metal contact with the stand and weakens the entire structure.
Use a fine tip marker to trace the crack’s path from start to finish. Mark about 2 to 3 millimeters beyond the visible end of the crack because the fracture often extends past what you can see. This tracing will guide your drilling or cutting. Also check for multiple cracks. A cymbal with several cracks radiating from different points may not be worth repairing because the structural integrity is too far gone.
Method 1: Drilling a Stop Hole
Drilling a stop hole is the simplest and most widely recommended repair for small cracks. The idea is straightforward: you drill a small round hole at the very tip of the crack. The round hole distributes stress evenly around its circumference instead of letting it concentrate at the sharp point of the crack. This stops the crack from growing further.
You will need a sharp metal drill bit, a center punch, a hammer, and a power drill or drill press. A 1/8 inch or 3/16 inch high speed steel (HSS) bit works well for most cracks. The hole should be slightly wider than the crack itself. Place the cymbal upside down on a flat surface with a piece of scrap wood underneath for support.
Use the center punch to create a small dimple at the point 2 to 3 millimeters beyond the visible end of the crack. This dimple prevents the drill bit from wandering across the surface. Drill slowly and with steady pressure. Let the bit do the work. Applying too much force or speed generates heat that can change the temper of the bronze around the hole.
Once the hole is drilled, use a small round file or sandpaper wrapped around a dowel to smooth any burrs inside the hole. Sharp edges inside the hole can become new starting points for cracks.
Pros: Minimal material removed, very small impact on tone, quick to complete, requires basic tools, works well on small cracks.
Cons: Only prevents spreading and does not close or remove the existing crack, the crack can still buzz when the cymbal vibrates, does not work well on long cracks, the cymbal may still develop a new crack near the hole over time.
Method 2: Cutting Out the Crack With a Half Moon Shape
This method is the go to solution for edge cracks. You remove the cracked section by cutting a smooth, curved arc (often called a half moon or scoop) from the edge of the cymbal. The curved cut eliminates the crack entirely and creates a smooth edge that resists new crack formation.
You will need a rotary tool with a metal cutting disc, a marker, safety glasses, and a metal file or sanding drum. Start by tracing a smooth arc around the crack with your marker. The arc should extend about half an inch beyond each end of the crack. Avoid creating any sharp inside corners because those act as stress concentrators and will likely crack again.
Secure the cymbal on a stable surface. Cut slowly along the marked line using the rotary cutting disc. Do not rush this step. Let the cutting disc work at a steady pace. Pressing too hard generates excessive heat and can warp the cymbal. After cutting, use a metal file and then fine grit sandpaper or an emery cloth sanding drum to round and smooth the entire cut edge.
The amount of material you remove directly affects the tone change. A small, tight arc on a 16 inch or larger cymbal will produce almost no audible difference. A larger removal will lower the pitch slightly and may add a trashy or washy character. Many drummers actually enjoy the new sound.
Pros: Completely removes the crack, very effective at preventing new cracks, the cymbal remains fully playable, minimal tone change with small cuts, smooth edge is safe to handle.
Cons: Permanently alters the shape of the cymbal, larger cuts can produce an unwanted “broing” sound from unbalanced vibration, not ideal for cracks in the bow or bell, requires a rotary tool.
Method 3: Using Epoxy to Seal the Crack
Epoxy repair is a less common method that some drummers try before committing to cutting. The goal is to fill the crack with a strong adhesive to bond the two sides together and restore some structural integrity. Metal specific two part epoxy is the standard choice for this approach.
Clean the crack thoroughly with acetone or isopropyl alcohol to remove any oil, dirt, or oxidation. The bond will only hold if the surfaces are completely clean. Mix the two part epoxy according to its instructions and work it into the crack using a toothpick, small spatula, or syringe. Try to get the epoxy as deep into the crack as possible.
Apply the epoxy to both the top and bottom sides of the cymbal for the strongest bond. Clamp or weigh down the area so the crack stays closed while the epoxy cures. Most epoxies need 12 to 24 hours for a full cure. After curing, sand any excess epoxy smooth so it does not interfere with stick contact or vibration.
The reality is that epoxy rarely provides a permanent fix for a playing cymbal. The repeated impact and vibration eventually break the bond. Epoxy also adds mass to the crack area, which dampens vibration at that point and dulls the cymbal’s tone.
Pros: Does not remove any material from the cymbal, relatively easy to apply, good as a temporary measure, inexpensive, can be combined with drilling for better results.
Cons: Bond often fails under regular playing, adds mass that dampens vibration and alters tone, does not address the underlying stress that caused the crack, can look messy, many experienced drummers consider this method unreliable for long term use.
Method 4: Welding and Brazing the Crack
Welding or brazing a cymbal crack sounds like the ultimate fix because it fuses the metal back together. In practice, however, traditional welding methods create significant problems for cymbal tone. The high heat required for TIG welding or brazing changes the crystal structure of the bronze alloy. This process, called annealing, softens the metal and removes the careful tempering that gives the cymbal its musical properties.
A cymbal that has been conventionally welded often sounds dead, flat, or produces a harsh metallic ring that has none of the original warmth or complexity. The welded area becomes harder than the surrounding metal and creates an uneven vibration pattern. Many drummers who have tried brazing report that the repair eventually cracks again because of this hardness mismatch.
Micro pulse arc welding is a newer technology that shows more promising results. This method uses extremely short bursts of electrical energy to fuse tiny amounts of filler metal into the crack. The heat affected zone is much smaller than with traditional welding, so the surrounding bronze retains more of its original temper. Some professional cymbal restoration specialists use this technique on vintage and rare cymbals with good results.
Laser welding is another advanced option. It produces even less heat distortion than pulse arc welding and can create very precise, narrow welds. However, access to laser welding equipment is limited and the service can be expensive.
Pros: Can fully close the crack and restore the cymbal’s original shape, micro pulse arc and laser welding preserve more of the original tone than traditional welding, good option for valuable vintage cymbals.
Cons: Traditional welding almost always ruins the cymbal’s tone, requires specialized equipment and professional expertise, expensive compared to other methods, heat affected zones still alter the metal to some degree, repaired areas may crack again.
Method 5: Patching With Donor Cymbal Material
Patching involves gluing or bonding a small piece of cymbal bronze over the crack. This method works best for cracks in the bow area where cutting out material would leave a hole in the playing surface. The patch acts as a structural reinforcement that holds the cracked area together.
Cut a small piece from a scrap or broken “donor” cymbal using tin snips or a rotary tool. Shape the patch so it extends at least half an inch beyond all edges of the crack. Grind down the bonding surface of both the patch and the cymbal around the crack using a grinding stone or coarse sandpaper. This roughened surface gives the adhesive a better grip.
Clean both surfaces with acetone. Apply super glue (cyanoacrylate) or metal epoxy to the ground surface and press the patch firmly into place. Clamp the patch down and let it cure for several hours or overnight. Apply the patch to the underside of the cymbal whenever possible. This protects the patch from direct stick contact and keeps the playing surface cleaner.
After curing, smooth all edges of the patch with a file and sandpaper so there are no sharp edges. The patch adds weight to one spot, which changes the cymbal’s balance and vibration pattern. Thinner patches affect tone less than thick ones.
Pros: Preserves the cymbal’s full diameter and shape, can reinforce bow cracks that cannot be cut out, relatively inexpensive, no heat involved.
Cons: Adds weight that changes tone and balance, adhesive bond often fails under heavy playing, can produce a dead or muffled sound at the patch point, results vary widely depending on the cymbal and crack location, some patches look unappealing.
How Each Method Affects Cymbal Tone
Every repair method changes the cymbal’s sound to some degree. The goal is to minimize that change and preserve as much of the original character as possible. Understanding how each method interacts with the cymbal’s vibration helps you make the best choice.
A cymbal produces sound through complex vibrations that travel across its entire surface. The edge, bow, and bell all vibrate at different frequencies and interact with each other. Anything that interrupts these vibrations, whether removing material, adding material, or changing the metal’s temper, will alter the sound.
Drilling a stop hole has the smallest impact because it removes only a tiny amount of metal. Most drummers report no audible difference after drilling a single 1/8 inch hole. The crack itself may still buzz slightly, which can add a subtle sizzle to the sound.
Cutting out a crack removes more material and can lower the cymbal’s pitch slightly. Small, clean arc cuts on larger cymbals often produce no noticeable difference during a performance. The cymbal may sustain a little less and decay a touch faster. Larger cuts can introduce an unwanted wobble or “broing” sound.
Epoxy and patching add mass rather than removing it. This dampens vibration in the repaired area and usually makes the cymbal sound darker or deader in that zone. The overall volume and projection may decrease.
Welding changes the metal itself. Even the best micro pulse arc weld alters the harmonic structure to some extent. Traditional welding causes the most drastic tone changes and is the least recommended for tone preservation.
Tools You Need for DIY Cymbal Repair
Having the right tools makes the repair process smoother and reduces the risk of further damage. You do not need an expensive workshop to fix a cracked cymbal. Most repairs require only a handful of common tools.
A power drill or drill press is essential for the stop hole method. A drill press offers better accuracy, but a handheld drill works fine if you are careful. Use high speed steel (HSS) drill bits rated for metal. A 1/8 inch bit is the most commonly used size. Always have a center punch and hammer to mark your drilling point and prevent the bit from skating across the cymbal surface.
A rotary tool (such as a Dremel) is the standard tool for cutting out cracks. Equip it with metal cutting discs for the actual cut and sanding drums or emery cloth barrels for smoothing edges. Keep extra cutting discs on hand because they wear down quickly on bronze.
Safety glasses are a must. Bronze shavings and sparks can fly during cutting and drilling. Work gloves protect your hands from sharp edges on the cut cymbal. A metal file set helps smooth edges that the rotary tool cannot reach.
Other helpful supplies include fine tip markers for tracing the crack and cut lines, acetone or isopropyl alcohol for cleaning, cutting oil to reduce heat buildup during drilling, and fine grit sandpaper (220 grit or higher) for finishing edges. If you plan to try the epoxy or patching method, add two part metal epoxy, super glue, and clamps to your list.
Step by Step Guide to the Most Effective Repair
The half moon cut combined with a stop hole is the most reliable repair for edge cracks. This combined approach removes the damaged material and provides insurance against further spreading. Here is the complete process from start to finish.
Step 1: Clean the cymbal with warm soapy water and dry it completely. This lets you see the full extent of the crack.
Step 2: Use a fine tip marker to trace the crack from edge to tip. Mark 2 to 3 millimeters beyond the visible end of the crack. If the crack extends more than an inch or two from the edge, drill a stop hole at the inner tip first using a 1/8 inch HSS bit. Place the cymbal on scrap wood, center punch your mark, and drill slowly.
Step 3: Draw a smooth, curved arc around the crack. The arc should have no sharp corners or angles. Extend the curve about half an inch past each side of the crack at the edge.
Step 4: Put on safety glasses and work gloves. Secure the cymbal so it does not spin while you cut. Use a rotary tool with a metal cutting disc to cut along the marked arc. Move slowly and let the disc do the work. Pause periodically to let the metal cool.
Step 5: File and sand the cut edge until it is completely smooth and rounded. Run your finger along the edge. If you feel any sharp spots, sand them down. Smooth edges are critical for safety and for preventing new cracks.
Step 6: Mount the cymbal on a stand and test it. Listen for any buzzing, wobble, or unwanted overtones. If you hear a “broing” sound, the cut may need to be widened into a broader arc.
When to Seek Professional Help
Some cracks are too severe or too important for a DIY fix. If you own a vintage, rare, or high value cymbal, professional repair is almost always the better choice. The cost of professional service is small compared to the replacement value of a discontinued or collectible cymbal.
Professional cymbal restoration specialists have access to micro pulse arc welders and laser welding equipment that most home workshops do not. These tools can repair cracks with far less heat distortion than any method available to a home user. Specialists like Tom Foote and services like FDS Drum Services in Nashville have developed techniques that restore both the structural integrity and much of the original tone.
You should also consider professional help if the crack is in the bell area of the cymbal. Bell cracks directly affect the cymbal’s fundamental tone, and amateur repairs in this zone almost always cause noticeable sound changes. Cracks that run through the bow from one side of the cymbal to the other also benefit from professional attention.
Multiple cracks on the same cymbal are another sign that professional evaluation is needed. A cymbal with three or four cracks may have underlying metal fatigue that makes home repair pointless. A professional can assess whether the cymbal is worth saving.
Cost varies depending on the method and the extent of damage. Expect to pay anywhere from $30 to $150 or more for professional crack repair. This is a reasonable investment for a cymbal that would cost $200 to $500 or more to replace.
How to Prevent Cymbals From Cracking Again
Repairing a crack is only half the job. Protecting the cymbal from future damage is just as important. A few simple changes to your setup and technique can dramatically extend the life of your cymbals.
Loosen your wing nuts. The cymbal should swing freely on the stand and tilt when struck. If it stays rigid, it absorbs too much force. Use cymbal felts above and below the cymbal and make sure the plastic sleeve covers the metal tilter rod. Metal on metal contact between the cymbal hole and the stand is a primary cause of keyhole cracks.
Adjust your cymbal angles. A slight tilt away from you encourages glancing blows rather than direct edge strikes. You should be hitting across the cymbal’s bow, not chopping straight down onto the edge. Lower your cymbals to a height where your natural arm movement creates a sweeping motion.
Check your stick technique. The most cymbal friendly approach is to strike with a glancing blow and follow through past the cymbal. Think of the cymbal as a surface you are brushing, not a surface you are hitting. Avoid burying the stick into the cymbal and stopping it there.
Use the right cymbal for the job. Thin crashes are not designed for heavy, repeated hitting. If you play aggressively, choose a slightly heavier cymbal that can absorb more energy. Rotate your cymbals on the stand periodically so the same edge does not take all the abuse.
Clean your cymbals regularly and store them in padded bags during transport. Dirt and grime can hide developing cracks, and unpadded transport invites edge damage.
Common Mistakes to Avoid During Repair
Even simple repairs can go wrong if you skip important steps. The most common mistake is not extending the repair far enough beyond the visible crack. Hairline fractures often reach 2 to 3 millimeters past what your eyes can see. If you drill your stop hole right at the visible tip of the crack, the fracture continues past the hole and keeps spreading.
Using a dull drill bit is another frequent error. A dull bit requires more pressure and generates more heat. It can also wander off your center punch mark and create an oblong hole rather than a clean round one. Always use a fresh or freshly sharpened bit.
Cutting too fast with a rotary tool overheats the bronze and can create a heat affected zone similar to welding. This altered zone becomes a weak point. Take breaks during cutting to let the metal cool. Some drummers apply a small amount of cutting oil to the cutting line to reduce friction and heat.
Leaving sharp corners on a cut edge guarantees a new crack will form at that corner. Every inside angle concentrates stress. Your cut lines should always be smooth curves with no angles or points. File and sand thoroughly after every cut.
Skipping the sound test before playing the cymbal at full volume is another mistake. Mount the cymbal on a stand and play it gently first. Listen for buzzing, dead spots, or strange overtones. If something sounds wrong, you may need to widen your cut or smooth an edge further.
Finally, do not ignore the cause of the crack. If you repair the cymbal but keep the same tight wing nut, high stand position, and edge chopping technique, you will crack it again in the same spot or a new one.
Can a Repaired Cymbal Sound as Good as Before
This is the question every drummer asks, and the honest answer requires some nuance. A repaired cymbal will never sound 100% identical to its pre crack state. Any repair, whether it removes material, adds material, or alters the metal’s temper, changes the vibration pattern of the cymbal.
However, the change can be so small that you cannot hear it during a live performance or in a recorded mix. A single stop hole in a 20 inch ride cymbal is virtually undetectable to the ear. A small half moon cut on a 16 inch crash may shave a fraction of a second off the sustain and lower the pitch by a barely perceptible amount.
Context matters. When you play the cymbal alone in a quiet room, you may notice subtle differences. When you play it with a full band, those differences disappear into the mix. Many drummers report that their repaired cymbals sound “different but still great” and sometimes even prefer the slightly altered character.
The larger the repair, the bigger the tone change. A cymbal with a 3 inch arc cut from its edge will sound noticeably different from its original state. It may become trashier, darker, or lose some projection. Some players embrace this and use repaired cymbals as unique effects cymbals.
The type of cymbal also matters. Ride cymbals and hi hats are more forgiving of small repairs because their primary sound comes from stick definition on the bow and bell. Crash cymbals are more sensitive because their sound relies on full surface vibration and a clean, even decay.
Ultimately, a well executed repair on a small crack preserves the vast majority of the original tone. It is almost always worth trying before spending hundreds of dollars on a replacement.
Frequently Asked Questions
Can I still use a cracked cymbal without repairing it?
You can play a cracked cymbal, but the crack will continue to spread with every hit. The longer you wait, the more material you will need to remove and the greater the tone change will be. A small crack today can become a cymbal splitting in half within a few weeks of heavy playing. The crack will also buzz and rattle, creating an unwanted sound during quieter passages. Address the crack as soon as you notice it for the best chance of preserving tone.
Does drilling a hole really stop a cymbal crack?
Yes, drilling a stop hole is a proven stress relief technique used in metalworking and engineering. The round hole replaces the sharp tip of the crack with a smooth curve that distributes stress evenly. This prevents the crack from concentrating force at a single point and growing further. It does not fix the existing crack, but it stops it from getting worse. Many drummers play for years on a cymbal with a drilled stop hole.
What size drill bit should I use for a cymbal crack?
Most experienced drummers and repair guides recommend a 1/8 inch (3mm) HSS drill bit for standard cracks. The hole should be slightly wider than the crack itself. For very fine hairline cracks, a 1/16 inch bit may be sufficient. For wider cracks, a 3/16 inch or 1/4 inch bit may be needed. Always use a center punch first and drill slowly to avoid overheating the metal.
Is it worth repairing a cheap cymbal?
It depends on the cost of repair versus replacement. If the cymbal costs less than $50 to replace and the repair requires professional service, buying a new one makes more sense. However, if you can do a simple drill or cut repair at home with tools you already own, the repair costs you nothing but time. Even inexpensive cymbals develop a played in character that a new cymbal will not have right away.
Will welding a cymbal ruin the sound?
Traditional TIG welding or brazing almost always changes the cymbal’s tone significantly because of the high heat involved. The heat alters the bronze alloy’s temper and makes the metal softer or more brittle in the weld zone. Most drummers and cymbal experts advise against conventional welding. Newer micro pulse arc welding and laser welding produce much less heat distortion and can preserve more of the original tone, but these methods require professional equipment and expertise.
How do I know if my cymbal is beyond repair?
A cymbal is generally beyond practical repair if it has multiple long cracks radiating from different points, if a crack runs from the edge all the way through the bell, or if the bell itself is split. Severe keyhole damage that has elongated the center hole beyond the size of a standard cymbal sleeve is also difficult to fix. If more than 15 to 20 percent of the cymbal’s edge needs to be removed, the tone change will be so significant that the cymbal essentially becomes a different instrument.

Hi, I’m Tessa! As a lifelong music lover and gear enthusiast, I started this blog to help fellow musicians navigate the overwhelming world of instruments and equipment. I spend my time researching, comparing, and reviewing musical gear so you can spend yours doing what matters most — making music.