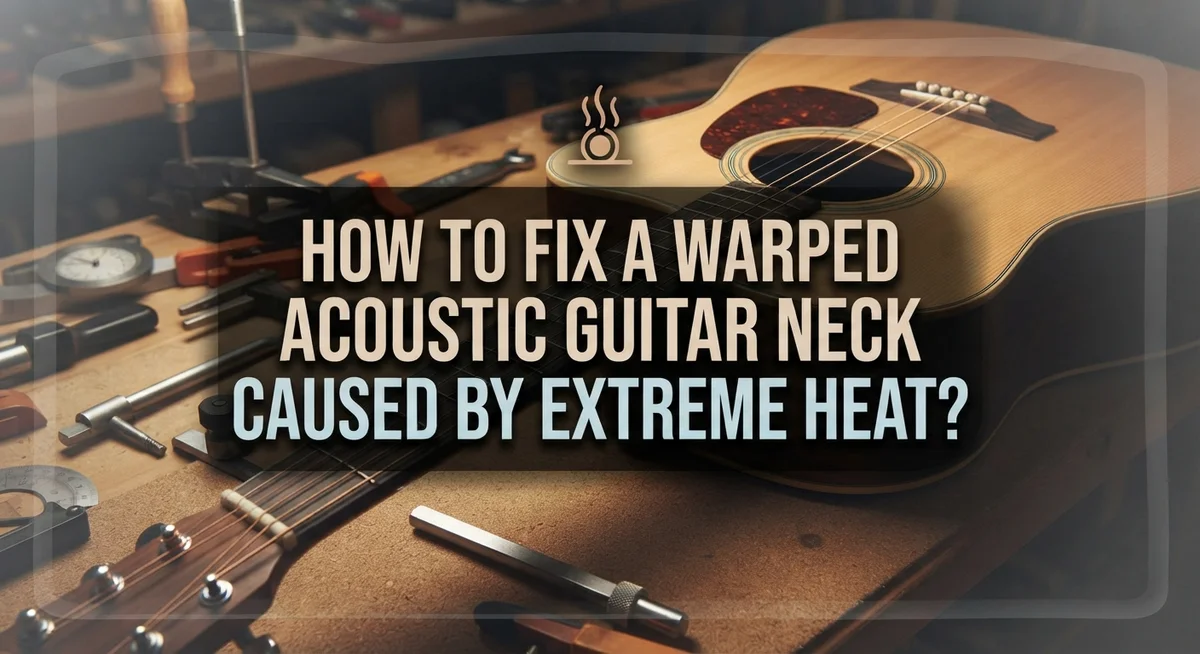
How to Fix a Warped Acoustic Guitar Neck Caused by Extreme Heat?
Leaving your guitar in a hot car or near a sunny window can quietly ruin its neck. Extreme heat dries out the wood unevenly. This causes the neck to warp, bend, or twist out of shape.
A warped neck changes everything about how your guitar plays. You might notice buzzing frets, high action, or notes that sound off. Playing becomes frustrating instead of fun.
The good news? You don’t always need a new guitar. Many heat related warps can be fixed with careful technique and patience.
This guide walks you through the real causes of heat warping. You’ll learn why the fingerboard glue joint matters so much. We’ll cover how heat softens this joint and allows repositioning.
By the end, you’ll know exactly how to approach a heat damaged neck safely and confidently.
In a Nutshell
- Rehydrate the wood first. This is the most skipped step, but wood needs moisture back before you correct any bend. Skipping this makes repairs harder and less stable.
- Heat the glue joint under the fretboard extension. This softens the bond so the fingerboard can be gently separated and repositioned without cracking.
- Separate the fingerboard carefully. Once the glue softens, you can lift and adjust the fingerboard to correct the warp.
- Reset the bridge position. Many players forget this step. A neck fix without a bridge check often leads to new playability problems.
- Add cleats for reinforcement. If the wood shows stress or thin spots, cleats help support the repair long term.
- Know your limits. Simple warps can often be fixed at home with care. Complex cases usually need a professional neck reset for safe, lasting results.
Understanding Heat Warping: Why Extreme Temperatures Damage Guitar Necks
Wood responds dramatically to heat because moisture is what holds its shape. When extreme temperatures hit your acoustic guitar, the wood loses water rapidly. This uneven drying creates internal stress that pushes and pulls the neck out of alignment.
Your guitar neck contains multiple wood types glued together. The fingerboard sits on top of the neck wood beneath it. These layers expand and contract at different rates when heat strikes them. The fingerboard glue joint becomes the weak point where separation begins.
Heat breaks down adhesive bonds. Glue that holds the fingerboard to the neck softens when temperatures climb. This softening allows the fingerboard to slip slightly on the neck base. The neck then warps as it dries unevenly, and the fingerboard follows that warped shape.
The truss rod inside your neck also matters. This metal rod resists some warping, but extreme heat can overwhelm its strength. The wood fibers around it dry out faster than protected areas, creating uneven shrinkage.
Acoustic guitars face bigger problems than electric guitars because their bodies transfer heat directly to the neck joint. The bridge and top also absorb heat, which compounds the damage. All these parts work together, so one warped section affects the whole instrument.
Understanding this process helps you see why simple fixes rarely work. You cannot force a warped neck straight without addressing what caused the warp. The wood needs moisture restored before you attempt any physical correction. The glue joints need softening before you separate components. This is why patience and proper sequence matter so much when fixing heat damage.
Signs Your Acoustic Guitar Neck Has Warped From Heat Exposure
Your acoustic guitar sends clear signals when heat has damaged its neck. Learning to spot these signs early helps you catch problems before they become severe.
The most obvious sign is a visible change in the neck’s shape. Look at your guitar from the headstock end. A healthy neck appears straight. A warped neck curves noticeably to one side or bows forward and backward. You might see gaps between the frets and the strings that weren’t there before.
Play your guitar and listen carefully. Frets that once sounded clean now buzz or rattle. This happens because the strings no longer sit evenly across all frets. Some frets touch the strings while others sit too high. The buzzing grows worse in certain positions on the neck.
Check how your strings sit above the fretboard. Measure the gap at the first fret and again at the twelfth fret. If these measurements differ significantly, your neck has likely warped. The action (string height) becomes uneven and uncomfortable to play.
Feel the fingerboard surface with your finger. Run it along the length of the neck. A warped fingerboard feels uneven. You might notice high spots where the wood has twisted or low spots where it has sunk.
Look at your bridge position too. Heat warping sometimes pulls the bridge out of alignment. The bridge might lean forward or sit at an odd angle. This misalignment creates tuning problems and changes how your guitar resonates.
Pay attention to these signs early. The sooner you identify heat damage, the better your chances of successful repair. Ignoring these symptoms allows warping to progress and causes additional structural damage.
Tools and Materials Needed Before You Begin the Repair
Before you start any repair work, gather the right tools and materials. Having everything ready prevents mistakes and keeps your guitar safe during the process.
Heat sources matter most for this repair. You’ll need a heat gun or heat lamp that lets you control temperature carefully. Never use direct flame or extreme heat. A regular household heat gun works well. You also need a way to monitor temperature so you don’t accidentally damage the wood further.
Glue and adhesives come next. Use hide glue or epoxy designed for guitar repair. These adhesives work best because they soften under heat and create strong bonds when cool. Regular wood glue won’t perform the same way on guitar necks.
You’ll need hand tools like a straightedge to check neck alignment and a feeler gauge to measure gaps. A heat lamp or heat gun helps soften the glue joint. Clamps hold pieces in position while glue dries. Get at least two or three good clamps rated for woodworking.
Moisture control supplies are essential. Keep a spray bottle filled with distilled water nearby. You’ll use this to rehydrate the wood gradually. Paper towels help you manage moisture without oversaturating the wood.
Protective equipment keeps you safe. Wear safety glasses when working with heat sources. Work gloves protect your hands from hot surfaces and sharp tools.
Measuring and marking tools help you track your progress. Use a pencil to mark reference points on the neck. A ruler or measuring tape documents any changes in neck shape.
Gather everything before you begin. This preparation means you won’t interrupt your work to search for missing items.
Step-by-Step Guide to Softening the Glue Joint and Resetting the Neck
Start by removing all strings from your guitar. This step reduces tension on the neck and lets you work safely without pressure pulling against the wood.
Next, apply gentle heat under the fretboard extension where it meets the neck. You want the glue joint to soften, not the wood itself. Use a heat source that you can control carefully. Move it slowly across the joint area. Check the temperature frequently so you don’t overheat the wood.
Once the glue feels soft, you can begin separating the fingerboard from the neck. Work slowly and use flat tools to gently pry the joint apart. Patience matters here. Rushing this step damages the wood fibers and makes repairs harder.
After separation, rehydrate the wood thoroughly. Heat drying caused the warping, so adding moisture back helps the wood return toward its original shape. Wrap damp cloths around the neck area and let them sit for several hours. This allows the wood to absorb moisture evenly.
Check the neck alignment with a straightedge as it rehydrates. You’ll notice changes happening gradually. Some warping may correct itself simply through rehydration.
Once the wood reaches proper moisture levels, carefully reposition the neck to its correct angle. This usually means resetting how the fingerboard sits on the neck body. Make small adjustments and check alignment constantly.
Let everything dry completely before moving forward. Rushing this drying phase causes new problems. The glue joint needs time to set properly in its new position.
Only after complete drying should you consider the next steps like bridge repositioning or reinforcement work.
Rehydrating the Wood: Techniques for Restoring Natural Moisture Balance
Wood loses moisture when exposed to extreme heat, and this causes the warping you see. Rehydrating the wood is essential because it allows the fibers to expand back toward their original shape. This process works best when you combine it with the glue joint separation you’ve already completed.
Start by creating a humid environment around your guitar neck. You can do this by placing the guitar in a room with controlled humidity levels, ideally between 45 and 55 percent. A simple approach involves using a humidifier or placing containers of water near the instrument. Let the wood absorb moisture slowly over several days or weeks. Rushing this step can cause new problems like finish damage or additional warping.
Monitor the neck’s shape as it rehydrates. Use a straightedge to check alignment every few days. You’ll notice the wood gradually becomes more flexible as moisture returns. This flexibility is crucial because it allows the neck to settle back into proper position without cracking.
Pay attention to how the fretboard feels during rehydration. The wood should feel slightly less brittle and more responsive. If the neck shows signs of improvement, continue the process. If it remains severely warped after two weeks of rehydration, the structural damage may be too extensive for this method alone.
Keep the guitar away from direct heat sources during this entire phase. Sunlight, heating vents, and radiators can reverse your progress. Consistent, gentle moisture restoration works better than aggressive techniques. Once the wood reaches proper moisture balance, it becomes much easier to address any remaining alignment issues with your neck.
Resetting the Bridge and Reinforcing the Neck With Cleats
Once your neck has been repositioned and the wood has rehydrated properly, you need to address the bridge and add structural support. The bridge may have shifted out of alignment during the warping process, so resetting it is crucial for proper string action and sound quality.
Start by checking the bridge position carefully. Use a straightedge to verify that the bridge sits perpendicular to the centerline of the guitar body. If heat caused the neck to move, the bridge angle likely shifted too. Gently loosen the bridge pins and lift the bridge slightly to inspect the glue joint underneath.
Clean away any old glue residue before regluing. Apply fresh adhesive to the bridge base and reposition it so it aligns perfectly with your neck correction. The bridge must sit at the correct angle to maintain proper string tension and playability.
After resetting the bridge, consider adding reinforcement cleats to the neck. Cleats are small wooden strips glued to the underside of the fretboard extension. They provide additional support and prevent future warping from recurring.
To install cleats, apply adhesive to the cleat’s back surface and press it firmly against the fretboard underside. Position cleats where the neck shows the most stress, typically near the body joint. Let the adhesive cure completely before stringing the guitar.
This reinforcement step matters significantly for guitars that experienced severe heat damage. Cleats distribute stress more evenly across the fretboard and neck joint. They act as internal bracing that prevents the wood from warping again under temperature changes.
Allow all glue joints to cure for at least 24 hours before restringing your guitar.
Tips for a Successful Heat-Warp Repair
Heat warping happens fast, but fixing it requires patience and the right approach. Your success depends on understanding what actually causes the problem and addressing each issue in the correct order.
Start with realistic expectations. Heat damage doesn’t always disappear completely. Some deformation responds well to treatment, while severe cases need professional help. Knowing the difference saves you time and frustration.
The most common mistake is skipping the rehydration phase. Many people try to force the neck straight without restoring moisture to the wood first. This fails because dried wood becomes brittle and won’t hold its new position. Rehydrate before you reshape.
Avoid applying excessive heat. You only need enough warmth to soften the glue joint, not to cook the wood further. Too much heat causes additional damage and makes the problem worse.
Don’t rush the drying process after repositioning. Glue joints need full curing time to set properly. Restringing too early or applying pressure before everything dries completely undoes all your work.
Check your bridge position carefully after neck work. Heat warping often affects how the bridge sits on the body. A misaligned bridge creates new problems like uneven string height and poor playability.
Consider reinforcement cleats if your guitar experienced severe heat exposure. These support pieces prevent the neck from warping again in the same way. They’re especially important for acoustic guitars that endure temperature swings.
Keep detailed notes during repair. Document what you observe at each stage. This helps you understand what worked and provides valuable information if you eventually consult a professional.
Professional guidance makes sense for complex cases. Acoustic guitar necks present unique challenges because they’re glued differently than solid body instruments.
Common Mistakes to Avoid During Neck Repair
When fixing a heat warped acoustic guitar neck, several mistakes can make your repair worse instead of better. Understanding what to avoid saves you time and protects your instrument.
Skipping the rehydration step is the biggest error guitarists make. You cannot simply heat the glue and expect the neck to stay straight. The wood itself lost moisture during heat exposure. Without restoring that moisture first, your neck will warp again once you finish. Rehydration must come before any glue softening or repositioning work.
Applying too much heat causes serious damage. Many people think more warmth means faster results. This approach burns the wood fibers and weakens the glue joint beyond repair. You only need enough heat to soften the adhesive. Gentle, controlled warmth works better than aggressive heating.
Neglecting the bridge reset is another common mistake. After you reposition your neck, the bridge position changes. If you don’t reset it properly, your action will be too high or too low. This ruins playability even if the neck looks straight.
Ignoring structural reinforcement needs causes future problems. A neck that experienced extreme heat damage becomes weaker. Adding cleats to the underside of the fretboard provides essential support. Without this reinforcement, warping can return within months.
Rushing the glue cure time weakens all your work. Adhesive needs at least 24 hours to set properly. Restringing too early puts stress on fresh glue joints that haven’t hardened yet.
Finally, don’t attempt complex repairs without proper tools and experience. Acoustic guitars have intricate bracing patterns inside the body. Mistakes during neck work can damage internal supports that are difficult to repair.
Final Thoughts
Fixing a heat warped guitar neck takes real skill. You now understand the core steps involved.
Rehydration comes first. Skip this step and your repair will fail. Wood needs moisture before it can move back into place.
Heat helps soften the glue joint. But too much heat damages wood fibers permanently. Gentle warmth works better than intense heat.
Your bridge position matters just as much as neck alignment. Many guitarists fix the neck but forget the bridge. This creates new problems later.
Cleats add strength where your guitar needs it most. Severe heat damage often means weaker wood underneath. Reinforcement prevents future warping issues.
Patience makes the difference between success and failure. Glue joints need full cure time. Rushing this process weakens everything you just repaired.
Some repairs go beyond home fixing. Complex acoustic guitars have bracing systems that require professional tools. A trained luthier can spot problems you might miss.
Think about your guitar’s value before attempting repairs. Vintage or expensive instruments deserve professional attention. Simple fixes work fine for less complex cases.
Document your repair process carefully. Notes help you track what worked. They also help if problems appear later.
Every guitar responds differently to heat damage. Some necks straighten easily with proper technique. Others need multiple attempts or professional intervention.
Trust your instincts during this process. If something feels wrong, stop and reassess. Guitar repair rewards careful, methodical work over rushed shortcuts.
Your patience today protects your guitar’s future sound quality. Take time now to avoid bigger problems later. A properly repaired neck will serve you well for years ahead.
Frequently Asked Questions
Can I fix heat warping without removing the fingerboard?
Partial fixes are possible, but complete corrections usually require fingerboard removal. Heat alone softens the glue joint under the fretboard extension. Once softened, you can reposition the neck slightly. However, this approach has limits for severe warping.
The fingerboard removal method works better for acoustic guitars. It lets you access the full neck structure and rehydrate the wood properly. You gain better control over alignment and can address the root cause of the damage.
How long does the rehydration process take?
Rehydration typically takes several weeks, sometimes longer. The wood needs time to absorb moisture gradually and evenly. Rushing this phase causes the repair to fail.
You’ll monitor the wood’s response during this period. The neck should begin showing signs of straightening as moisture returns. Patience here directly impacts your final results.
What happens if I skip the bridge reset after neck work?
Your guitar’s action becomes uneven or too high. The bridge position changes when you reposition the neck. Skipping this step leaves your guitar unplayable or uncomfortable.
The bridge must align with the new neck angle. This adjustment ensures proper string height and playability. It’s not optional—it’s essential for a working instrument.
Do I need reinforcement cleats after heat damage?
Severe heat exposure often requires cleats for added strength. These braces support the neck and prevent future issues. Your guitar’s specific damage determines whether you need them.
Cleats aren’t always necessary for minor warping. Assess the damage extent before deciding. When in doubt, professional evaluation helps you make the right choice.

Hi, I’m Tessa! As a lifelong music lover and gear enthusiast, I started this blog to help fellow musicians navigate the overwhelming world of instruments and equipment. I spend my time researching, comparing, and reviewing musical gear so you can spend yours doing what matters most — making music.