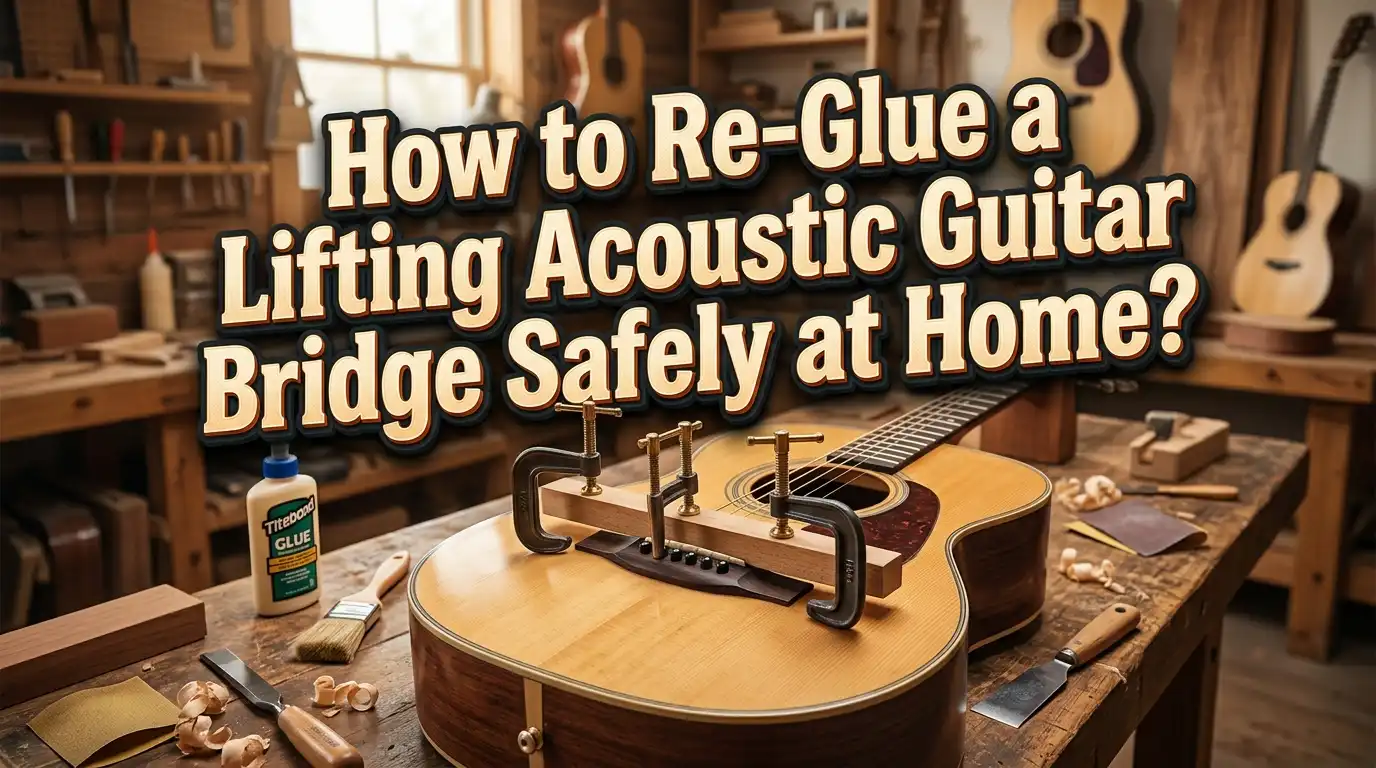
How to Re-Glue a Lifting Acoustic Guitar Bridge Safely at Home?
You pick up your acoustic guitar and notice something alarming. The bridge is pulling away from the top. A small gap has appeared at the back edge, and you can feel it shifting under your thumb. This is a lifting bridge, and it is one of the most common acoustic guitar problems.
The good news? You can fix it at home if you follow the right process. A lifting bridge does not mean your guitar is ruined. It simply means the glue bond between the bridge and the soundboard has failed.
This guide walks you through every stage of a safe and successful bridge reglue. You will learn how to identify the problem, choose the right glue, remove the bridge, clean the surfaces, and clamp everything back together.
Key Takeaways
- A lifting bridge is a fixable problem. Most acoustic guitar owners will face this issue at some point. Temperature swings, humidity changes, and constant string tension wear down the glue joint over time. Catching it early saves you money and protects the guitar top from further damage.
- The right glue matters. Original Titebond (aliphatic resin) and hot hide glue are the two preferred adhesives for bridge reglues. Avoid super glue, construction adhesive, and polyurethane glues. They either fail to hold or create bonds that are impossible to undo later.
- Surface preparation is the most important step. Old glue must be completely removed from both the bridge and the guitar top. A fresh glue joint requires clean, bare wood on both surfaces. Skipping this step almost guarantees the repair will fail.
- Clamping pressure must be firm but not excessive. Too little pressure creates a weak bond. Too much pressure squeezes out all the glue and starves the joint. A balanced approach with proper cauls distributes force evenly.
- Heat is your best friend during removal. Warming the bridge to around 200 to 250 degrees Fahrenheit softens most wood glues and allows the bridge to separate cleanly without tearing the soundboard.
- Patience protects your investment. Allow at least 24 hours of clamping time before restringing. Rushing this step can compromise the entire repair.
What Causes an Acoustic Guitar Bridge to Lift
Several factors cause a guitar bridge to separate from the soundboard. The most common cause is environmental change. Wood expands and contracts as humidity and temperature shift. Guitars stored in rooms with poor climate control or left inside hot vehicles face the greatest risk. The glue bond weakens gradually until the bridge begins to pull away.
String tension also plays a major role. Steel strings exert a constant forward pulling force on the bridge. Over years, this stress can overcome even a well made glue joint. Worn bridge pins make the problem worse. As pins wear down, the ball ends of the strings creep up inside the bridge plate and place uneven stress on the bridge from below.
Another common cause is finish trapped under the bridge. Many budget guitars are built with a complete finish coat on the soundboard before the bridge is glued on. The bridge sticks to the lacquer rather than bare wood. This bond will hold for a while, but it is far weaker than a wood to wood joint. Eventually, the lacquer lets go and the bridge lifts.
Poor original gluing is also a factor. If the manufacturer did not apply enough glue, did not clamp properly, or did not clean the surfaces, the joint will fail sooner. Understanding these root causes helps you prevent the problem from recurring after your repair.
How to Tell If Your Guitar Bridge Is Actually Lifting
Before you start any repair, confirm the problem is real. Not every guitar bridge sits perfectly flush at the edges. Some guitars are built with bridge corners that were never glued down. That is a design choice, not a defect, and it does not need fixing.
The simplest test uses a thin piece of paper or a business card. Try to slide the edge under the back of the bridge. If the paper slips in more than a few millimeters, the bridge is lifting. A piece of paper that disappears half an inch or more under the bridge signals a serious issue that needs prompt attention.
You can also tap the bridge area gently with your fingernail. A solid, tightly glued bridge produces a clear, firm sound. A lifting bridge often produces a hollow or dull tone because the wood is no longer making full contact with the soundboard.
Visual inspection works too. Look at the bridge from the side at eye level. Check for any visible gap between the bottom of the bridge and the guitar top. Pay close attention to the back edge and the rear corners, as these are the areas that lift first due to string tension pulling the bridge forward.
If you notice buzzing, increased action, or the guitar going out of tune faster than usual, a loose bridge may be the cause. These symptoms develop because the bridge is no longer transferring string vibrations efficiently to the soundboard.
Tools and Supplies You Will Need
A successful bridge reglue depends on having the right tools ready before you start. You do not need a professional shop, but you do need some specific items. Here is what to gather.
You will need a thin, flexible spatula or palette knife for separating the bridge from the top. A dedicated bridge removal spatula works best because it has a sharp leading edge and a flat profile that slides through the glue joint without gouging the wood. A standard art palette knife can work in a pinch, but make sure it is thin enough.
For heating, a 250 watt infrared heat lamp with a brooder reflector is the professional choice. A household iron wrapped in foil or a heat gun on a low setting can also work, though they require more care. You will also want a laser infrared thermometer to monitor temperature.
Gather your clamping supplies. Deep throat clamps or soundhole clamps that can reach through the guitar body are ideal. You will need a bridge plate caul for the inside and a bridge clamping caul for the top. You can make cauls from plywood shaped to fit your bridge.
Stock up on Titebond Original wood glue, 80 grit and 150 grit sandpaper, masking tape, a small brush for applying glue, Q tips, damp cloths, a razor blade or hobby knife for scoring, and a small mirror to inspect the interior of the guitar.
Choosing the Right Glue for Your Bridge Repair
The glue you choose can make or break this repair. Not all adhesives work for this job. The right choice depends on your skill level and the guitar’s value.
Titebond Original is the most popular choice among luthiers and home repair enthusiasts. It is an aliphatic resin PVA glue that bonds wood extremely well. It has a working time of about five minutes, which gives you enough time to position the bridge and apply clamps. It cleans up with water while still wet. It can be softened with heat for future repairs. Most factory built guitars use this type of glue from the start.
Hot hide glue is the traditional luthier’s choice. It produces an excellent bond and is favored for its tonal properties. Hide glue can be undone and reapplied indefinitely, which makes it ideal for vintage instruments. However, it requires heating in a glue pot, and it sets very fast. The short working time leaves little room for error. This is best for experienced repair people.
Titebond III is a waterproof version that offers slightly stronger hold. Some repair technicians use it on instruments that will face extreme touring conditions. It is a solid alternative to Titebond Original.
Avoid super glue (cyanoacrylate), Gorilla Glue (polyurethane), and epoxy. Super glue is brittle and does not fill gaps. Gorilla Glue expands as it cures and creates a foamy, weak bond. Epoxy creates a permanent bond that cannot be undone, which complicates any future repair work.
Pros of Titebond Original: long working time, strong bond, easy cleanup, reversible with heat, widely available. Cons: not waterproof, slightly weaker than hide glue in some tests.
Pros of hot hide glue: strongest traditional bond, excellent tone transfer, infinitely reversible. Cons: requires a glue pot, short working time, higher skill requirement.
Removing the Lifting Bridge Safely
Before you can reglue, the bridge must come off completely. A partial reglue almost never holds. Old glue and new glue do not bond well together, so you need fresh wood to wood contact across the entire surface.
Start by removing all strings and bridge pins. Loosen the strings completely and take them off. Store the bridge pins somewhere safe. Next, mark the bridge position on the guitar top. Use a sharp razor blade or hobby knife to lightly score the finish around the entire perimeter of the bridge. This prevents the lacquer from chipping away when the bridge separates. Apply masking tape around the edges for a visual reference when you reattach the bridge later.
Now create a heat mask from corrugated cardboard. Trace the shape of the bridge and cut out the center so only the bridge is exposed. Cover the surrounding area to protect the finish from heat. You can layer reflective insulation on top for extra protection.
Apply heat from your lamp or iron. Position the heat source a few inches above the bridge and keep it moving to heat the surface evenly. Aim for 200 to 250 degrees Fahrenheit on the bridge surface. This brings the glue joint underneath to roughly 140 degrees, the softening point for most wood glues.
After about five to ten minutes of heating, begin working your spatula under the bridge at the lifted edge. Never force the tool. Let the softened glue guide the blade through the joint. If resistance increases, apply more heat and wait. Forcing the spatula can dig into the soundboard or split the wood.
The bridge should eventually release with minimal effort. Work slowly and patiently.
Cleaning Both Surfaces for a Strong Bond
This step determines whether your repair lasts years or fails within weeks. Clean, bare wood surfaces are essential for a solid glue joint. Any old glue, finish, or debris left behind will act as a barrier and weaken the new bond.
Start while the bridge is still warm from removal. Old glue scrapes off more easily when it is soft. Use a sharp chisel held flat against the surface to carefully remove glue residue from the bottom of the bridge. Work in the direction of the grain and avoid digging into the wood.
On the guitar top, use the same flat chisel technique. Be very gentle here because the soundboard is thin spruce, typically only 2 to 3 millimeters thick. Remove only the glue and any trapped finish. If your guitar had lacquer under the bridge, you will need to carefully scrape or sand it down to bare wood within the scored outline you made earlier.
After the initial cleanup, sand both surfaces lightly with 80 grit sandpaper on a flat block. The sanding block should match the slight radius of the guitar top to ensure even contact. Sand until both surfaces show a uniform, clean wood appearance with no shiny spots, dark patches, or glue residue.
Finally, score a crosshatch pattern into both surfaces using a razor blade or hobby knife. Cut shallow lines in a grid pattern. This increases the gluing area and gives the adhesive more surface to grip. The crosshatch pattern also helps prevent the bridge from sliding during clamping. Blow away any dust and inspect both surfaces under good light before proceeding.
Dry Clamping: The Practice Run
Professional luthiers always do a dry clamp before applying any glue. This rehearsal step lets you check the fit, test your clamp positions, and practice your workflow without the pressure of a setting adhesive.
Place the bridge back onto the guitar top in its marked position. Insert two small dowels or bridge alignment pins through the bridge pin holes to lock the bridge in the correct spot. These pins act as guides and prevent the bridge from sliding out of position.
Now install your cauls and clamps. Reach inside the sound hole and position the interior caul against the bridge plate. Hold it in place with your clamp while you position the top caul over the bridge. Tighten everything just enough to hold the assembly together.
Check alignment from every angle. The bridge should sit within the scored lines and tape marks you made earlier. Use a small mirror inside the sound hole to verify the interior caul is centered and not pressing against any braces at an angle.
Look for any gaps between the bridge and the top. Press down on different areas of the bridge and watch for movement. If one side rocks or a gap appears, the bottom of the bridge may need to be sanded to match the radius of the guitar top.
Practice loosening and tightening the clamps. Note how many turns it takes to reach a good pressure. This information will be valuable during the actual glue up when your working time is limited. A dry run that goes smoothly means the real glue up will go smoothly too.
Applying Glue and Clamping the Bridge
With your dry run complete, you are ready for the real thing. Work in a clean, well lit area and have all your tools within arm’s reach.
Apply a generous layer of Titebond Original to both surfaces. Use a small brush to spread the glue evenly across the bottom of the bridge and the prepared area on the guitar top. You want enough glue to see some squeeze out around all edges when pressure is applied. Squeeze out confirms full coverage. Too little glue creates dry spots that become weak points.
Place a towel inside the guitar through the sound hole to catch any drips. Position the bridge using your alignment pins and press it down firmly with hand pressure. You should see glue squeezing out around the perimeter of the bridge. Wipe away the excess with a damp cloth or Q tip, but do not obsess over perfect cleanup yet. You will get another chance after clamping.
Install the interior caul, then the top caul, and begin tightening the center clamp. Apply firm pressure but do not overtighten. Overtightening starves the joint by squeezing out too much glue. You want a thin, even glue film between the two surfaces. Add wing clamps if your caul has them, or use lighter clamps on the bridge ends.
Watch for additional squeeze out as you tighten each clamp. Clean up the fresh glue around the bridge with damp Q tips and a thin ruler wrapped in a damp cloth. Press down on the bridge edges and look for air bubbles in the squeeze out. If you see bubbles being sucked in and out, add slightly more pressure in that area.
Double check the bridge position one final time. Then leave it alone. Do not touch the clamps or adjust anything for at least 12 to 24 hours.
Curing Time and What to Expect
Patience at this stage is critical. The glue needs time to cure fully before the joint can handle string tension again.
Titebond Original reaches handling strength in about one hour, but it does not achieve full bond strength for 24 hours. Most luthiers leave the clamps on overnight as a minimum. Some wait a full 24 hours before removing clamps, and then wait another 24 hours before stringing the guitar.
Hot hide glue sets faster. It gels within minutes and reaches handling strength in about two hours. However, full strength still takes 24 hours. If you used hide glue, you can remove clamps sooner, but still wait a full day before applying string tension.
During the curing period, keep the guitar in a stable environment. Avoid sudden temperature changes or extreme humidity shifts. A room at 45 to 55 percent relative humidity and 68 to 75 degrees Fahrenheit is ideal. Do not move the guitar or bump the clamps.
After you remove the clamps, inspect the joint carefully. Run your fingernail along every edge and check for gaps. The bridge should feel completely solid with no movement at all. Clean up any remaining dried glue with a slightly damp cloth or a gentle guitar polish. If you see glue residue in the bridge pin holes, use a reamer turned backwards to burnish the holes clean without removing wood.
Apply a small amount of lemon oil or fretboard conditioner to the bridge wood. The heat from removal may have dried it out slightly. Let the oil soak in, wipe off the excess, and then string up the guitar.
Method Comparison: Full Removal Versus Partial Reglue
Some guitarists wonder if they can skip the full bridge removal and simply work glue into the gap. This partial reglue approach is tempting because it is faster and less intimidating. Let us compare both methods.
Full bridge removal and reglue is the professional standard. You remove the bridge completely, clean both surfaces to bare wood, and glue everything back with full surface contact. This creates the strongest possible bond and ensures no old glue interferes with the new joint.
Pros: produces the strongest and most reliable bond, removes trapped finish, allows full inspection of the bridge plate, and creates a joint that can last the life of the guitar. Cons: requires more tools, takes more time, carries a small risk of soundboard damage during removal, and demands more skill.
Partial reglue (gluing without removal) involves working thin glue into the lifted gap using a palette knife or syringe and then clamping. Some luthiers have success with this on guitars where only a small portion of the back edge has lifted.
Pros: faster, less risky for beginners, requires fewer tools, and works well for minor lifts. Cons: the bond is weaker because old glue remains on most of the surface, cannot address trapped finish, may not hold long term under string tension, and often needs to be redone.
For any lift larger than a few millimeters, the full removal method is strongly recommended. The partial approach is best considered a temporary fix or a solution for inexpensive instruments where the investment in a full repair does not make financial sense.
Common Mistakes to Avoid During the Repair
Even careful guitar owners make errors during a bridge reglue. Knowing the most common mistakes helps you avoid them.
Forcing the spatula during removal is the number one risk. If the glue has not softened enough, the blade can dive into the spruce top and tear out wood fibers. Always let the heat do the work. If the spatula meets resistance, stop and apply more heat.
Using the wrong glue ruins many home repairs. Polyurethane glues like standard Gorilla Glue expand and foam, filling gaps with weak material. Super glue shatters under stress. Construction adhesive never fully hardens. Stick with Titebond Original or hot hide glue.
Skipping surface preparation is another frequent error. Applying new glue over old glue or lacquer creates a sandwich that will fail. Both surfaces must be sanded to clean, bare wood.
Overtightening clamps starves the joint and can even crack the guitar top or damage internal braces. Apply firm, even pressure and stop once you see consistent squeeze out around the edges.
Not marking the bridge position before removal leads to misalignment during regluing. Even a millimeter of shift can affect intonation and string spacing. Always score the outline and use tape markers.
Rushing the cure time is the final common mistake. Stringing the guitar before the glue has fully cured puts 150 to 200 pounds of tension on a joint that is not ready. Wait at least 24 hours after clamping before you put strings back on. This patience protects your work and ensures a lasting repair.
When to Call a Professional Luthier Instead
Not every bridge repair belongs at the kitchen table. Some situations call for professional help, and knowing that boundary protects your guitar.
If the bridge tore away and took wood with it, you have a soundboard repair on your hands. Filling torn grain, patching spruce, and restoring structural integrity require professional skills and tools. A botched patch job can permanently affect the guitar’s sound and resale value.
Vintage or high value guitars deserve professional care. A Martin D-28 from the 1960s or a pre-war Gibson is worth thousands of dollars. The cost of a professional bridge reglue, typically $100 to $250, is a tiny fraction of the instrument’s value. The risk of damaging a valuable guitar is not worth the savings of a home repair.
If you discover structural damage inside the guitar, such as loose braces, a cracked bridge plate, or a warped top, these problems compound the bridge repair and require an experienced luthier’s assessment.
If you feel uncomfortable with any step in this process, stop. There is no shame in recognizing your limits. A professional luthier has done hundreds of these repairs and can complete the job in a few hours with minimal risk. Ask friends, local music shops, or online forums for recommendations.
The bridge reglue is one of the most approachable guitar repairs for a home enthusiast, but it still involves heat, sharp tools, and a thin soundboard. Honest self assessment is the best tool in your kit.
Preventing Future Bridge Lifts
A successful repair means nothing if the bridge lifts again in a year. Prevention starts with understanding what caused the failure in the first place.
Control your guitar’s environment. Keep the instrument in a room with stable humidity between 45 and 55 percent. Use a guitar humidifier inside the case during dry winter months. Avoid storing the guitar near heating vents, in direct sunlight, or in uninsulated spaces like attics and garages. Never leave a guitar in a hot car. Interior car temperatures can exceed 140 degrees Fahrenheit, which is enough to soften most wood glues.
Inspect your bridge pins regularly. Worn pins allow string ball ends to creep upward inside the bridge, placing uneven stress on the bottom of the bridge. Replace pins at the first sign of wear. The slots should still be clean and the pins should sit firmly without wobbling.
Use the correct string gauge. Heavier strings produce more tension on the bridge. If your guitar was designed for light gauge strings, using medium or heavy gauge increases the stress on the bridge joint significantly. Check the manufacturer’s recommendations.
Loosen the strings slightly if the guitar will sit unplayed for weeks or months. This reduces constant stress on the bridge and the top. You do not need to detune completely. Dropping each string by a whole step is enough.
Finally, check the bridge every time you change strings. Run your fingernail or a piece of paper along the back edge and corners. Catching a small lift early means a simple repair. Ignoring it leads to a much bigger job later.
Frequently Asked Questions
Can I use super glue to reattach my guitar bridge?
No. Super glue (cyanoacrylate) is not suitable for bridge regluing. It forms a rigid, brittle bond that does not handle the constant stress of string tension. It also does not fill gaps between surfaces. Any small imperfection in fit will leave a weak spot. Super glue is extremely difficult to remove cleanly, which makes future repairs harder. Titebond Original or hot hide glue are the correct choices for this type of repair.
How long should I leave the clamps on after regluing?
Leave the clamps in place for a minimum of 12 hours. Most experienced luthiers recommend a full 24 hours of clamping time. After removing clamps, wait another 24 hours before restringing the guitar. This gives the glue joint time to reach full cure strength. Rushing this timeline is one of the most common reasons home bridge reglues fail. Temperature and humidity can also affect cure time, so err on the side of caution in cold or damp environments.
Is a lifting bridge an emergency that needs immediate attention?
It is not an emergency in the sense that your guitar will fall apart overnight. However, you should loosen the strings right away to reduce tension on the weakened joint. Continuing to play with a lifting bridge allows the gap to grow and increases the risk of the bridge tearing away and damaging the soundboard. Address the issue within days, not months.
Can I reglue the bridge without removing it completely?
You can attempt a partial reglue on minor lifts by working thin glue into the gap with a palette knife and clamping. This can work as a short term fix for small separations. However, the repair is weaker because old glue remains on most of the contact surface. For lifts larger than a few millimeters or for any guitar you care about long term, a full removal and reglue is the better approach.
How much does a professional bridge reglue cost?
Professional bridge reglue costs typically range from $100 to $250 depending on the luthier, your location, and the condition of the guitar. If additional work is needed, such as removing finish from under the bridge, repairing the bridge plate, or patching the soundboard, the cost can go higher. For budget guitars worth under $200, you may decide the home repair route makes more financial sense.
Will regluing the bridge affect my guitar’s tone?
A properly reglued bridge should restore your guitar’s original tone, not change it. In fact, many players report that their guitar sounds better after a bridge reglue because the bridge is once again making full contact with the soundboard. A lifting bridge reduces vibration transfer and deadens the sound. Fixing that connection brings back resonance and volume. The choice of glue can have a subtle effect on tone, which is why some luthiers prefer hot hide glue for premium instruments.

Hi, I’m Tessa! As a lifelong music lover and gear enthusiast, I started this blog to help fellow musicians navigate the overwhelming world of instruments and equipment. I spend my time researching, comparing, and reviewing musical gear so you can spend yours doing what matters most — making music.