How to Stop Banjo Bridges From Sliding Out of Place?
If you play banjo regularly, you know that sinking feeling — you are mid-song, everything sounds great, and then the tone starts going sideways. You look down and your bridge has crept out of position again. This is one of the most frustrating problems banjo players deal with, and it happens to beginners and experienced players alike.
The good news is that a sliding banjo bridge is almost always fixable. Most causes come down to a handful of straightforward issues, and most solutions take only a few minutes to apply.
This guide walks you through every single reason your bridge might be moving and gives you a clear, step-by-step plan to stop it from happening again.
Read through from the beginning or jump to the section that matches your specific situation.
In a Nutshell
- A banjo bridge is a floating bridge, meaning it is held in place only by the downward pressure of the strings. It is not glued. This design is intentional, but it also means that anything reducing string pressure allows the bridge to shift.
- String tension and head tension are the two most critical factors. When either of these is too low, the bridge loses its grip on the banjo head and begins to slide during play.
- Playing technique matters more than most players realize. Resting your picking hand too firmly on or near the bridge, or anchoring with heavy pressure, can physically push the bridge forward over time.
- The banjo head surface type plays a major role. Frosted heads provide more friction than smooth, clear heads. If you use a clear or Renaissance head, your bridge is more likely to slide without some additional grip.
- Quick friction fixes like rosin, rubber cement, or beeswax on the bridge feet can stop sliding immediately without permanently altering your banjo or affecting its tone.
- Correct bridge placement using the 12th fret harmonic method is essential. A bridge placed in the wrong spot will be pulled toward the “right” position by string tension every time you play, which makes it appear to keep sliding.
What Is a Banjo Bridge and Why Does It Float?
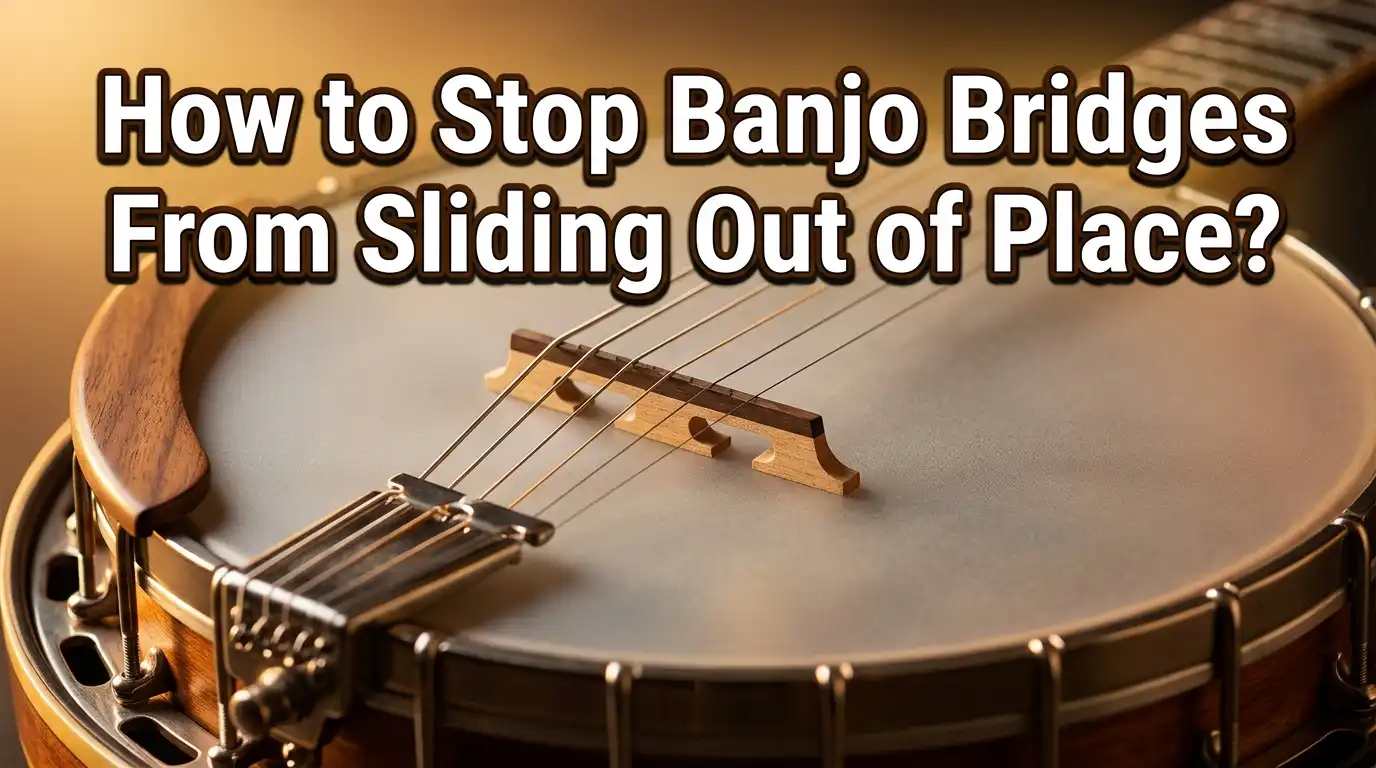
Before you can fix a sliding bridge problem, it helps to understand why the bridge behaves the way it does. The banjo bridge is a small, three-footed piece of wood — typically made with a maple body and an ebony top — that sits on the banjo head and transmits string vibration down into the head and pot assembly. Unlike a guitar bridge, which is glued firmly to the top of the instrument, a banjo bridge is entirely “floating.” It is held in position purely by the downward pressure of the strings running from the tuning pegs over the bridge to the tailpiece.
This floating design is shared by other instruments like the violin and mandolin. It gives the banjo several advantages, including easy bridge replacement, adjustable action, and the ability to experiment with different bridge styles and heights. However, it also means that the bridge relies entirely on string pressure to stay put. The moment that pressure is reduced, angled, or disrupted, the bridge becomes free to move.
Understanding this principle is the first step to solving the problem. The bridge does not slide because something is broken or defective. It slides because the physical forces holding it in place are not strong enough, or because other forces are pushing it out of position. Every solution in this post works by either increasing the holding force or removing the force that is causing the movement.
Why String Tension Is Your First Line of Defense
String tension is the primary force keeping your banjo bridge locked in position. When the strings are tuned to standard pitch and running at full playing tension, they press down on the bridge with considerable downward force. This downward force, called “break angle,” is what pins the bridge feet against the banjo head.
The break angle depends on how the strings run from the nut, over the bridge, and down to the tailpiece. A steeper angle means more downward pressure. A shallow angle means less pressure. If your tailpiece is set very high or is pulling the strings almost parallel to the head, you will have very little break angle and almost no downward force on the bridge. This is a common cause of a sliding bridge that many players overlook.
Check your tailpiece height. The tailpiece should hold the strings close enough to the head so that the strings press firmly down on the bridge as they pass over it. If the tailpiece is sitting too high, lower it slightly and observe whether the bridge becomes more stable. Most tailpieces have a simple adjustment mechanism, and even a small change in angle can dramatically increase the downward pressure on the bridge.
Also check that all five strings are at proper pitch before you start playing. A banjo that is left in an open, slack-tuned state with reduced string tension for extended periods can allow the bridge to drift between playing sessions. Always confirm bridge placement when you pick the instrument up after it has been sitting for a while.
How Banjo Head Tension Affects Bridge Stability
The tightness of your banjo head plays a bigger role in bridge stability than most beginners expect. A loose banjo head does not just affect your tone — it directly affects how firmly the bridge sits on the instrument. When the head is too loose, the bridge feet can sink slightly into the surface, which makes the bridge more prone to tipping and sliding under the force of your picking hand.
A properly tensioned banjo head should produce a clear, crisp tone and feel firm when you tap it. Many experienced players check head tension by tapping the head about an inch inside the tension hoop and listening for a tight, high-pitched tap, similar to a high D note or higher. A dull or thuddy sound indicates a head that is too loose.
To tighten the head, use a coordinator-style adjustment or tighten the tension hoop nuts evenly around the perimeter of the pot. Always tighten in small, equal increments, moving across the pot in a star pattern rather than going in a circle. This keeps the tension even across the entire head and prevents the head from pulling unevenly.
Be aware that tightening the head will also raise the action, since the bridge is pushed upward as the head tightens. Always re-check your bridge position and action after making head adjustments. Deering Banjos notes that head tension changes affect the position of the head membrane, which can shift where your bridge sits even if you marked its position carefully.
The Correct Bridge Placement Method Using Harmonics
One often overlooked reason a bridge keeps sliding is that it was never placed in the correct position to begin with. When a bridge is set in the wrong spot, the strings constantly try to pull it toward the position where intonation is correct. This creates a slow, consistent drift that makes it seem like the bridge is sliding on its own.
The correct way to place a banjo bridge uses a two-step process. First, use the 12th fret distance method as a starting point. Measure the distance from the front edge of the nut to the center of the 12th fret. Then place the bridge that same distance from the 12th fret on the other side, toward the tailpiece. This puts the bridge very close to where it needs to be.
Second, fine-tune using harmonics. Lightly touch the first and fourth strings directly above the 12th fret and pluck them. This produces a chimed harmonic note. Then fret those same strings at the 12th fret normally and compare the pitch. If the fretted note is higher than the harmonic, the bridge needs to move slightly away from the nut. If the fretted note is lower than the harmonic, the bridge needs to move slightly toward the nut. Keep adjusting in tiny increments until both notes match perfectly.
Once the bridge is in the correct intonation position, it will experience much less pulling force from the strings, making it significantly more stable during play. Marking the correct position with a light pencil line around the feet is a smart habit that helps you restore the bridge quickly if it ever does shift.
How to Use Rosin on Bridge Feet to Prevent Sliding
One of the oldest and most effective tricks for stopping a banjo bridge from sliding is applying rosin to the bottom of the bridge feet. Rosin is a resin product most commonly associated with violin and cello bows, but it has been used for generations to add grip to banjo bridges as well. It works by creating a slightly tacky, high-friction surface on the feet that grips the banjo head without damaging it.
To apply rosin, take a block of rosin and scrape it gently with a knife or fingernail to create a small amount of fine rosin dust. Rub this dust onto the bottom surface of each bridge foot using your fingertip. Apply only a thin, even coat. You do not need very much. Too much rosin can make the feet feel sticky and attract dirt over time.
After applying the rosin, replace the bridge in its correct position under the strings and bring the strings back to full tension. You should immediately notice that the bridge feels more locked in place. The rosin will not prevent you from moving the bridge intentionally when you need to adjust it, but it will resist the small, involuntary movements that happen during normal playing.
This fix works on all head types, but it is especially useful on smooth, clear, or Renaissance-style heads where there is less natural friction between the bridge feet and the head surface. Reapply the rosin occasionally as it wears away with use.
Using Rubber Cement or Beeswax as a Grip Agent
If rosin is not giving you enough grip, two other trusted options are rubber cement and beeswax. Both of these have been used by experienced banjo players and luthiers for years, and both work on the same principle: increasing friction between the bridge feet and the head surface without permanently bonding the bridge in place.
For rubber cement, apply a very thin coat to the bottom of each bridge foot using a small brush or toothpick. Allow it to dry completely before placing the bridge back on the head. When dry, rubber cement forms a slightly grippy, rubber-like film that holds remarkably well against lateral sliding forces. The bridge will still be removable if you need to shift it, but it will not creep during play. Do not apply rubber cement to the head itself, as this could leave a residue.
For beeswax, rub a small piece of natural beeswax directly onto the bottom of the bridge feet. Beeswax creates a slightly waxy, friction-increasing surface that many players find ideal because it leaves no visible residue and does not affect tone at all. Players in the banjo community at Banjo Hangout forums have reported that beeswax worked immediately even after other methods had failed.
Both of these options are completely reversible. If you ever need to replace the bridge or adjust its position, the grip coating can be removed cleanly. Neither material will harm your banjo head or leave a permanent mark.
The Pencil Mark Trick for Quick Position Recovery
Even if you solve the sliding problem completely, there will likely come a time when your bridge shifts due to a string change, a knock, or travel in a case. Having a reliable reference point to restore the correct position instantly is a simple habit that saves a lot of time and frustration.
The pencil mark method is as easy as it sounds. Once you have confirmed that your bridge is in the correct intonation position using the harmonic method, take a sharp pencil and lightly trace around the outside edge of the two outer feet. This gives you a permanent reference mark that is barely visible under playing conditions but clear enough to use when needed.
Use only a pencil, never a pen or marker, since pencil marks are easy to remove with an eraser when you eventually need to move the bridge. Ink marks can be difficult to clean from a banjo head and may leave permanent staining.
This trick does not prevent sliding on its own, but it works brilliantly as a companion to the grip methods described in this post. If the bridge ever does slip, you can restore it to the exact correct position in seconds, without needing to go through the full harmonic tuning process again. Many professional banjo players keep a light pencil outline on their head at all times for this reason.
Checking for Neck Alignment Issues That Cause Chronic Drift
If your bridge consistently drifts to one side rather than just forward or backward, the problem may run deeper than friction or string tension. Chronic sideways drift is often a sign of neck misalignment. When the neck is not perfectly centered relative to the pot, the strings pull on the bridge at a slight angle, and the bridge slowly migrates to one side as you play.
To check for this, relax all the strings and remove the bridge entirely. Re-tension only the third string. Watch where that string naturally sits as it runs across the head toward the tailpiece. The third string should run in a perfectly straight line from the nut to the tailpiece, passing through the exact center of both. If it pulls to the left or right, the neck is not aligned correctly.
In mild cases, this misalignment can be addressed by setting the bridge slightly off-center to match where the strings naturally want to sit. Applying a grip agent like rubber cement will then hold it in this compensated position. In more significant cases, the neck heel cut may need to be professionally adjusted by a luthier.
Do not try to force the bridge to a centered position if the strings are pulling it off-center. As experienced players on Banjo Hangout have noted, fighting the strings creates intonation problems and will cause the bridge to keep drifting back to its “natural” position no matter how many times you reset it.
How Playing Technique Can Move Your Bridge
Many players are surprised to learn that their own right-hand technique is the cause of their sliding bridge. This is more common than most players admit, and identifying and fixing it is often the fastest solution available. The right hand creates direct physical contact near or on the bridge during normal playing, and if that contact is too forceful or poorly positioned, it pushes the bridge incrementally out of place.
The most common technique-related cause is anchoring too heavily on the bridge itself. Some players rest the heel of their picking hand on the bridge or press firmly into the bridge as they pick. Each pick stroke in this position applies a small forward push to the bridge, and over the course of a song, those small pushes add up to a significant displacement.
To check whether this is happening to you, play normally and observe where your picking hand makes contact with the instrument. The heel of your hand should rest lightly on the banjo head or on the strings behind the bridge, not on the bridge itself. Adjusting your anchor point to sit further back toward the tailpiece reduces or eliminates the pushing force entirely.
Additionally, aggressive strumming or hard attack rolls can create enough lateral vibration to shift a bridge that is not firmly seated. If you play with a strong attack, make sure your bridge has adequate grip on the head using one of the friction methods covered in this post.
Does Your Banjo Head Type Affect Bridge Sliding?
Not all banjo heads are equally good at holding a bridge in place. The surface texture of the head makes a significant difference in how much friction exists between the head and the bridge feet. Understanding head types helps you choose the right solution for your specific setup.
Frosted heads, which have a rougher, matte texture on top, provide the most natural friction and are the least likely to allow bridge sliding. Most standard bluegrass banjos use a frosted head, and many players with frosted heads never experience significant bridge movement.
Clear heads and Renaissance-style heads have much smoother surfaces. The smoother the head surface, the less friction there is, and the more likely the bridge is to slide. Players using these head types almost always need to apply rosin, rubber cement, or beeswax to the bridge feet to compensate for the reduced natural grip.
If you have a smooth head and are experiencing persistent bridge sliding despite using friction treatments, you may want to consider switching to a frosted head. This is a more significant change, but it solves the root cause of the slipping rather than just managing the symptom. Deering Banjos confirms that head selection affects both tone and bridge stability, so consider the tonal impact of any head change before committing.
How String Gauge Affects Bridge Pressure and Stability
String gauge is another factor that influences how firmly the bridge stays in place. Heavier strings exert more downward pressure on the bridge because they carry more tension at the same pitch. This additional pressure translates directly into better bridge grip on the head. If you are currently using a very light string gauge and experiencing bridge movement, experimenting with a medium gauge set may help.
However, it is important to balance this consideration with playability. Heavier strings are harder to fret, can be tougher on the fingers, and may alter the feel of your instrument significantly. Do not jump to a dramatically heavier gauge just to fix a bridge problem without trying the friction-based solutions first. Those solutions are simpler and have no negative impact on playability.
Also make sure that your strings are seated properly in the bridge slots. If a string is riding up out of its slot, it changes the angle at which it presses on the bridge, which can reduce downward force unevenly and cause the bridge to tip or rock. Check each string slot to make sure the strings sit snugly and at the correct depth. For wound strings, the slot should be about half the string diameter deep. For plain strings, the slot can be cut slightly deeper.
When to Adjust or Replace Your Banjo Bridge Entirely
Sometimes a bridge that keeps sliding is doing so because the bridge itself has a problem. A warped, worn, or poorly made bridge may never stay in place no matter what friction methods you apply. Knowing when to replace the bridge rather than continuing to fix the same problem is an important part of banjo maintenance.
Inspect the bottom of the bridge feet. The feet should be flat and even so that they make full contact with the head surface. If the feet are rounded, worn unevenly, or warped, they will rock on the head and lose their grip under the slight vibrations of playing. Run a fingernail across the bottom of each foot. It should feel completely flat with no rocking motion when pressed against a hard surface.
Also check the bridge height. If the bridge is too short for your setup, the strings may not be pressing down at a steep enough angle to hold it in place. Bridges are available in heights ranging from half an inch to eleven sixteenths of an inch or taller. The 5/8-inch height is the most common on standard five-string banjos, but your instrument may benefit from a taller bridge if the string break angle is currently very shallow.
If you decide to replace the bridge, take the opportunity to choose a higher quality bridge made from dense, straight-grained maple with a solid ebony top. A better bridge will generally sit more firmly, transmit vibration more efficiently, and last significantly longer than a cheap replacement.
Step-by-Step Action Plan to Stop Your Bridge From Sliding
Now that you understand all the causes and fixes, here is a clear action plan that you can work through from start to finish. Follow these steps in order, and you should be able to solve even a persistent sliding bridge problem.
Step one: Check your string tension. Make sure all strings are at proper playing pitch before testing bridge stability. Low string tension is the single most common cause of a sliding bridge.
Step two: Check your tailpiece angle. The strings should press firmly down over the bridge. If the tailpiece is too high, lower it slightly to increase the break angle.
Step three: Verify correct bridge placement using the 12th fret harmonic method described earlier in this post. Confirm that the bridge is in its optimal intonation position before moving on.
Step four: Mark the correct bridge position with a light pencil line around the outside of the feet.
Step five: Apply rosin dust to the bottom of the bridge feet. Replace the bridge and test for stability.
Step six: If rosin alone is insufficient, try rubber cement or beeswax on the feet instead. Let rubber cement dry completely before placing the bridge.
Step seven: Check your head tension. Tap the head and listen for a clear, high tone. Tighten the head if necessary, then recheck bridge placement.
Step eight: Evaluate your playing technique. Adjust your right-hand anchor point away from the bridge itself.
Step nine: If the bridge drifts sideways, check neck alignment using the third string method.
Step ten: If none of the above solve the problem, inspect the bridge for warped feet or insufficient height and replace it if necessary.
Working through these steps systematically will pinpoint the exact cause of your specific problem and give you a lasting solution.
Maintenance Habits That Prevent Future Bridge Sliding
Prevention is always easier than repeated repair. Once you have fixed your sliding bridge problem, a few simple maintenance habits will keep it from becoming a recurring issue. The most important habit is checking bridge position every time you change strings. String changes disrupt the downward pressure on the bridge and are one of the most common times for the bridge to drift out of position.
Each time you install new strings, use the harmonic method to confirm and restore the correct bridge position before you start playing. This takes less than two minutes once you are familiar with the process, and it guarantees that your banjo sounds its best from the first note.
Also check bridge position after any head adjustment, after traveling with your instrument, and after the banjo has been stored for an extended period. Temperature and humidity changes can cause the head to tighten or loosen slightly, which affects bridge position. A quick check takes moments and prevents the frustration of playing out of tune without knowing why.
Re-apply rosin or beeswax to the bridge feet every few months, or sooner if you notice the bridge starting to shift again. These friction coatings do wear away gradually and need occasional refreshing to remain effective.
FAQs
Why does my banjo bridge keep moving when I play?
The most common reasons are insufficient string tension, a loose banjo head, a slippery head surface, incorrect bridge placement, or a heavy-handed playing technique. The bridge is a floating component held in place only by the downward pressure of the strings, so any reduction in that pressure allows it to shift.
Is it okay to glue my banjo bridge in place to stop it from sliding?
Gluing the bridge is generally not recommended. The floating bridge design allows for intonation adjustment and easy replacement. A small drop of rubber cement on the feet provides grip without permanently bonding the bridge, and it is far easier to remove than wood glue.
How do I know if my banjo bridge is in the right position?
Use the 12th fret harmonic method. Lightly touch the first and fourth strings at the 12th fret and produce a harmonic note, then compare it to the same string fretted at the 12th fret. Both notes should match in pitch. If the fretted note is sharp, move the bridge away from the nut. If it is flat, move the bridge toward the nut.
Can the type of banjo head cause my bridge to slide?
Yes. Clear and Renaissance-style heads have smooth surfaces that provide less friction than frosted heads. If you are using a smooth head, applying rosin or rubber cement to the bridge feet is especially important for keeping the bridge in place.
What is the best material to put on banjo bridge feet to prevent sliding?
Rosin dust is the most traditional and widely recommended option. Beeswax and thin rubber cement are also very effective. All three options increase friction without damaging the bridge or the head, and all are reversible.
How often should I check my banjo bridge position?
Check bridge position every time you change strings, after any adjustments to the head tension, and after the banjo has been stored or transported. Periodic checks during regular playing are also a good idea, especially if you notice any change in your banjo’s tone or intonation.
Does string gauge affect how stable the bridge is?
Yes. Heavier string gauges exert more downward pressure on the bridge, which increases stability. However, heavier strings also change playability and feel. Try friction-based solutions first before changing your string gauge to address bridge sliding.
What should I do if my bridge keeps drifting sideways no matter what I try?
Sideways drift is usually a sign of neck misalignment. Test this by slackening all strings, removing the bridge, and tensioning only the third string to see if it runs straight from the nut to the tailpiece. If it pulls to one side, a luthier may need to assess and correct the neck heel cut.

Hi, I’m Tessa! As a lifelong music lover and gear enthusiast, I started this blog to help fellow musicians navigate the overwhelming world of instruments and equipment. I spend my time researching, comparing, and reviewing musical gear so you can spend yours doing what matters most — making music.