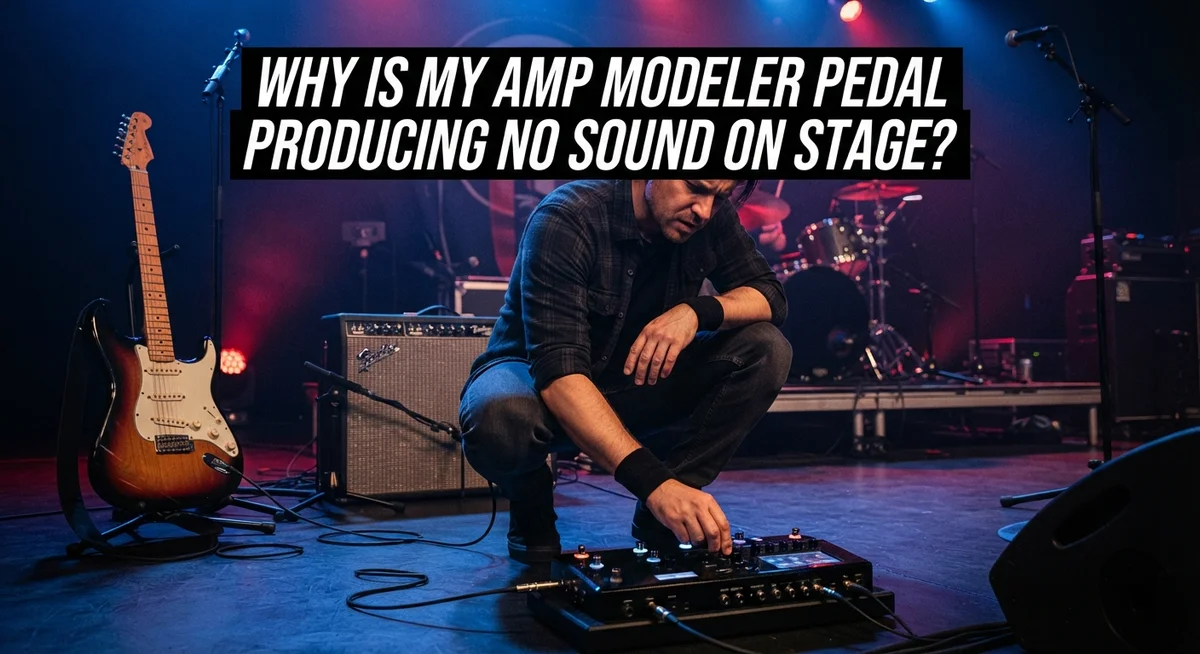
Why Is My Amp Modeler Pedal Producing No Sound on Stage?
Picture this. You step on stage, hit your amp modeler pedal, and nothing happens. No sound. No warning. Just silence in front of a waiting crowd.
This scenario happens more often than you think. Amp modeler pedals are powerful tools. But they can fail at the worst possible moment.
The good news? Most silent pedal issues come from simple, fixable problems. A dead battery. A loose cable. Backwards wiring. Even a volume knob turned down too low.
This guide walks you through the most common reasons your amp modeler goes silent on stage. We cover power supply issues, cable connection problems, and wiring mistakes that trip up even experienced players.
By the end, you will know exactly what to check before your next gig. No more guessing. No more panic. Just a clear plan to get your sound back and keep the show moving.
In a Nutshell
- Power issues top the list. A dead battery or wrong adapter often causes silence. Always check your power source first.
- Wiring direction matters a lot. Many players connect outputs to inputs by mistake. This backwards setup blocks all sound.
- Amp volume gets forgotten. It sounds simple, but low or muted amp volume is a common culprit. Check this before anything else.
- Cable connections cause trouble. Loose or faulty cables break your signal chain fast. Test each connection carefully.
- Blown fuses stay hidden. A fuse can blow without obvious signs. This quiet failure needs a direct check.
- One pedal at a time helps. Testing gear individually helps you isolate the real problem quickly. This method saves time during soundcheck.
How Amp Modeler Pedals Work in a Live Signal Chain
Your amp modeler pedal sits in the middle of your signal chain. Understanding how it connects to everything else helps you find the silent pedal problem fast.
The signal flow works like this: your guitar plugs into the pedal’s input jack. The pedal then processes your sound through its amp models and effects. Finally, the pedal’s output jack sends the signal to your amplifier or mixer. This chain must stay connected properly at every step.
Your power source feeds the pedal electricity. Without power, nothing happens. The pedal needs either a battery or an AC adapter to run its digital processing. No power means no sound, even if all cables look perfect.
Cable connections carry your signal through the chain. Each cable must connect firmly at both ends. A loose connection breaks your signal flow instantly. The pedal receives nothing from your guitar, or it sends nothing to your amp.
Wiring direction matters greatly. Your guitar’s output connects to the pedal’s input. The pedal’s output then connects to your amp’s input. Reversed connections block your signal completely. Check your cable labels and trace the path carefully.
Your amp volume sits separate from the pedal. The pedal can work perfectly while your amp stays muted or turned down low. This simple detail gets overlooked constantly on stage.
A blown fuse inside the pedal stops everything too. The fuse protects the pedal’s circuits but can fail without visible damage. You may need to open the pedal to inspect it.
Understanding this signal path helps you spot problems quickly. You know exactly where your sound should go at each step. This knowledge makes troubleshooting faster and gets you back to playing.
Checking Your Power Supply and Battery Status
Your power supply is the first thing to check when your amp modeler pedal goes silent. Start by verifying your pedal actually has power.
Look at your pedal’s LED indicator light. If it is not glowing, you likely have a power problem. Check whether you are using a battery or an AC adapter. If you use a battery, it may be dead. Replace it with a fresh one and test your sound immediately.
If you use an AC adapter, make sure it is plugged into a working outlet. Try plugging something else into that same outlet to confirm power is flowing. The outlet itself might be the issue, not your pedal.
Next, inspect your power adapter carefully. Verify it matches your pedal’s requirements. Using the wrong adapter voltage or polarity can prevent your pedal from powering on. Check the adapter cable for any visible damage, kinks, or frayed spots. A damaged cable stops power from reaching your pedal even if the outlet works fine.
Look inside your pedal’s power jack for loose connections. Sometimes the cable sits partially inserted and breaks your power circuit. Push the connector in firmly until you hear or feel it click into place.
Some pedals have internal fuses that protect against power surges. A blown fuse looks like a broken wire inside a small cylindrical tube. If you see one, you will need to replace it with the correct amperage fuse. Check your pedal’s manual for the exact fuse type and rating.
Power problems account for most silent pedal situations on stage. Spending two minutes checking these basics often solves your problem before you even need to troubleshoot cables or settings.
Inspecting Cable Connections and Wiring Direction
Your cables are the physical pathway for sound to reach your amp. When cables fail or connect incorrectly, your signal disappears completely.
Start by examining every cable connection on your pedal. Push each cable firmly into its jack. Sometimes vibration on stage loosens connections without you noticing. Wiggle each cable gently while your pedal is powered on. If sound suddenly returns, you found a loose connection.
Check the cable direction next. This is where most players make mistakes. Your guitar cable goes INTO the pedal’s input jack. Your output cable goes FROM the pedal’s output jack TO your amp. Reversed connections produce no sound at all. Look for labels on your pedal’s back panel. Input jacks and output jacks have different markings.
Inspect the actual cables for damage. Look for bent connectors, crushed sections, or exposed wires. A damaged cable stops sound even when connections look tight. Swap cables with another instrument to test this quickly.
Test your cable path step by step. Unplug your guitar from the pedal. Plug your guitar directly into your amp. If sound works now, your cable connections to the pedal are the problem.
Reconnect everything carefully. Match input to input and output to output. Use gentle pressure to seat each connector fully. Avoid forcing cables into jacks.
On stage, cable connections fail more often than you think. Movement, vibration, and repeated setup cause looseness. Make checking cables your second troubleshooting step after verifying power. This simple inspection solves most silent pedal situations quickly.
Step-by-Step Troubleshooting Process for Silent Pedals
When your amp modeler pedal goes silent on stage, follow this systematic approach to find the problem fast.
Start with your amp volume first. This seems obvious, but many players forget this step under pressure. Turn up your amp’s master volume knob. If sound appears, you found your answer. Move on only if the amp volume is already up.
Next, check your power source. Look at the LED indicator on your pedal. A dark screen means no power reaches the unit. If you use batteries, replace them with fresh ones. If you use an AC adapter, verify it plugs into a working outlet. Test the outlet with another device to confirm it works. Inspect the power jack on your pedal for loose connections or bent pins.
Examine all cable connections thoroughly. Wiggle each cable gently while listening for any sound. Loose connections create silence faster than anything else on stage. Look at both ends of every cable. Verify the cables are firmly seated in their jacks.
Check your wiring direction carefully. This is where most mistakes happen. Your guitar output goes to the pedal’s input. The pedal’s output goes to your amp’s input. Reversed connections produce no sound at all. Trace your signal path from guitar to amp step by step.
Test one cable at a time. Disconnect all cables except one. Plug your guitar directly into your amp. If sound works, reconnect your pedal to find which cable causes the problem.
Look inside your pedal for blown fuses. Many amp modelers have internal fuses that protect circuits. A blown fuse stops all power instantly. Check your pedal’s manual for fuse location and replacement instructions.
Common Mistakes That Cause No Sound Issues
Mistakes happen fast on stage, and they usually stop your sound. Understanding what goes wrong helps you fix problems quickly.
Backwards wiring is the most common mistake. Players connect output cables to input jacks by accident. Your signal cannot travel forward when connections are reversed. Always verify that cables leave your pedal’s output jack and enter your amp’s input jack. Check labels on every connection before you perform.
Using the wrong power adapter causes silent pedals too. Your amp modeler needs specific voltage and amperage. An adapter with incorrect specifications will not power your pedal properly. Some adapters look similar but deliver different electrical current. Match your adapter to your pedal’s exact requirements every time.
Neglecting to check amp volume is surprisingly common. Players focus on the pedal and forget about basic amp settings. Your amp volume knob must be turned up for sound to come through. This simple step saves you from unnecessary troubleshooting during a performance.
Poor cable connections damage your signal path without warning. Cables slip out of jacks during transport or setup. Loose connections create intermittent sound or complete silence. Push every cable firmly into its jack until you feel resistance. Wiggle connections gently to ensure they are secure.
Testing one pedal at a time isolates the real problem. Disconnect everything except one cable and your power source. This method reveals whether your pedal or your cables are faulty. Add one cable back at a time until you find the issue.
These mistakes are preventable with careful attention before you go on stage. Double check your setup during sound check. Verify connections, adapter type, and cable direction. Your performance depends on these simple checks.
Isolating the Problem: Testing Pedals One at a Time
Testing one pedal at a time is your fastest way to find where sound stops. This method eliminates guesswork and points directly to the problem.
Start by disconnecting all cables from your amp modeler except one. Keep only the cable running from your instrument to the pedal input. Leave the pedal output connected to your amp. Now play your instrument and listen carefully.
If you hear sound, the pedal works fine. Add the next cable in your chain one at a time. Play after each addition. This reveals exactly which cable or connection causes the silence.
If you hear nothing with just one cable, move to your power source. Check that your battery has charge or your adapter is plugged in properly. Look at the LED light on your pedal. A dark screen means no power reaches the unit.
Still silent? Test your single cable for damage. Wiggle it gently at both ends while playing. Listen for crackling or popping sounds. These indicate a broken wire inside the cable jacket.
Next, verify your cable direction is correct. Your instrument cable must go into the pedal input, not the output. The output cable goes from the pedal to your amp input, never to your amp output.
If one cable works but adding another causes silence, that second cable is faulty. Replace it before your next performance.
This step by step method saves you time on stage. You’ll know exactly which component failed instead of guessing randomly. Most players find their problem within five minutes using this approach.
Addressing Weak Tone and EQ Issues on Stage
When your amp modeler pedal sounds weak or the tone feels off on stage, EQ adjustment is your first solution. Amp modelers often produce thin, brittle highs and weak midrange frequencies that don’t cut through live sound.
Start by checking your pedal’s built in EQ settings. Most modelers have three band or five band equalizers you can adjust. Turn down the high frequencies slightly if your tone sounds too sharp or piercing. Boost your midrange around 1kHz to 3kHz to add warmth and presence that cuts through stage noise.
Your amp’s master volume matters too. A quiet amp volume combined with weak pedal output creates poor tone quality. Increase your amp volume gradually while adjusting the pedal’s output level. This gives you cleaner signal flow without distortion.
Cable quality affects your tone significantly. Poor quality cables introduce noise and lose high frequency content. Damaged cables create thin, weak sound even when your pedal works perfectly. Inspect each cable for visible damage or kinks.
The stage environment changes how your tone sounds. Reflective surfaces bounce sound waves differently than your practice space. Your ears hear the tone differently from stage position versus audience position. Adjust your EQ settings to sound good from where you stand, not from the audience area.
Test your tone before performing. Arrive early and run through your settings with the actual stage setup. This prevents weak tone surprises during your set. Small EQ adjustments make huge differences in live sound quality.
Preventing Future On-Stage Sound Failures
Sound failures on stage are stressful, but you can prevent them with smart planning. Start by creating a pre show checklist that you follow every single time before performing. This checklist should cover power, cables, and basic settings.
Check your power source first. Verify your battery has charge or your AC adapter is plugged in correctly. Test this at home before load in. Bring backup batteries and a spare power adapter to every gig. Dead power is the silent killer that stops your sound instantly.
Inspect all cables thoroughly before you leave home. Look for visible damage, frayed ends, or bent connectors. Replace any cable that looks worn or questionable. Test each cable by connecting it and listening for signal. A bad cable ruins your entire rig, so this step matters.
Label your cables clearly. Use tape or markers to identify which cable goes where. This prevents backwards wiring when you’re setting up quickly on stage. Clear labels save you minutes and headaches.
Keep your connections tight. Loose cables create intermittent sound loss that feels random but isn’t. Push connectors all the way in until they click or seat fully. Check connections again right before you perform.
Arrive early to your venue. Set up your entire rig and run through a full sound check. Play through your amp modeler pedal for several minutes. Listen for dropouts or weak signal. This early arrival gives you time to fix problems before the show starts.
Store your pedal safely between gigs. Protect it from temperature changes and physical damage. A damaged pedal fails when you need it most.
Final Thoughts
Silence on stage feels scary. But most amp modeler problems have simple fixes.
Power issues, wiring mistakes, and loose cables cause almost every silent pedal. You now know how to check each one.
Start with the basics every time. Check your amp volume first. Then look at your power source and cable connections.
Backwards wiring trips up even experienced players. Always double check that outputs connect to inputs correctly.
Testing one pedal at a time saves you from panic. This method finds the broken link fast, even during a soundcheck rush.
Tone problems differ from silence problems. Weak mids and harsh highs need EQ adjustments, not troubleshooting steps.
Your pedal’s built in EQ and your amp’s settings work together. Small tweaks fix most tone complaints on stage.
Preparation beats panic every single time. Check your gear before you leave home. Label your cables so you never guess again.
Arrive early to test your full setup at the actual venue. This single habit prevents most surprises during your set.
Keep spare cables and a backup power adapter in your bag. These small items save entire shows.
Your amp modeler pedal is a tool, not a mystery. Understanding how signal flows through your gear gives you confidence.
Sound problems happen to every musician at some point. The difference is how fast you recover.
Practice these checks until they become second nature. Soon you will diagnose issues in seconds, not minutes.
Trust your troubleshooting process. Your gear will work when you prepare it properly and test it before every show.
Frequently Asked Questions
Why does my amp modeler pedal have no sound even though it’s powered on?
Several issues could cause this problem. Your amp’s volume knob might be turned down all the way. Check that first. Next, verify your cables are plugged into the correct ports. Output cables should connect to your amp’s input, not the other way around. Reversed connections are a common mistake that causes complete silence.
Also inspect each cable for visible damage or loose connections at both ends. A single loose cable stops all sound instantly.
How do I know if my power supply is the real problem?
Test your power source by checking the battery indicator on your pedal if it uses batteries. If you’re using an AC adapter, make sure it’s the correct type for your specific pedal model. Look for a blown fuse inside your power connection area. A blown fuse looks burned or discolored.
If you suspect a battery issue, replace it with a fresh one and test again. For AC adapters, verify the cable is fully plugged into both the wall outlet and your pedal.
What should I do if only one cable works but adding a second cable causes silence?
The faulty cable is your culprit. Test each cable individually by connecting it to your pedal one at a time. When you find the cable that causes silence, remove it from your setup. This isolation method quickly identifies bad cables without guessing.
Keep spare cables in your gig bag to swap out quickly during a performance.
Can a blown fuse cause my pedal to stop working on stage?
Yes, a blown fuse cuts power to your entire pedal instantly. Check your pedal’s fuse compartment, usually located near the power input. If the fuse looks dark or burned, it needs replacement. Always carry spare fuses that match your pedal’s specifications.

Hi, I’m Tessa! As a lifelong music lover and gear enthusiast, I started this blog to help fellow musicians navigate the overwhelming world of instruments and equipment. I spend my time researching, comparing, and reviewing musical gear so you can spend yours doing what matters most — making music.