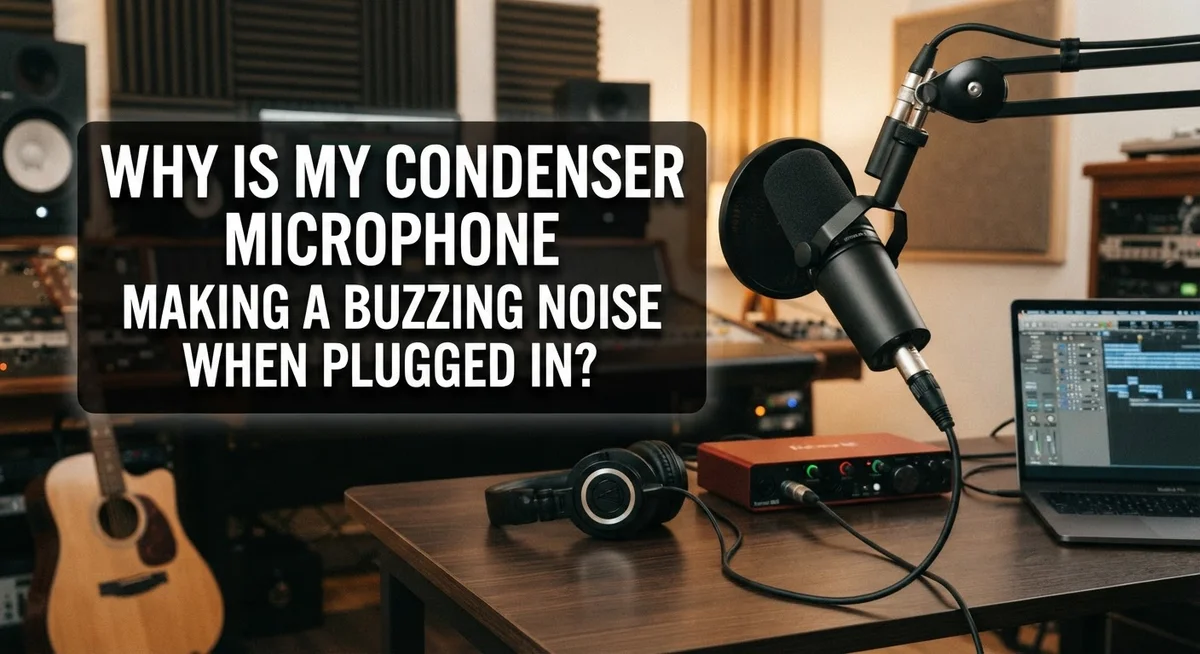
Why Is My Condenser Microphone Making a Buzzing Noise When Plugged In?
You plug in your condenser microphone. You get ready to record. Then you hear it, an annoying buzz in the background.
This problem happens to many people. It can turn a good recording session into a frustrating one.
The good news? This issue usually has a simple explanation. Buzzing noise often points to a grounding problem, not a broken microphone.
In this article, we will explore why this buzzing happens. We will look at the main causes behind this annoying noise.
By the end, you will know how to diagnose the issue yourself. You will also learn practical steps to stop that buzz for good.
Let’s get your microphone working clearly again.
In a Nutshell
- Grounding issues cause most buzzing noises. A loose connection at the microphone grill often triggers this problem.
- Touch the test. If touching your mic or PC stops the buzz, you likely have a grounding issue.
- Check your cables first. Loose or damaged cables are a common and easy fix.
- Ground loops create hums too. These happen when multiple devices share power sources incorrectly.
- Room noise can fool you. Sometimes the buzz comes from environmental sources, not your gear.
- Small grill adjustments help. A slightly deformed grill can lose proper contact and cause noise.
- Windows sound settings offer clues. Enabling mic monitoring helps you isolate where the noise starts.
- Don’t skip the basics. Many people replace equipment before checking simple grounding problems.
Common Causes of Condenser Microphone Buzzing
Condenser microphones create buzzing sounds for several specific reasons. Understanding these causes helps you fix the problem quickly.
Loose grounding connections rank as the most common culprit. Your microphone’s metal grill must make solid contact with the body. When this connection loosens, electrical interference sneaks in and creates that annoying buzz. Even tiny gaps cause problems.
Ground loops happen when your audio equipment connects to power sources in ways that create competing electrical paths. Imagine electricity flowing in circles instead of straight lines. This circular flow produces a distinctive hum or buzz through your microphone. Multiple devices plugged into different outlets can trigger this issue.
Faulty cables introduce noise into your signal chain. Damaged wires, loose connectors, or poor quality cables let interference slip through. A cable that works fine one day might develop internal breaks the next. Always inspect both ends of your cable for corrosion or bent pins.
Environmental interference comes from devices around your recording space. Cell phones, WiFi routers, fluorescent lights, and computer monitors emit electromagnetic signals. Your sensitive condenser microphone picks up these signals easily, especially if cables run near these devices.
Self noise from your equipment can sound like buzzing too. Some microphones and audio interfaces generate inherent electrical noise. This happens more often with cheaper or older gear, but quality equipment isn’t immune.
Room background noise sometimes masquerades as a microphone problem. Low frequency hums from HVAC systems or electrical appliances might seem like your mic is broken. Pay attention to whether the noise changes when you move the microphone or adjust your room’s equipment.
The key is testing systematically. Start by checking physical connections. Then isolate your microphone from other devices. Move cables away from electronics. This process reveals which cause applies to your specific situation.
How Grounding Issues Trigger Buzzing Noise
Grounding issues create electrical paths that shouldn’t exist. When these paths form, your microphone picks up unwanted electrical signals. The result? That annoying buzzing sound you hear.
Your condenser microphone needs proper electrical grounding to work cleanly. The microphone grill contacts the internal components and creates an electrical connection. If this contact becomes loose or weak, grounding fails. Electrical interference then flows into your audio signal instead of safely away.
Ground loops happen when your microphone, audio interface, and computer all connect to different power outlets. Each device tries to complete its own electrical circuit. These competing circuits create a hum or buzz at 50 or 60 Hz (depending on your country’s power standard). The frequencies mix together and sound like buzzing noise.
A simple test reveals if grounding is your problem. Touch the metal grill of your microphone with your finger. If the buzzing stops or reduces, you have confirmed a grounding issue. Your body becomes a temporary ground path. This proves the problem sits in your physical connections, not your microphone’s electronics.
Loose connections at the XLR cable are frequent culprits. The connector pins inside may not seat fully in the socket. Dirt or corrosion on the pins blocks proper contact. Even slight movement of the cable can interrupt grounding and trigger buzzing.
The microphone grill itself can become deformed over time. Dents or bends prevent the grill from touching the microphone body properly. This breaks the grounding connection at the source. You may need to gently adjust the grill to restore contact.
Check every connection point along your audio chain. Inspect where cables plug into your microphone, audio interface, and computer. Tighten any loose connectors by hand. Replace any cables that show visible damage or corrosion. These simple physical checks often eliminate buzzing without any other intervention needed.
Step-by-Step Guide to Diagnosing the Buzzing Sound
Start your diagnosis by listening carefully to the buzzing sound. Pay attention to when it happens. Does it occur constantly, or only during certain times? Does it change volume when you adjust your microphone position?
Next, perform a simple touch test. While recording or monitoring your mic, gently touch the metal grill of your microphone with your finger. If the buzzing stops or decreases when you make contact, you have found a grounding problem. This tells you the issue is electrical, not mechanical.
Now check every cable connection. Inspect where your XLR cable connects to both the microphone and your audio interface. Look for loose connectors or bent pins. Gently wiggle each connection point while listening. If the noise changes or disappears, you found a loose cable.
Examine your microphone grill for physical damage. Run your fingers around the edges to feel for dents or deformation. A grill that no longer sits flush against the microphone body can break the electrical connection needed for proper grounding.
Test your cables independently. Try using a different XLR cable if you have one available. Sometimes cable damage is invisible but still causes buzzing. This simple swap can confirm whether the cable itself is the problem.
Listen for environmental sources. Move away from your computer, router, or other electronic devices. If the buzzing follows you, it likely comes from your equipment. If it stays in one location, external interference may be responsible.
Finally, enable microphone monitoring in your system settings. This lets you hear exactly what your microphone is picking up without recording. You can then identify whether the buzz originates from your mic or from background noise in your room. This step isolates the problem quickly and saves you time troubleshooting the wrong areas.
Checking Cables and Connections for Faults
Loose cables and poor connections are often the first place to check when your condenser microphone buzzes. Start by examining your XLR cable where it connects to both the microphone and your audio interface. Push each connector firmly into its socket. Sometimes a cable sits partially inserted, creating intermittent contact that produces noise.
Look closely at the cable itself along its entire length. Bend it gently while listening through headphones to see if the buzzing changes or stops. This reveals whether the cable has internal damage. Damaged wires inside the sheath can cause electrical interference that sounds like buzzing.
Check the connection at your audio interface next. The input port should feel snug and secure. If it feels loose or wiggly, the interface port may need attention. Try a different cable in the same port to determine if the port itself is faulty.
Inspect both ends of your XLR connector for bent pins or corrosion. Bent pins prevent proper electrical contact. Corrosion appears as white, green, or blue discoloration on the metal contacts. Clean corroded connectors gently with a dry cloth or specialized contact cleaner.
Don’t overlook the power supply cable for your audio interface. A loose power connection can introduce ground noise into your entire system. Ensure this cable is fully seated in both the interface and the wall outlet.
Test with a different cable if you have one available. This quickly tells you whether your current cable is the problem. Many buzzing issues disappear once you swap in a known working cable.
After checking connections, listen carefully to identify whether the buzzing changed at all. If it stopped completely, you found your culprit. If buzzing persists, move on to testing other potential causes like grounding issues or environmental interference.
Inspecting the Microphone Grill and Internal Grounding
The microphone grill protects internal components while allowing sound waves to enter. Over time, physical deformation or loose internal grounding contacts can trigger buzzing noise.
Start by examining your grill visually. Look for dents, bends, or visible damage that might affect how internal components connect electrically. Even small deformations can disrupt grounding pathways inside your microphone.
Gently press on different areas of the grill while listening to your audio output. If the buzzing stops or changes when you apply pressure, you’ve likely found a grounding contact issue. This simple test confirms that physical contact matters to your electrical circuit.
Check where the grill connects to the microphone body. These connection points often accumulate dust or corrosion over time. Use a soft, dry cloth to gently clean around the grill edges and the body connection points.
If buzzing persists after cleaning, the internal grounding contact may have shifted. Some condenser microphones allow you to carefully access internal components. Consult your microphone’s documentation to see if disassembly is possible without voiding warranties.
If you do open your microphone, look for any loose screws, springs, or metal contact points. The grounding wire or spring that touches the grill might have moved out of position. Gently adjust these components back into contact, ensuring they touch both the grill and the microphone body.
Never force any internal parts. Microphone components are delicate and sensitive to pressure. Reposition components slowly and carefully.
After inspection and any adjustments, reassemble your microphone completely. Plug it back in and test the audio output. The buzzing should reduce or disappear if grounding contact has been restored.
If buzzing continues after grill inspection and internal checks, the problem likely exists elsewhere in your signal chain. Move forward with testing other components like cables, your audio interface, or environmental interference sources.
Using Windows Sound Settings to Isolate the Problem
Windows Sound Settings give you a direct way to hear what your microphone is actually capturing. This helps you figure out if the buzzing comes from your mic itself or from something else in your setup.
Open your Windows Sound Settings by right clicking the speaker icon in your system tray. Select “Sound settings” from the menu. Scroll down until you find the “Input” section. Your microphone should appear in the list of available input devices.
Click on your condenser microphone to select it. Look for an option that says “Microphone” or shows your device name. Below that, you should see a button or toggle labeled “Mic monitoring” or “Listen to this device.” Enable this feature.
Once you turn on mic monitoring, you will hear exactly what Windows is recording from your microphone. This is your golden tool for isolation. The buzzing sound will come through your speakers or headphones in real time.
Pay close attention to what you hear. Does the buzzing stay constant, or does it change when you move the microphone cable? Does it get louder when you touch the microphone grill? Does it stop completely when you hold the cable at a certain spot?
These observations tell you important information. Constant buzzing suggests electrical interference. Buzzing that changes with cable movement points to a loose connection. Noise that stops when you touch the grill confirms a grounding problem.
Important note: Keep your speaker volume low during this test. Mic monitoring can create feedback if the volume gets too high. You only need to hear the buzzing clearly enough to analyze it.
After you finish testing, disable mic monitoring to avoid feedback during normal recording. Your Windows Sound Settings now serve as your diagnostic tool, letting you pinpoint exactly where your problem originates before you try any physical fixes.
Mistakes to Avoid When Troubleshooting Mic Noise
When troubleshooting your buzzing condenser microphone, avoid these common mistakes that waste your time and delay a real fix.
Don’t skip the basics. Many people jump straight to replacing equipment when the problem sits in a loose cable or connector. Take five minutes to wiggle each connection point while listening to your audio output. A simple reconnection often solves the issue completely.
Avoid assuming your microphone is broken. Buzzing typically means an electrical grounding problem, not a failed microphone. Your mic likely works perfectly once you fix the grounding issue. Rushing to buy new gear wastes money when your current setup just needs adjustment.
Don’t ignore the grill contact point. This is where many people miss the real culprit. The grounding connection at your microphone grill can shift over time or get blocked by dust. Test this by gently pressing on your grill while monitoring audio. If the noise changes or stops, you found your problem. Skipping this check means you’ll keep troubleshooting other areas that aren’t causing your issue.
Never force internal components open. If you decide to inspect inside your microphone, be extremely gentle. Microphone parts are delicate and sensitive to pressure. Forcing anything can cause permanent damage that actually breaks your microphone.
Avoid testing without proper monitoring. Use your Windows Sound Settings to enable mic monitoring. This lets you hear exactly what your microphone captures. Testing without this feature means you’re guessing about what’s actually happening. You might miss important clues about whether your buzzing is electrical interference, environmental noise, or a grounding problem.
Don’t overlook cable quality. A damaged cable causes problems even if connections look tight. Physical damage inside the cable creates electrical noise. Always inspect the entire cable length for kinks, cuts, or worn spots before assuming something else is wrong.
Final Thoughts
Buzzing noise from your condenser microphone feels frustrating. But now you understand what causes it.
Grounding issues create most buzzing problems. Loose grill contacts, damaged cables, and poor connections are the usual suspects.
Your microphone probably works fine. The real problem often hides in small physical details you can fix yourself.
Start with simple checks before assuming the worst. Test your cables first. Press gently on the grill while listening. These quick steps save you time and money.
Physical contact stopping the buzz tells you everything. This confirms a grounding issue rather than mic failure. You do not need a replacement microphone.
Windows Sound Settings gives you clear answers too. Mic monitoring lets you hear exactly what your microphone captures. This helps you pinpoint the noise source quickly.
Remember to stay patient during this process. Electrical issues sometimes take a few tries to identify correctly.
Avoid rushing to conclusions. Many people replace their microphone when a simple cable swap would fix everything. Check the basics first every time.
Environmental noise plays a role too. Your room, nearby electronics, and even lighting can add unwanted hum. Rule these out during your testing.
If you open your microphone, handle everything gently. Internal parts are delicate and sensitive to pressure. Rushing this step can create new problems.
Grounding problems are common with condenser microphones. This does not mean your equipment is faulty or low quality. It simply means one connection point needs attention.
Most buzzing issues resolve with basic troubleshooting. Check your cables, inspect your grill, and test your settings. These three steps solve the majority of cases.
Trust the process and work through each step calmly. Your microphone will likely work perfectly once you identify the loose connection or grounding problem causing the noise.
Frequently Asked Questions
Why does the buzzing stop when I touch my microphone?
When buzzing stops after you touch the microphone, this points directly to a grounding problem. Your body carries electrical charge. When you make contact with the microphone, you complete a grounding path. This eliminates the electrical imbalance causing the buzz.
This is actually helpful information. It tells you the microphone itself works fine. The issue lives in your setup, not the equipment.
Can loose cables really cause buzzing sounds?
Yes, absolutely. Loose cables are one of the most common causes of microphone buzzing. A cable that isn’t fully connected allows electrical interference to enter your audio signal.
Check both ends of your cable. Push connectors in firmly. Look for visible damage or bent pins. Sometimes the solution is this simple.
What’s the difference between buzzing and background noise?
Buzzing is a consistent electrical hum or buzz tone. Background noise includes room sounds like air conditioning, fans, or traffic. Buzzing typically stays the same pitch and volume. Background noise changes and varies.
Use mic monitoring to hear what your microphone captures. This helps you identify which problem you actually face.
Should I open my microphone to fix the buzzing?
Only open your microphone if you’re comfortable working with delicate electronics. The grill contact point sometimes causes issues. If you decide to look inside, work gently and carefully.
Many buzzing problems fix themselves through cable checks and grounding solutions first. Try those steps before opening anything.
Is my condenser microphone broken if it buzzes?
Probably not. Buzzing almost always means an electrical grounding issue, not a failed microphone. Your microphone likely works perfectly fine.
Start with simple fixes. Check connections. Inspect cables. Test grounding. Most buzzing problems disappear after these basic steps.

Hi, I’m Tessa! As a lifelong music lover and gear enthusiast, I started this blog to help fellow musicians navigate the overwhelming world of instruments and equipment. I spend my time researching, comparing, and reviewing musical gear so you can spend yours doing what matters most — making music.