How to Adjust the Truss Rod on a Semi-Hollow Body Electric Guitar?
Does your semi-hollow guitar feel harder to play than it used to? Maybe the strings buzz near the first few frets. Or perhaps they sit too high above the fretboard now.
The problem often comes down to one small part inside your neck. It’s called the truss rod. This metal rod controls the neck’s curve, also known as relief.
A tiny adjustment can transform how your guitar feels and plays. But many players feel nervous about touching this part of their instrument. Semi-hollow bodies add another layer of concern since their construction differs from solid body guitars.
This guide walks you through the entire process step by step. You will learn how to spot the signs that signal you need an adjustment. We cover the exact tools required, including the right nut driver size.
By the end, you will feel confident making these adjustments yourself. Small, careful turns make all the difference here.
In a Nutshell
- Truss rod adjustments control neck relief. Turning the rod changes how much your neck bows forward or back, which affects playability.
- Direction matters. Turn the rod counter clockwise to loosen it and add relief. Turn it clockwise to tighten it and reduce relief.
- Use the right tool. A 1/4 inch thin walled nut driver fits most truss rods. A magnetic tip screwdriver without the tip also works well.
- Small turns make a big difference. Always adjust in tiny increments. A quarter turn can change your setup more than you expect.
- Watch for warning signs. Check your neck for backbow or too much relief before you decide to adjust anything.
- Avoid common mistakes. Never over tighten the rod. This can damage or break your neck. Skip large single turns and always use the correct tool size.
- Check periodically. Semi-hollow bodies can shift with humidity and temperature. Regular checks keep your guitar playing smoothly.
Understanding the Truss Rod and Neck Relief
The truss rod sits inside your guitar neck and controls how much your neck bows forward or backward. This forward bow is called neck relief. A small amount of relief is good because it gives your strings room to vibrate without buzzing against the frets.
Your semi-hollow body guitar’s neck can shift over time. Temperature changes and humidity swings make wood expand and contract. These shifts affect how straight your neck stays. The truss rod lets you compensate for these natural movements.
Understanding relief helps you know when adjustment is needed. Positive relief means your neck bows forward slightly, creating a gentle curve. This curve prevents buzz on the lower frets. Backbow happens when your neck curves backward instead. This makes the higher frets feel too high and uncomfortable to play.
Most semi-hollow guitars need just a tiny bit of relief. Too much relief makes your action feel high and playing becomes tiring. Too little relief causes the dreaded fret buzz that ruins your tone.
The truss rod works like a lever inside your neck. When you turn it one direction, you tighten the rod and reduce relief. When you turn it the other way, you loosen the rod and add relief. Think of it as a seesaw that balances the wood’s natural tendency to bow.
Before you touch anything, inspect your neck carefully. Look down the side of your guitar neck toward a light source. You will see if your neck has too much curve, too little curve, or just the right amount.
Semi-hollow bodies need periodic checks because their larger bodies experience different wood movement than solid guitars. The hollow chambers allow more air circulation inside, which affects how humidity impacts the wood. Regular inspections help you catch problems early before they affect playability.
Signs Your Semi-Hollow Body Guitar Needs a Truss Rod Adjustment
Your semi-hollow body guitar sends you clear signals when the truss rod needs adjustment. Learning to spot these signs keeps your instrument playing smoothly.
Fret buzz is the most obvious warning sign. When you play open strings or fretted notes, listen for a rattling sound. This buzz happens when strings vibrate against frets they shouldn’t touch. If buzz appears mainly on the first few frets, your neck likely has too much relief or a backbow. The truss rod can fix this issue.
Difficulty playing higher up the neck suggests a problem too. If your guitar feels uncomfortable when you reach the 12th fret and beyond, the neck angle may have shifted. Your hand position changes, and suddenly playing feels awkward or requires extra finger pressure. This discomfort often points to neck relief issues.
High action near the first frets is another clue. When strings sit too far from the fretboard at the beginning of the neck but feel normal further down, relief has likely changed. You’ll notice this immediately when playing open chords.
Dead or muted notes without buzzing can also indicate problems. Some strings sound flat or lack resonance compared to others. This happens when the neck bends in ways that affect string vibration patterns.
Neck appearance changes matter too. Stand your guitar on a table and look down the fretboard from the headstock end. You should see a slight forward bow. If the neck looks perfectly straight or bows backward, adjustment is needed.
Temperature and humidity changes affect semi-hollow bodies significantly. Seasonal shifts cause wood movement. Check your neck every few months, especially when seasons change. This preventative approach catches problems early.
Pay attention to how your guitar feels and sounds during regular play. Small changes in comfort or tone often mean your neck needs attention.
Tools You’ll Need for a Safe Adjustment
Before you start adjusting your truss rod, gather the right tools. This prevents damage and makes the job much easier.
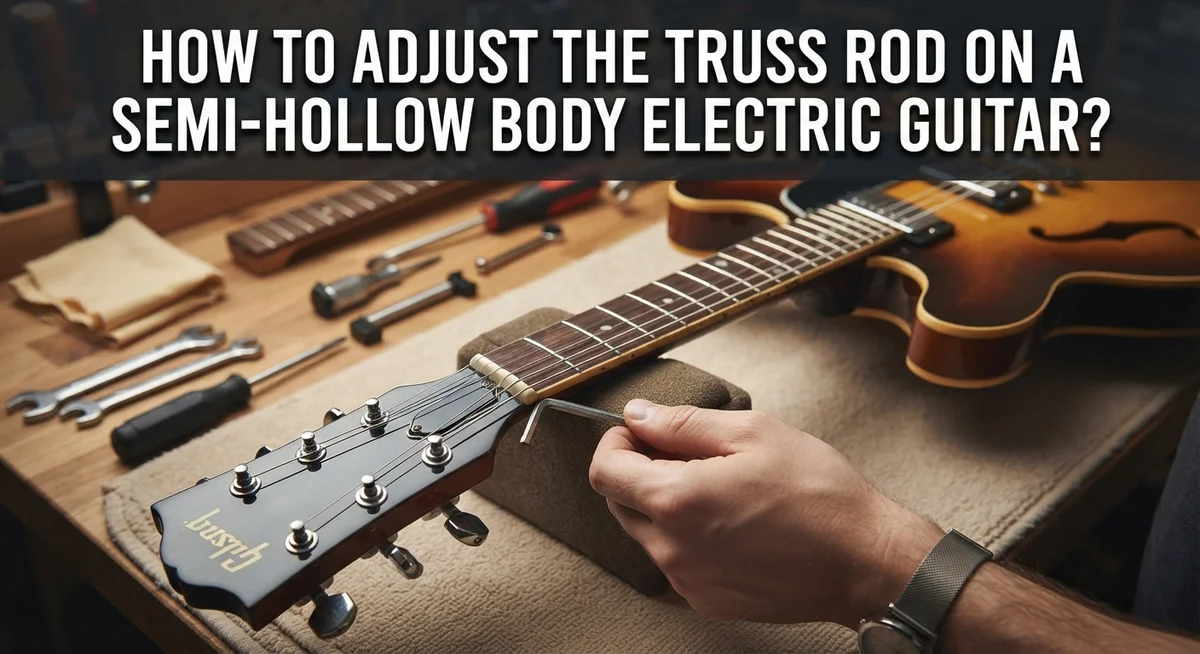
The most important tool is a 1/4 inch thin walled nut driver. This fits the truss rod nut on most semi-hollow body guitars. A magnetic screwdriver tip works well too if you don’t have a nut driver. The magnetic feature helps you hold the tool steady while turning.
You’ll also need a straightedge to check your neck properly. A metal ruler or a dedicated neck straightedge works great. Place it along the frets to see if your neck has relief or backbow. This tells you exactly what adjustment you need to make.
A capo is helpful for your inspection process. Place it on the first fret, then sight down the neck from the headstock end. This shows you the true shape of your neck without string tension affecting it.
Keep a small flashlight nearby. You need good light to see inside the truss rod access area, especially on semi-hollow bodies where the access point can be tricky to reach. Some guitars have the adjustment at the headstock while others hide it at the body end.
Never use power tools or oversized wrenches. These cause stripped nuts and broken necks. A properly fitting hand tool gives you control and feel. You can sense when you’ve turned enough and stop before causing problems.
Have a notebook handy to write down your starting point. Record how many turns you make and in which direction. This helps you track changes and return to the original position if needed.
Finally, work on a clean, flat surface where your guitar stays stable. A guitar stand or work mat prevents accidental drops. Taking time to gather everything upfront makes the adjustment process safe and straightforward.
Step-by-Step Guide to Adjusting the Truss Rod
Start by positioning your guitar on a flat, stable surface. Rest the body on a pillow or soft cloth to prevent scratches. Make sure you have good lighting so you can see the truss rod nut clearly.
Locate the truss rod access point on your semi-hollow body. Most models have the nut at the headstock, either on the front or back. If you cannot find it, check your guitar’s manual for the exact location.
Insert your 1/4 inch thin walled nut driver into the truss rod nut. A magnetic screwdriver tip works well here. Make sure the tool fits snugly without forcing it. Forcing a wrong size tool strips the nut and damages your guitar permanently.
Make your first adjustment in very small increments. Turn the tool only one quarter turn at a time. Remember that counter-clockwise adds relief (more bow), while clockwise reduces relief (straightens the neck).
After each quarter turn, remove the tool and wait a moment. The wood needs time to respond to the change. Check your neck with your straightedge to see the progress.
Never make large adjustments in a single turn. Many players damage their necks by turning too aggressively. Your semi-hollow body guitar has a delicate balance between the truss rod tension and the wood itself.
If you feel resistance while turning, stop immediately. Do not force the tool further. Excessive resistance means you have reached the limit or something is wrong.
Keep detailed notes about each adjustment you make. Write down how many quarter turns you completed and what you observed. This record helps you understand your guitar’s needs over time.
Work slowly and patiently. Truss rod adjustment is not a race. Taking your time prevents costly mistakes and keeps your semi-hollow body playing beautifully for years to come.
Special Considerations for Semi-Hollow Body Construction
Semi-hollow body guitars have unique structural features that affect truss rod adjustment. The body design creates different stress patterns compared to solid body guitars.
The semi-hollow construction means your neck experiences different tension forces. Air chambers inside the body affect how vibrations travel through the instrument. This influences how quickly you’ll notice changes after adjusting the truss rod. Your semi-hollow body may need more frequent checks than solid guitars.
Wood movement happens faster in semi-hollow designs. The open cavities allow air to circulate inside the body more freely. Temperature and humidity swings impact the neck differently than in solid instruments. You should monitor your guitar’s neck more regularly.
Access to the truss rod might be trickier on some semi-hollow models. Some designs place the adjustment point at the headstock. Others hide it under the pickguard or inside the f-hole. Check your specific guitar’s manual to find the exact location. You may need to remove hardware or position the guitar at an angle to reach it comfortably.
The thinner body walls mean you need extra care during adjustment. Forcing the tool or making jerky movements can damage the internal structure. Work slowly and deliberately with smooth, controlled turns.
Semi-hollow bodies often have slightly different neck geometry too. The neck may be slightly thinner or have different bracing underneath. This affects how much relief adjustment actually changes your playability. Small turns matter even more on these instruments.
Always work in a climate controlled space when adjusting semi-hollow guitars. Let your guitar sit for 24 hours after adjustment before evaluating the results. The wood needs time to settle into its new position. Semi-hollow bodies take longer to stabilize than solid guitars.
Keep detailed records of your adjustments. Note the date, temperature, humidity level, and how many turns you made. This information helps you spot patterns over time. You’ll develop better instincts for maintaining your specific guitar.
Common Mistakes to Avoid During Adjustment
Over tightening the truss rod is the most dangerous mistake you can make. When you turn the rod too tight, you risk cracking or breaking your neck completely. This damage is often permanent and very expensive to repair.
Making large adjustments in a single turn causes serious problems. Your neck needs time to respond to changes. Turn the rod only a quarter turn at a time, then wait several minutes before checking your progress.
Using the wrong tool size strips the truss rod nut quickly. An oversized wrench or screwdriver damages the nut’s edges. This makes future adjustments nearly impossible. Always use the correct 1/4 inch thin walled nut driver for your semi hollow body guitar.
Forcing the tool when you feel resistance is another common error. If the nut won’t turn smoothly, stop immediately. Resistance means something is wrong. Pushing harder can snap the rod inside your neck. Back off and reassess your approach.
Skipping the inspection step leads to unnecessary adjustments. Many players adjust their truss rod without checking if adjustment is actually needed. Inspect your neck first using a straightedge and capo. This tells you exactly what correction is required.
Adjusting in cold or humid conditions causes problems later. Wood expands and contracts with temperature and moisture changes. Your adjustment may seem perfect today but wrong tomorrow. Always work in a climate controlled space.
Ignoring your starting point leaves you confused during the process. Write down exactly where the nut was before you started. This helps you track your progress and return to the original position if needed.
Finally, making adjustments too frequently wears out the truss rod mechanism. Semi hollow body guitars need periodic checks, but constant tweaking causes wear. Give your guitar at least a week between major adjustments to let the wood settle properly.
Troubleshooting Persistent Neck Issues
When your semi-hollow body guitar develops persistent neck issues, the truss rod becomes your main tool for fixing them. Recognize the problem first by checking if your neck has excessive relief or a backbow. Excessive relief means the neck curves forward too much. A backbow means it curves backward.
Place your guitar on a flat surface and sight down the neck from the headstock. You should see a very slight forward curve. If the curve is dramatic or reversed, adjustment is needed.
Start with small turns only. Quarter turns are your friend here. After each quarter turn, remove your tool and wait a few minutes. This pause lets the wood settle and respond to the change. Never rush this process or make large adjustments in one session.
If you feel resistance while turning, stop immediately. Pushing through resistance can crack your neck or strip the nut. A slight resistance is normal, but grinding or hard stopping means something is wrong.
Document everything you do. Write down the date, how many quarter turns you made, and in which direction. This record helps you track progress and avoid repeating mistakes. It also helps if you need to return to a previous setting.
Semi-hollow bodies need extra patience because their construction affects how the neck responds to adjustment. The air chambers inside the body create different tension patterns than solid body guitars. This means changes take slightly longer to fully settle.
Wait at least 24 hours after your final adjustment before evaluating results. Your neck needs time to stabilize in its new position. If problems persist after proper adjustment, you may have structural issues that require professional repair rather than simple truss rod work.
Final Thoughts
Adjusting the truss rod on your semi-hollow body guitar does not have to feel scary. Small steps and patience make the whole process simple. You just need the right mindset and a bit of care.
Remember that your guitar’s neck reacts to more than just the truss rod. Temperature, humidity, and string tension all play a part. Semi-hollow bodies respond a little differently than solid bodies, so give your instrument time to adjust.
Always trust your eyes and hands over guesswork. Sight down the neck before and after every change. This simple check tells you if your adjustment worked or if you need another small turn.
Never rush this process. A guitar neck moves slowly, and rushing leads to mistakes. Waiting 24 hours between adjustments protects your instrument and gives you accurate results.
Keep your tools simple and correct. A properly sized nut driver or screwdriver tip prevents stripped nuts and frustration. Using the wrong tool creates problems that take longer to fix than the original issue.
Write down what you do each time you adjust the rod. This record helps you track patterns and avoid repeating mistakes. It also helps you understand how your specific guitar behaves over time.
If you ever feel unsure or meet strong resistance, stop right away. Forcing anything can damage your neck permanently. A repair technician can help when a job feels beyond your comfort level.
With practice, truss rod adjustments become second nature. You will learn how your guitar feels and sounds at its best. Your semi-hollow body will reward your careful attention with better playability and tone.
Trust the process, stay patient, and let small changes guide you toward a well adjusted neck.
Frequently Asked Questions
How do I know if my semi-hollow body guitar needs a truss rod adjustment?
Inspect your neck by sighting down it from the headstock toward the body. Look for two common issues: backbow (neck curves backward) or excessive relief (too much curve forward). Press the first fret and the last fret simultaneously. If a gap appears in the middle, your neck has too much relief.
You may also notice fret buzz on lower frets or difficulty playing without buzzing sounds. These signs suggest your truss rod needs attention.
What tool size do I need for adjustment?
Use a 1/4 inch thin-walled nut driver or a magnetic screwdriver tip. This size fits most semi-hollow body guitars properly. The tool must fit snugly without forcing or wiggling.
A magnetic tip helps keep the tool secure during turning. Avoid oversized or undersized tools, as they strip the truss rod nut quickly and cause permanent damage.
Which direction do I turn the truss rod?
Turn clockwise to tighten the rod and reduce neck relief. Turn counter-clockwise to loosen the rod and add relief. Remember that small movements create big changes in neck straightness.
Always make quarter-turn adjustments. Wait 24 hours between sessions to let the neck settle before checking progress.
How often should I adjust the truss rod on my semi-hollow body?
Adjustment frequency depends on playing style, climate changes, and storage conditions. Semi-hollow bodies may need periodic checks because their construction affects neck response differently than solid bodies.
Most players adjust once or twice yearly. However, significant temperature or humidity shifts may require more frequent attention.

Hi, I’m Tessa! As a lifelong music lover and gear enthusiast, I started this blog to help fellow musicians navigate the overwhelming world of instruments and equipment. I spend my time researching, comparing, and reviewing musical gear so you can spend yours doing what matters most — making music.